Table of Contents
Canva's Form AI app can generate a draft survey, registration form or quiz from a written description. It can also provide a participant link and a response-management view. The generated form still needs a careful review: remove unnecessary personal-data fields, correct the question types and test the full submission flow before sharing it.
Plan the form before generating it
List the information you actually need, who will respond and how the responses will be used. Decide which questions are required, whether participants must upload files and who should have access to the collected data. Avoid asking for sensitive information unless it is necessary and you have an appropriate process for handling it.
Create a form with Form AI in Canva
1. Find the Form AI app
Open a project in Canva, then open the three-dot menu or Apps in the current editor.
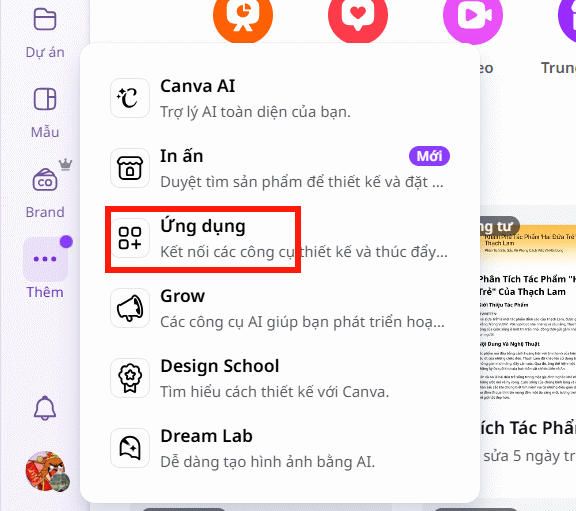
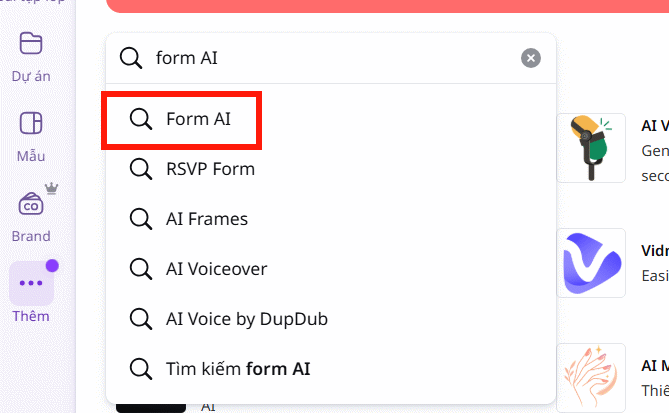
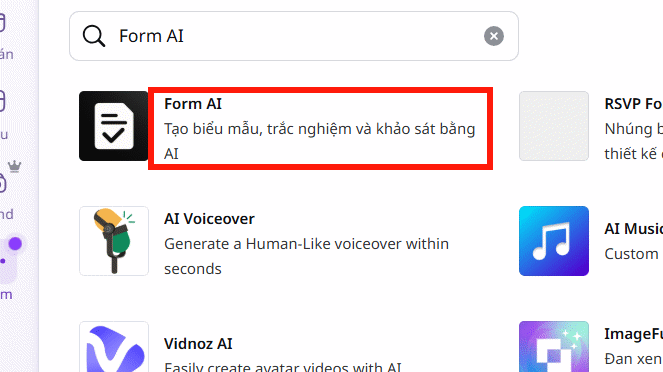
Search for Form AI and select the app result. Because Canva apps and plan access can change, check the app name, provider and permissions displayed before using it.
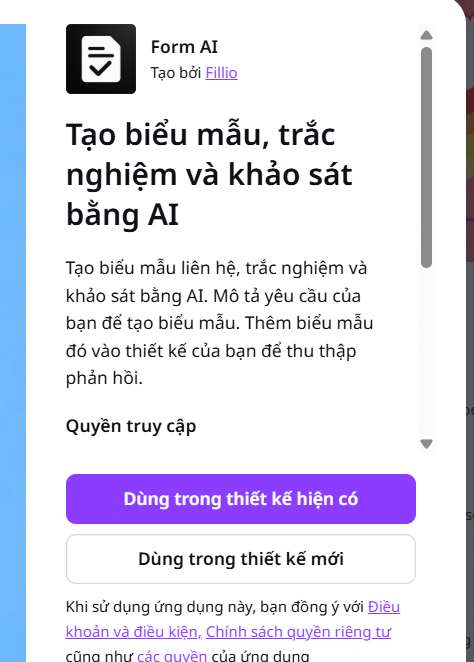
2. Choose an existing or new design
Add the form to an existing design if you have already prepared a page for the event, class or project. Choose a new design when you want to test the generated form separately.
3. Describe the form clearly
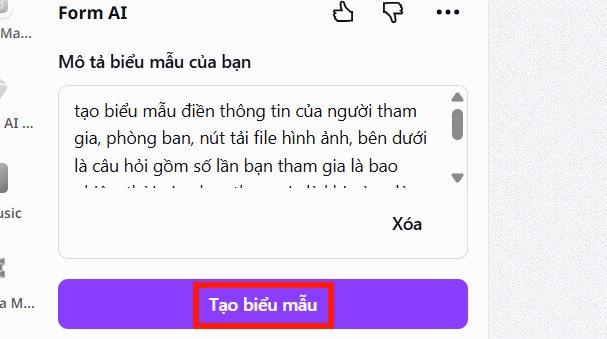
In the prompt, specify the form's purpose, intended respondents, fields, question types and required items. Use descriptive field names rather than asking the app to “make a professional survey.” The original Vietnamese example requests participant and department details, an image upload, and questions about attendance time and a received product:
tạo biểu mẫu điền thông tin của người tham gia, phòng ban, nút tải file hình ảnh, bên dưới là câu hỏi gồm số lần bạn tham gia là bao nhiêu, thời gian bạn tham gia là khi nào, dòng nhập nội dung với câu hỏi sản phẩm bạn nhận được là gìA stronger brief could also state which questions are required, which should use multiple choice, and whether respondents may submit more than once. Select Create Form after checking the description.
4. Review the generated form
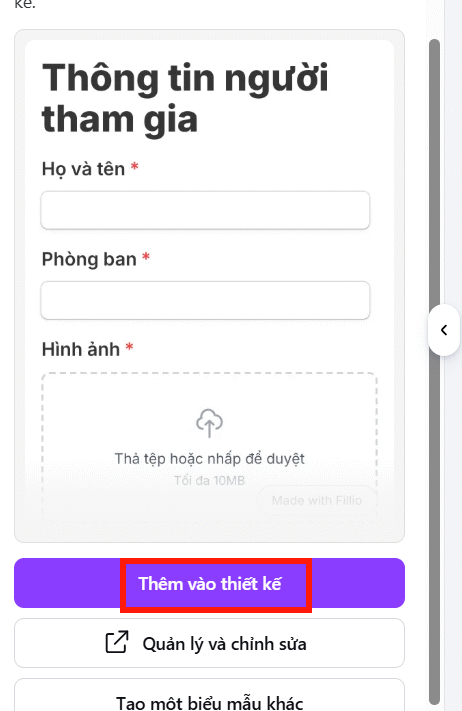
When the draft appears, read every field before choosing Add to design. Check the question wording, answer choices, required status, date formats and file-upload instructions. Remove duplicate questions and add a short explanation of the form's purpose.
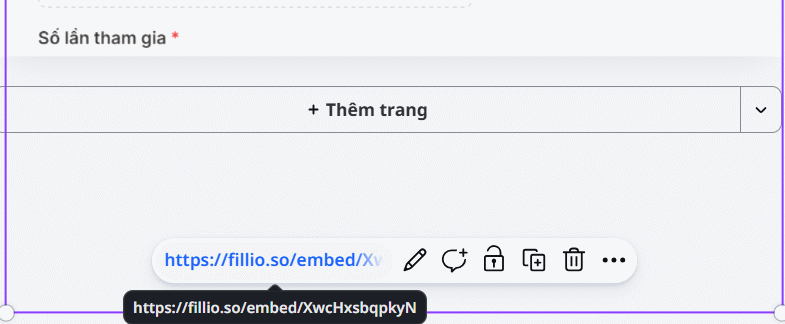
In the Canva design, use the form link to open the respondent view. Do not distribute it yet; first complete a test submission on both desktop and mobile if participants may use either device.
5. Share the participant link
After testing, send the participant link through the appropriate channel. Tell respondents who is collecting the information, why it is needed, which fields are optional and how to ask for help. If the form accepts uploads, state the allowed file types and avoid requesting documents that contain unnecessary personal information.
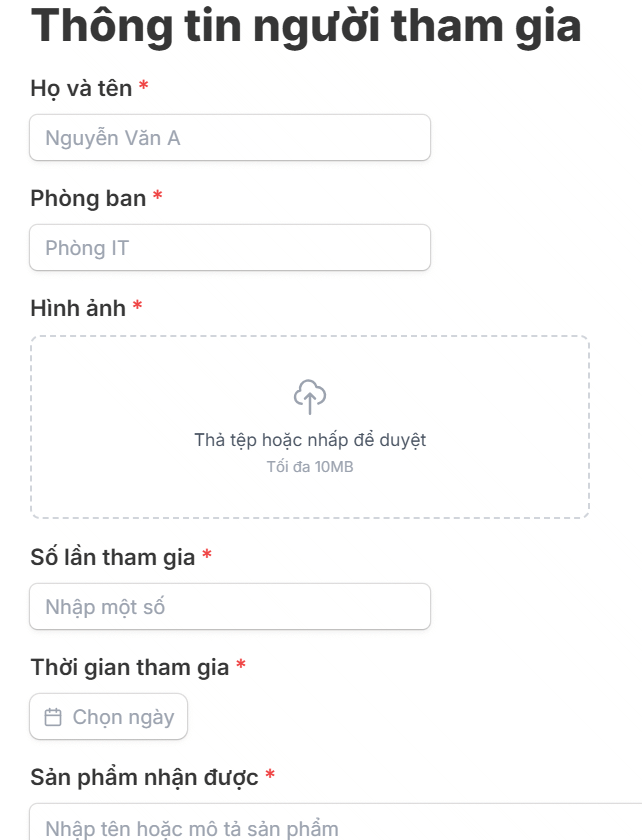
6. Manage responses and settings
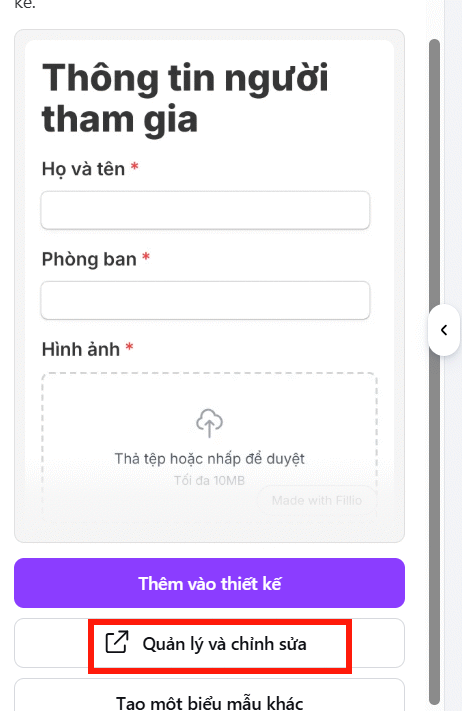
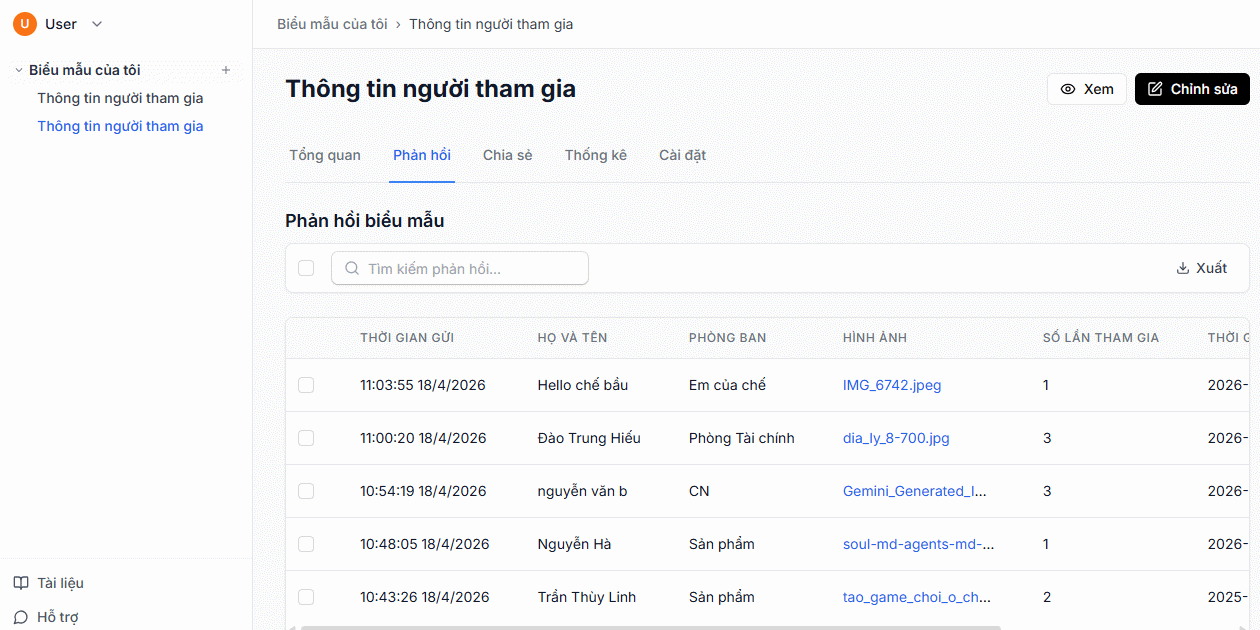
Return to the form section in Canva and select Manage and Edit. The management view shows submitted responses and related submission details available to the form owner.
Review responses only with people who need access. Correcting a question after submissions have started can make earlier and later answers difficult to compare, so duplicate the form or document the change when it affects meaning.
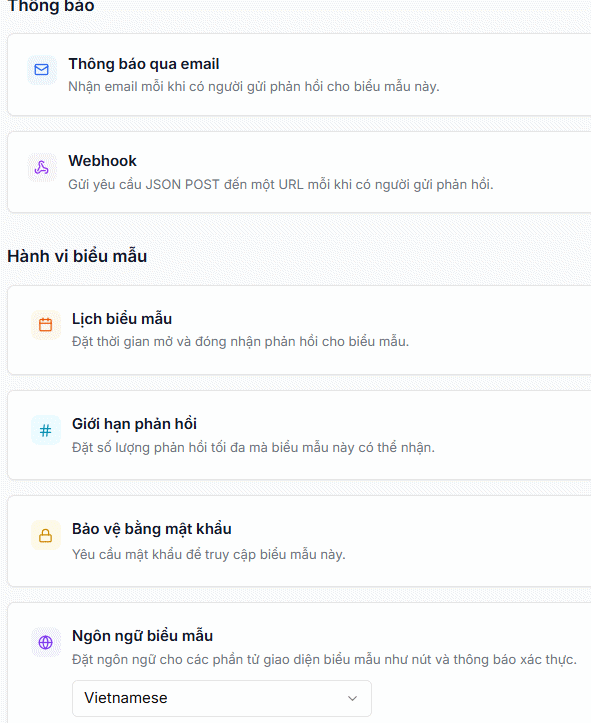
Open Settings and check the options for response collection, access and form status. Close the form when the collection period ends, and retain responses only as long as they are needed for the stated purpose.
Final test checklist
- Submit one complete test response and one response with optional fields blank.
- Confirm required fields and validation messages work as intended.
- Verify the owner can see the response in the management view.
- Check the confirmation message and participant instructions.
- Remove the test data before launching the real form if appropriate.
For a more established survey workflow, compare the process with this guide to creating a form in Google Forms. Developers who need a form embedded and processed on their own site can instead start with this HTML, CSS and JavaScript contact form guide.






Reader Comments 0
Sign in with email or Google to join the discussion.