Table of Contents
AI has made emoji creation faster and more flexible than ever before. Instead of using pre-made emojis or spending time designing them yourself, you simply input a description, and the AI will generate emojis in the exact style, color, and expression you want.
For Canva users, it's an effective solution for creating unique emoji sets for various design purposes such as social media posts, presentation slides, infographics, stickers, learning materials, or other media products. You can create emojis in many different styles, from 3D, cartoon, chibi, kawaii to expressive characters. The article below will guide you on how to create emojis in Canva using commands.
How to design AI emojis on Canva
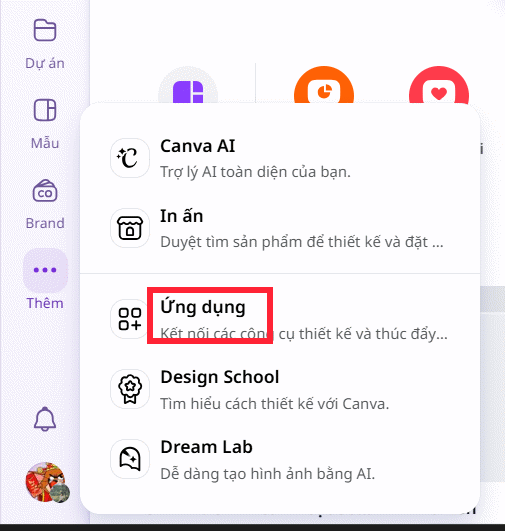
Step 1:
You tap the three-dot icon and then select Apps to search.
In the search box, enter the keyword "ai emoji" to search for emoji generator apps.
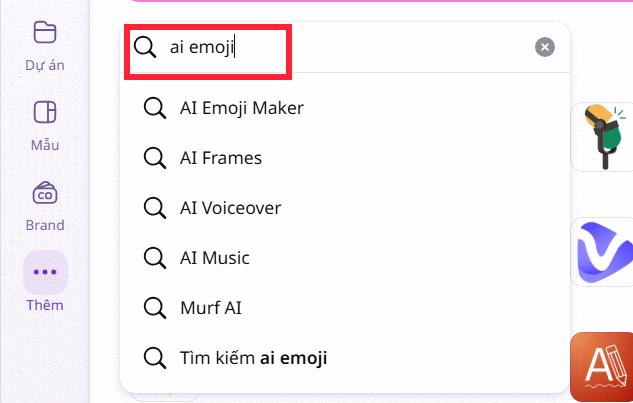
Step 2:
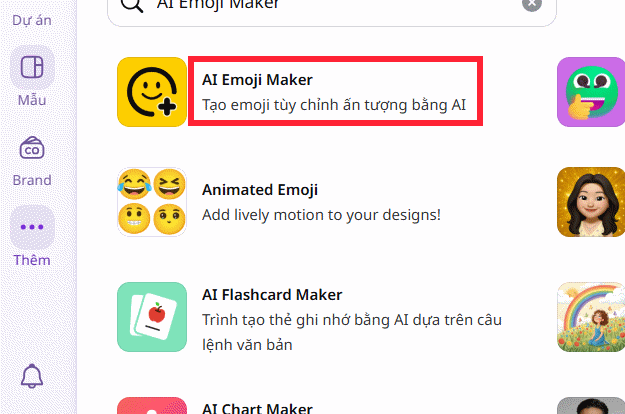
Once the application interface is displayed, tap on the AI Emoji Maker app to start using it.
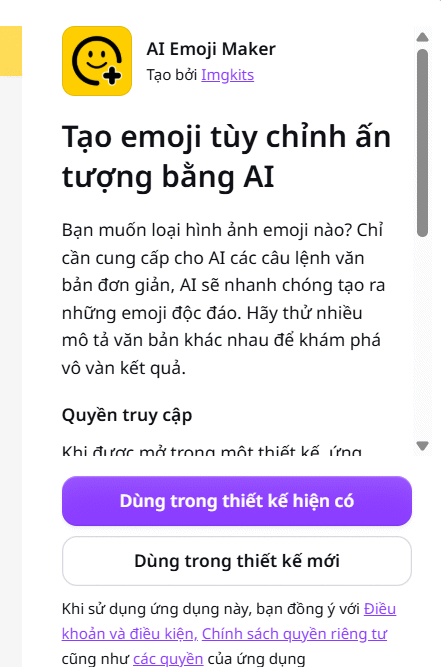
Then you choose the design you want to insert emojis into.
Step 3:
In the new interface, enter the description of the emoji you want to create and then press the Create button at the bottom.
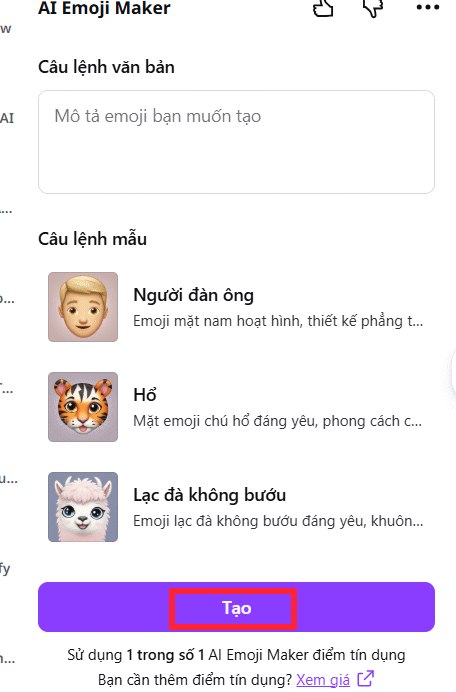
You can refer to some emoji descriptions below.
1. Professional style
A high-quality 3D emoji of a young businessman, confident smile, expressive face, glossy finish, vibrant colors, clean design, transparent background.
2. Cartoon style
A cartoon-style emoji of a princess wearing a golden crown, cheerful expression, colorful outfit, bold outlines, transparent background.
3. Pixar style
A Pixar-style emoji of a friendly dog, expressive eyes, realistic fur details, cinematic lighting, vibrant colors, transparent background.
4. Chibi style
A chibi emoji of a young wizard holding a magic wand, oversized head, small body, joyful expression, colorful costume, transparent background.
5. Modern 3D style
A modern 3D emoji of a camel, realistic proportions, friendly expression, smooth textures, studio lighting, transparent background.
6. Minimalist style
A minimalist emoji of a cat, simple geometric shapes, clean lines, flat colors, modern icon design, transparent background.
7. Mascot style
A mascot-style emoji of a firefighter, energetic pose, expressive face, bold colors, clean vector design, transparent background.
8. Practical sales style
A semi-realistic emoji of an astronaut, detailed facial features, modern spacesuit, realistic lighting, transparent background.
9. Fantasy style
A fantasy emoji of a dragon, glowing eyes, detailed scales, magical atmosphere, vibrant colors, transparent background.
10. Sticker style
A sticker-style emoji of a panda, playful expression, thick white outline, vibrant colors, transparent background.
A formula for writing emoji descriptions in Canva.
A [style] emoji of a [character], [expression], [appearance], [lighting], [color palette], transparent background.
For example:
- A realistic 3D emoji of a lion, roaring confidently, golden mane, dramatic lighting, transparent background.
- A fantasy emoji of a princess, elegant smile, sparkling gown, magical lighting, transparent background.
- A cartoon emoji of a pirate, laughing, wearing a pirate hat and eye patch, bold colors, transparent background.
- A minimalist emoji of a robot, neutral expression, metallic silver finish, clean vector style, transparent background.
Step 4:
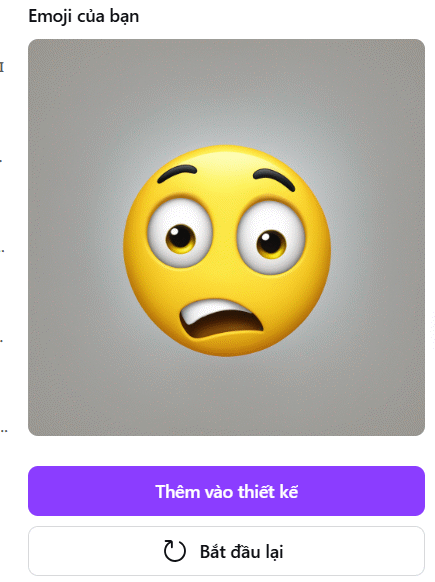
Wait a moment for Canva to design. Once you have emojis, click "Add to design" .
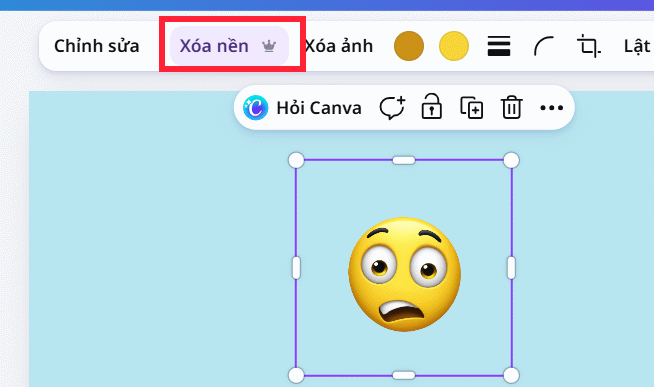
When adding emojis to your design, tap "Remove background" to get the complete emoji.
How to create emojis on Canva using Emojify
Step 1:
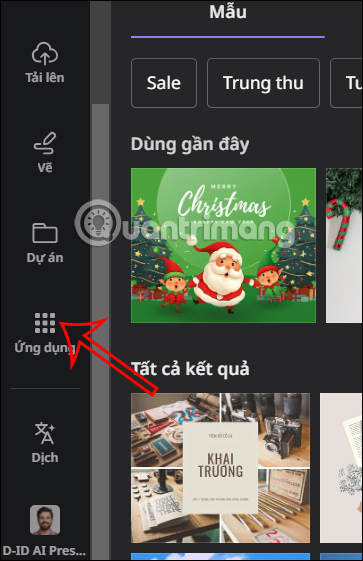
First, log in to your Canva account and open an existing design or a new one. Next, on the left side of the interface, click on the "Apps" option .
Step 2:
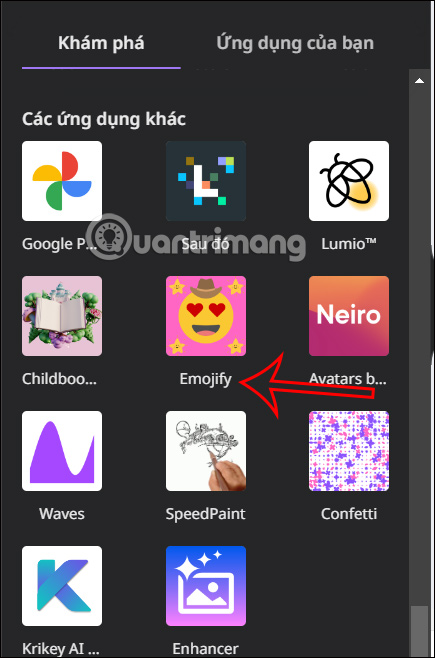
A list of available applications on Canva will then be displayed. Scroll down and click on the Emojify application as shown below to use it.
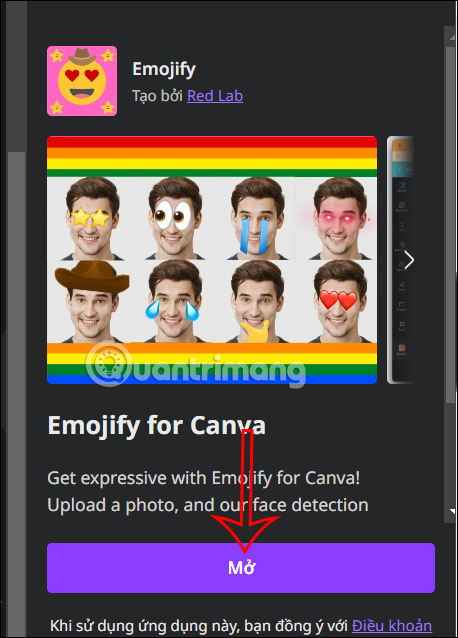
Once the Emojify app interface is displayed, tap Open to use Emojify to create stickers on Canva.
Step 3:
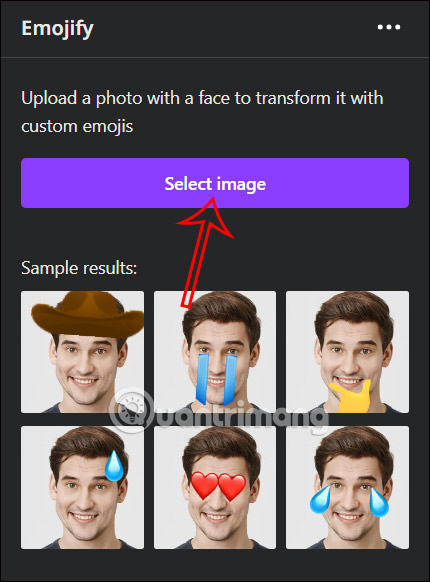
First, click on "Select image" to upload the image you want to use as an emoji. You can upload a personal photo or any image you like. It's recommended to use a frontal photo for easier facial recognition.
Immediately afterward, the Emojify app on Canva will identify the face in the photo to proceed with editing and creating the emoji.
Step 4:
The result you will see is the emoji created in Cava as shown below. To use any emoji, simply click on it .
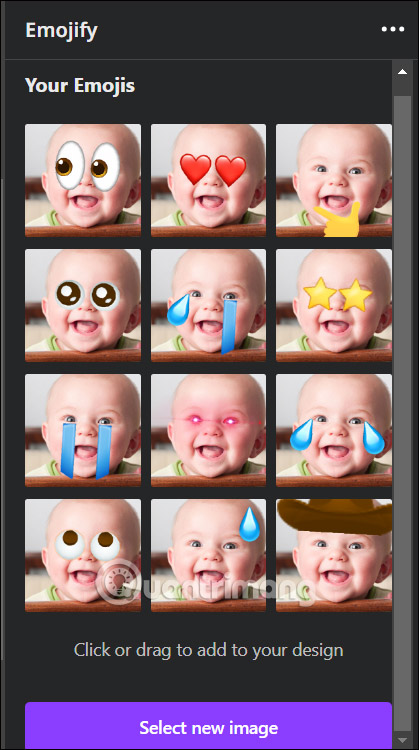
The emoji is immediately inserted into your existing design in Canva so we can continue using it and make the necessary adjustments to fit your design in Canva.
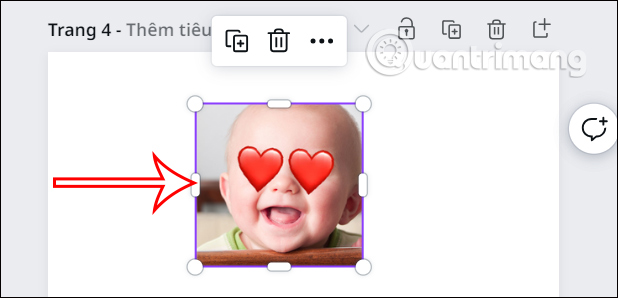
For example, you can choose a filter for this emoji. We select a color filter for the emoji and then adjust the level of color filter usage.
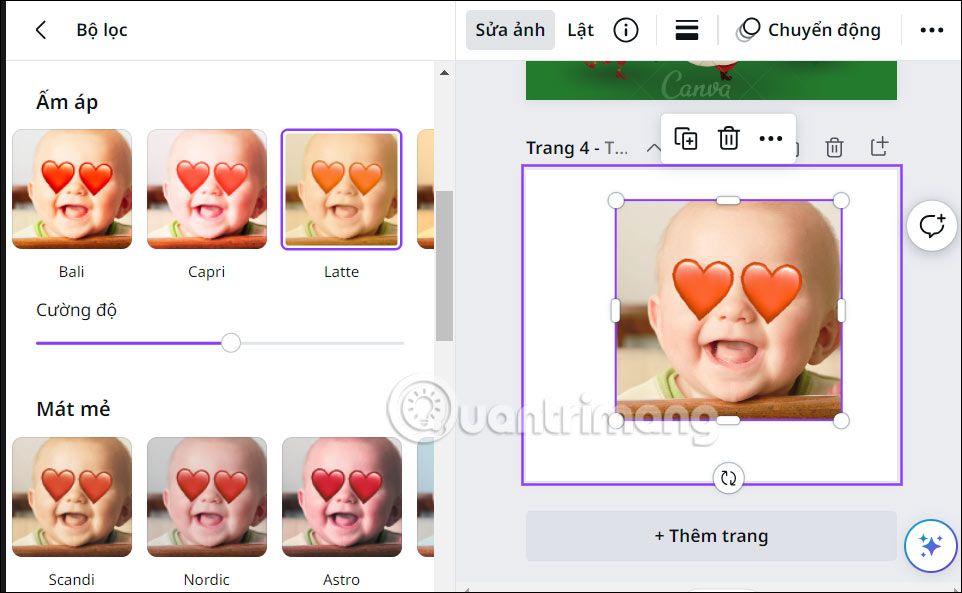
Step 5:
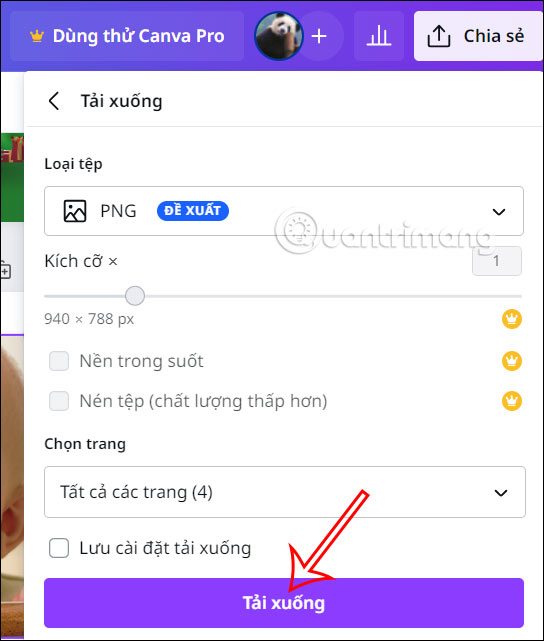
Finally, you just download the emojis from Canva as usual.
Video tutorial on creating emojis in Canva
Related Articles
 Guide to Creating 3D Designs Using AI in Canva4 minutes read
 Guide to Creating Canva Designs in ChatGPT5 minutes read
 Guide to Designing Posters in Canva AI4 minutes read
 Design Infographics in Canva AI from Data4 minutes read
 How to Design Greeting Cards on Canva AI4 minutes read
 How to Create Mind Maps Using Canva AI6 minutes read
Reader Comments 0
Sign in with email or Google to join the discussion.