Table of Contents
Introduction
Webinars have become an effective way for businesses, educators, and creators to share knowledge with their audiences. These sessions often contain valuable discussions, presentations, and insights that can continue generating value after the live event.
However, webinar recordings are rarely ready for publishing immediately. Long pauses, repeated points, technical interruptions, and unnecessary sections can affect the viewing experience.
Editing these recordings manually can take hours, especially when creators want to turn one webinar into multiple formats such as full videos, highlights, and short social media clips.
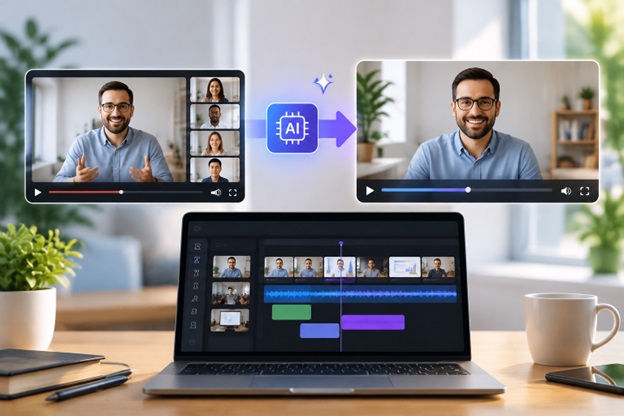
AI-powered editing workflows are helping simplify this process by making it easier to organize footage, create initial edits, and prepare professional videos faster.
Why Webinar Recordings Need Editing
A live webinar is created for real-time interaction, but recorded content needs a different structure for on-demand viewers.
Before publishing, creators often need to:
- Remove unnecessary sections
- Cut long pauses
- Improve video flow
- Highlight important discussions
- Add captions and visual elements
- Create shorter versions for different platforms
For businesses and content creators producing regular webinars, manually reviewing hours of footage can slow down the publishing process.
AI-assisted editing helps reduce repetitive editing tasks while allowing creators to focus on improving the content and presentation.
How to Edit Webinar Recordings With Invideo Editor
Editing a webinar recording starts with transforming raw footage into a structured video. Instead of manually reviewing every part of a long recording, creators can use AI-assisted workflows to speed up the initial editing process.
Invideo Editor combines AI editing agents with a professional timeline workflow. Creators can provide direction, allow AI agents to handle repetitive editing tasks, and continue refining the project manually.
Follow these steps to edit a webinar recording:
Step 1: Open Invideo Editor and Create a New Timeline Project
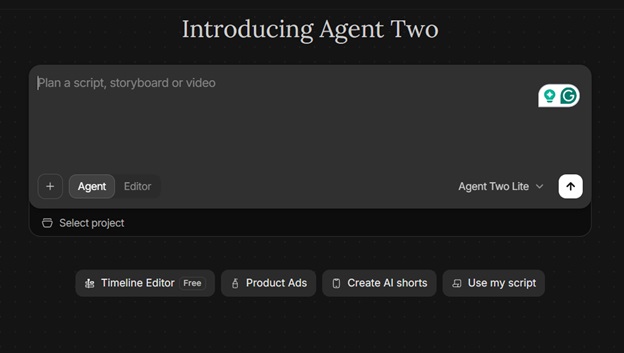
Go to invideo.io and select Timeline Editor below the prompt box.
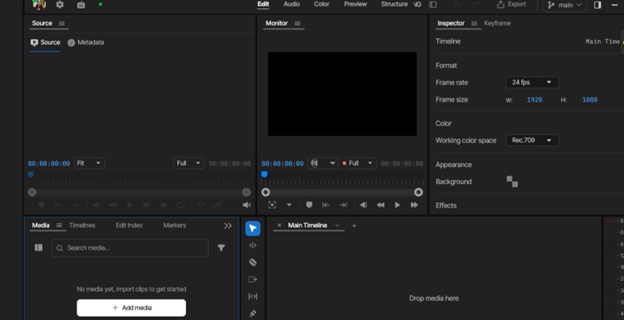
Create a blank timeline to start your webinar editing project. This provides the workspace where you can upload your recording and build the final video.
Step 2: Upload Your Webinar Recording
Open the Media section and upload or drag your webinar footage into the project.
You can add:
- Full webinar recordings
- Speaker footage
- Screen recordings
- Additional media files
Working with complete webinar footage allows the editing workflow to understand the full context of the discussion.
For better results, recordings with multiple takes, pauses, or repeated sections provide more opportunities for AI-assisted editing.
Step 3: Create an AI Agent and Describe Your Edit
After uploading your footage, create an AI agent and provide instructions about the type of edit you want.
You can describe the edit based on:
- Main discussion topics
- Webinar structure
- Recording order
- Transcript or script
For example, you can ask for a cleaner version of the webinar by keeping important sections, removing repeated points, and creating a structured first draft.
Invideo Editor’s AI agents can review footage, select usable takes, remove unusable material, and build an editable base cut based on your direction.
Step 4: Review the AI-Generated Base Cut
After the AI-assisted edit is created, review the timeline and make adjustments.
A base cut is the first complete version of the video created from usable footage. It removes repeated takes, mistakes, pauses, and filler sections while creating a starting point for further editing.
At this stage, creators can:
- Check the overall structure
- Adjust the order of sections
- Replace clips
- Improve pacing
- Add creative changes
The timeline remains editable, allowing creators to continue refining the final video.
Step 5: Improve Video Quality Before Publishing
After creating the main edit, creators can add finishing touches to make the webinar more professional.
Common improvements include:
- Adding captions
- Improving audio clarity
- Adjusting visuals
- Adding branding elements
- Refining transitions
A clean editing workflow helps make long webinar recordings easier to watch and more suitable for different audiences.
Step 6: Create Multiple Versions From One Webinar
A single webinar can become several pieces of content.
Creators can transform one recording into:
- Full-length webinar videos
- Educational clips
- Social media highlights
- Short promotional videos
- Training resources
Invideo Editor supports cut-downs and versioning, helping creators turn one project into multiple formats while keeping the editing process organized.
This makes it easier to maximize the value of existing webinar content.
How AI Helps Repurpose Webinar Content
A webinar recording can contain enough valuable information to create multiple types of content. Instead of using the recording only as a complete video, creators can transform it into different formats for different audiences.
AI-assisted editing makes it easier to identify useful moments and prepare content variations from the same recording.
Examples of webinar repurposing include:
Creating Short Educational Clips
Important sections from a webinar can be turned into shorter videos that highlight specific topics, answers, or discussions.
These clips can be shared on platforms where audiences prefer shorter content.
Turning Webinars Into Training Materials
Businesses can reuse webinar recordings as internal learning resources, onboarding materials, or educational content for customers.
Creating Highlight Videos
A highlight version can showcase the most valuable moments from a longer webinar, making it easier for new viewers to understand the key takeaways.
Preparing Content for Multiple Platforms
The same webinar can be adapted for different channels, such as:
- YouTube videos
- Social media clips
- Website resources
- Email campaigns
With workflows like Invideo Editor, creators can use AI-assisted editing and cut-down capabilities to transform a single project into different versions while keeping the editing process organized.
Final Thoughts
Turning webinar recordings into professional videos can be time-consuming when every step is handled manually. AI-powered editing workflows make it easier to organize footage, create first drafts, and prepare content for different platforms.
Invideo Editor helps simplify webinar editing by combining AI editing agents with timeline-based editing. Creators can use AI assistance for tasks such as footage review, take selection, cleanup, and creating an editable starting point while maintaining control over the final project.
As webinars continue to grow as a content format, AI-assisted editing will help creators and businesses transform long recordings into professional, reusable video content.
Related Articles
 What Is Webinar?6 minutes read
 How to Stop Apple from Storing Siri Recordings on iPhone: Step-by-Step Guide2 minutes read
 TOP 5 ISO File Editing Software on Windows 10/118 minutes read
 6 AI Tools Help Remove Noise During audio/video Recording6 minutes read
 How to Edit a WAV File: Step-by-Step Guide7 minutes read
 Useful Tips to Make Your Voice-over Recordings More6 minutes read
Reader Comments 0
Sign in with email or Google to join the discussion.