Improve the sound quality of the microphone on the computer
When you listen to the radio or watch live stream on facebook for example, you can hear the sound very smooth as if listening to the broadcasters speaking live, far different than when you try to record your voice.Ever wondered how radio stations as well as recording centers and streamer have been so good at recording sound quality?
To achieve this, an indispensable factor is the quality of the hardware, but the processing process, post-editing after the audio is recorded (or sometimes directly) is the factor. decided to make the sound better.
This article will use two popular post-audio editing software to help you better understand the problem, which is Adobe Audition and Audacity.Adobe Audition is a great tool with a very intuitive interface (an important factor for audio editing software), while Audacity is completely free (but missing some features and uses). will be a little more difficult.
Buy an independent microphone
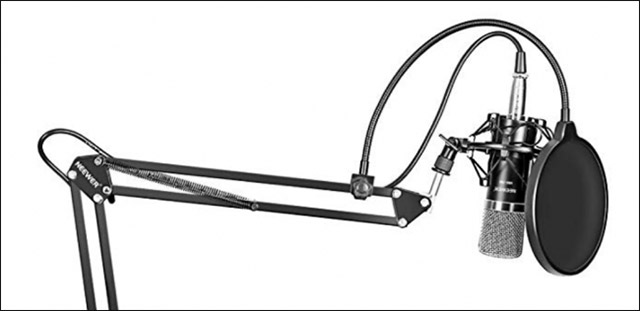
As mentioned, an important factor for good recording quality is the quality of the recording device (microphone).While post-processing can help your microphone sound much better, but if the quality of the raw recording is good from the beginning, the post-production process is also easier.The main concern here will be noise.Although audio processing applications such as Audacity are great for noise filtering and creating professional flat sound, it can't eliminate good noise.The device's built-in microphones are usually small and have no sound filtering, so it also captures quite a bit of noise from outside, which causes interference.Large, independent microphone systems are usually much less noisy due to their superior sound filtering capabilities.
A high quality removable microphone set can easily cost up to hundreds of dollars, but it is for audio professionals, professional streamer.As for the average user, inexpensive removable mics like the TONOR BM-700 for just $ 30 will give you a significantly better recording quality than the built-in microphone or laptop. your phone
Noise Reduction (noise reduction)
Most microphones, even high-end microphones, are not completely 'smooth' and eliminating background noise that causes noise is one of the first steps in 'cleaning' your sound.
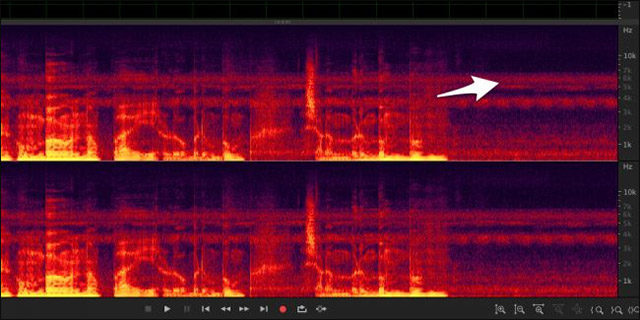
Spectral frequency display in Audition is very useful for displaying noise level.It shows the noise amplitude at each other frequency over time.Before conducting noise reduction filtering, you can see at the end of the audio range (while there is no voice), there is still a lot of data, the data here is the noise that the microphone has collected. again.Looking closer, these noise lines stretched across all the sounds.
After conducting noise reduction, there are still noises, but much less than before.
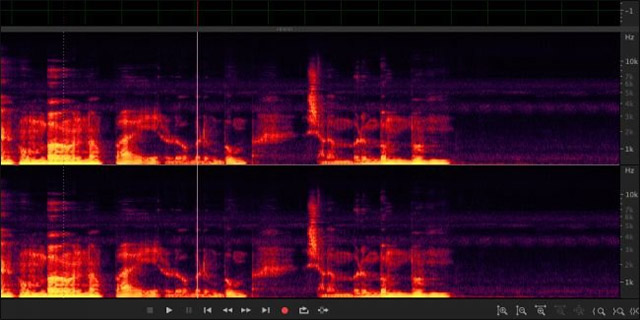
Since these frequencies are cut off, the sound will be slightly distorted, and this is where the noise-canceling microphones work.
You can perform noise reduction in many different ways, but one of the best ways is to use a so-called noise print to selectively cut noise, this method is also very useful, usable for all types of noise.In addition, there are many other effects (such as hiss removal) that you can use to alleviate and reduce noise adapting to different frequencies without using noise print.
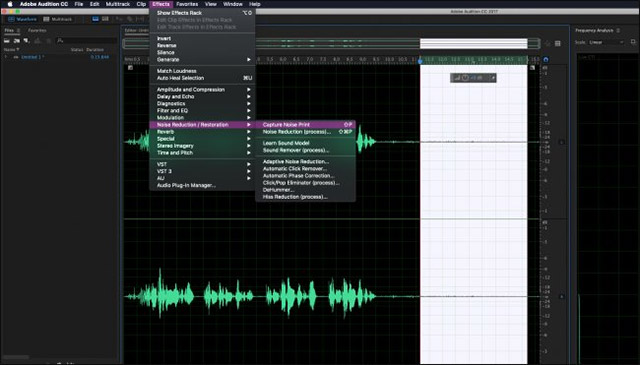
In Audition, you must first record the noise print before you can use the noise reduction function.Choose a quiet sound range and choose Effects> Noise Reduction> Capture Noise Print.

Next, in the same menu, select Noise Reduction (Process) .This will open a dialog box in which you can configure noise reduction settings.
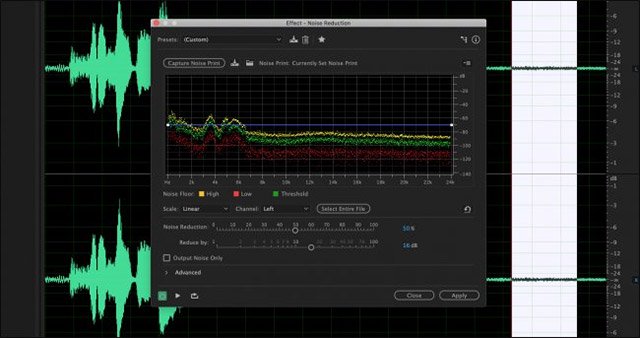
The default settings are usually quite good, but you can also adjust floor noise if you want.
This screen shows you the noise level that the microphone receives at each frequency.You can preview the sound with the Play button in the bottom left corner before applying your changes.You can also select 'Output Noise Only' to preview all deleted noise.When doing this, try to keep the main record free of noise to minimize audio distortion.
In Audacity, just select Effect> Noise Reduction.From here you can install noise configuration and some other settings.
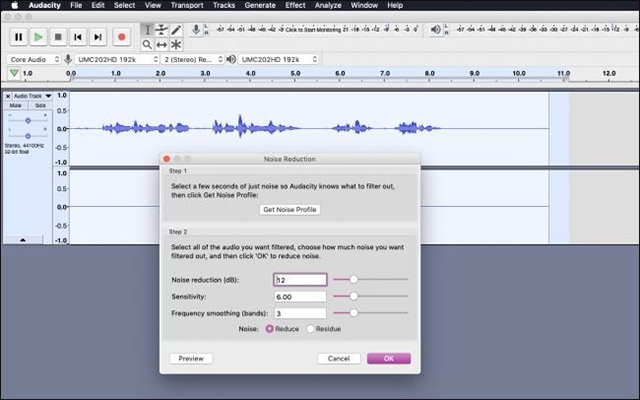
Audacity does not have enough features such as removing Audition noise but will also help improve noise greatly.
Equalization
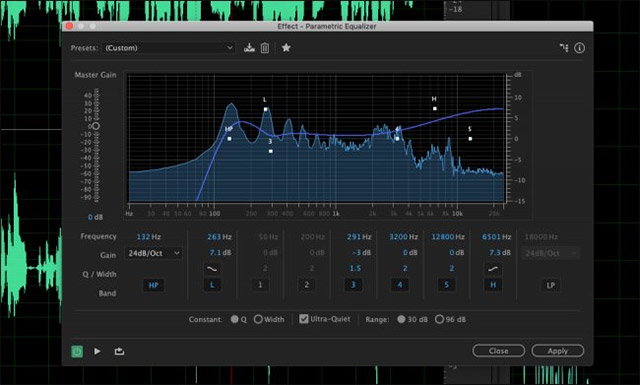
Equalization, or EQing, is to adjust the volume of different notes in each audio range.For example, you can enhance or cut the bass as you like.However, in reality, the art of adjusting EQ requires far more sophistication, even though it only revolves around minor edits to make the sound better.For example, if you have a deep radio recording, you might think that you should only increase the bass, but in fact, this will make the voice sound bup and will not create out the effect you desire.
Audition's Vocal Enhancer installer is a useful assistant in voice editing. This setting will first filter out very low bass (low bass) and increase the frequency to the point where vocals often exist. You can open this window in Filter and EQ> Equalizer Parametric .Like noise reduction, you need to select an audio range to adjust the EQ, and you can preview your changes with the Play button.

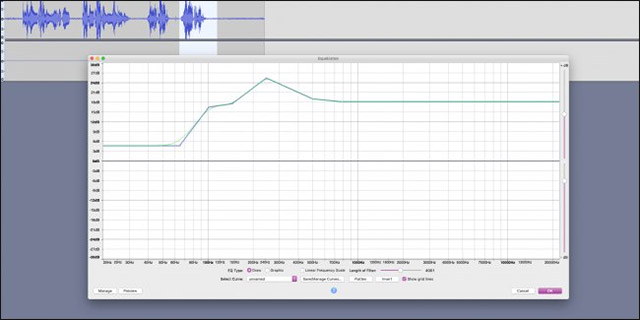
You can edit EQ in Audacity by visiting Effect> Equalization.
Compression and standardization
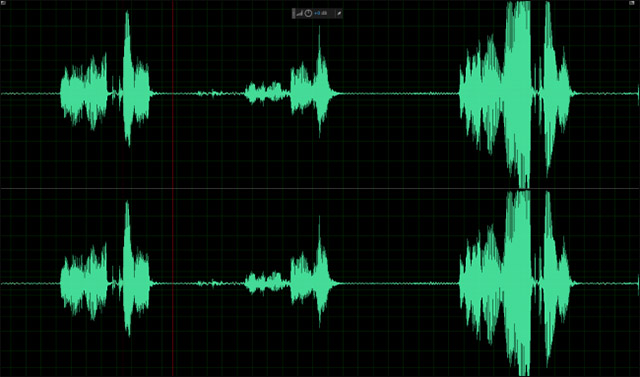
One problem you may encounter with your microphone is the level of uniformity in volume that it can obtain.In many cases, recordings will have the same spectrum as the image shown above, with very quiet parts while the rest are very large.
Compression (compresson) will help you solve this problem.This type of compression differs from traditional digital compression used to reduce file size.Audio compression is an attempt to make the clip more uniform in volume.Below is a voice recording similar to the above, but has been compressed:
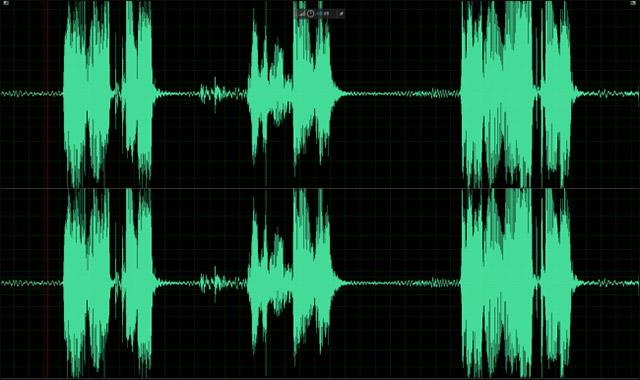
Note that this can also increase the volume of background noise in pause scenes, as well as on quieter sound bands.
You may not notice but this feature is being applied very popular on most songs on radio, called "Loudness Wars".See this wave diagram of a song that has been edited for radio broadcasting compared to the downloadable version:
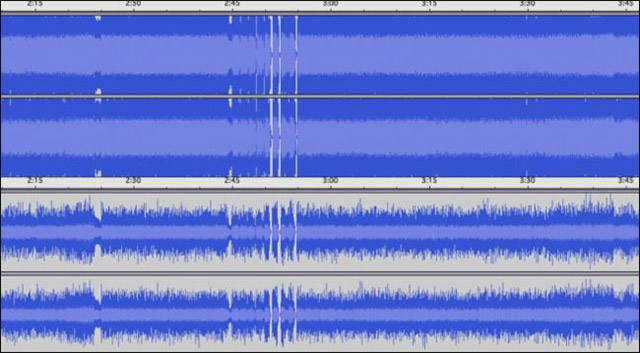
The radio revision is compressed and standardized to 100%, while the downloadable version is reduced at volume level.This is an extreme example and you will never really need to compress your audio so much in practice.
Normalization is similar to compression and it is often the last step in post-processing.Normalization will need your entire recording, and make the largest part of the sound range reach 100% volume.This is useful to keep a consistent volume between different recordings.In summary, compression makes the volume uniform in a recording, and standardizes to make this volume consistent between recordings.When both of these features are used together, your recording will sound much better.
Direct handling

Both Audition and Audacity operate primarily on pre-recorded recordings, ie post-production processing.Therefore, they are not very useful when you want to stream live (live stream).To get audio output quality while live streaming is fine, you need to route the audio inside your computer.
To do this, we will need a virtual audio cable (VAC) from VB-Audio.This is a completely free program.VAC creates a 'virtual output' that you can choose as your speaker.It will send your system sound to another virtual input that you can set as your microphone in any application.You will not hear the audio output while using the virtual output, this is great.
Audition has a monitoring feature in Multitrack , you can use it to apply some effects in real time and then export them to headphones for monitoring.Normally, this will allow you to hear your microphone when recording.However, if you choose VAC as an output device, VAC will route it to your microphone input.A pretty simple solution, but that's the only way to run the Audition effect directly on your recording.
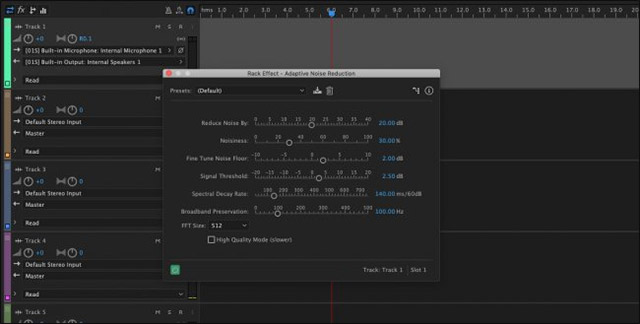
You cannot use all features that are only applicable to recordings available with live recordings, but many features will still work.Remember that applying too many effects can affect the performance of the system while running.
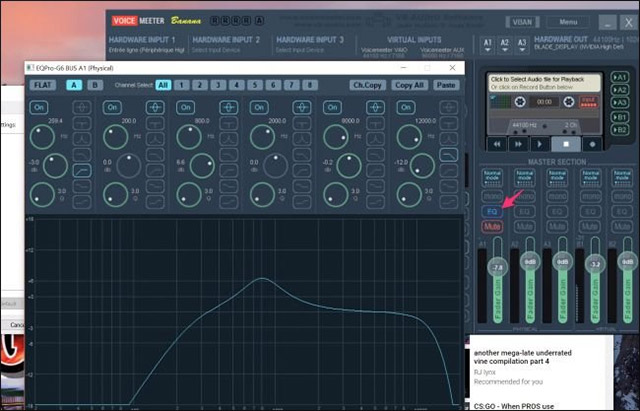
If you don't have Audition or don't need a software with full effects, you can use Banana VoiceMeeter software to perform some basic EQing.
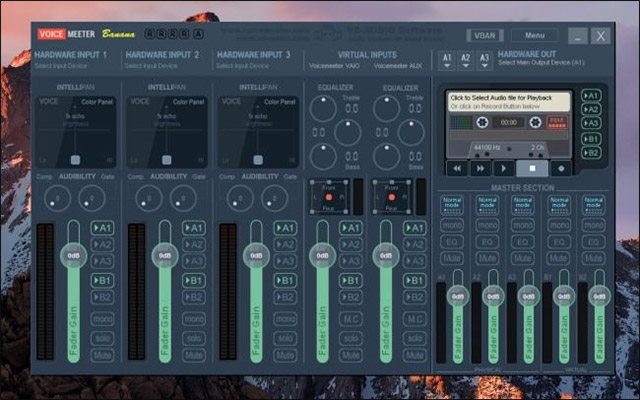
VoiceMeeter Banana has an equalizer with full parameters that you can use to adjust your microphone sound while streaming.
Good luck!
see more
- How to live stream Facebook with OBS Studio software
- How to use FXSound to improve PC sound quality
- How to manage and improve sound quality in Windows 10
- 3 Equalizer applications help improve sound quality on macOS