How to Use Teamspeak
If you enjoy playing first-person shooters, online role-playing games, or other cooperative multiplayer games, using a voice chat app is a must. The ability to stay in touch without having to type out lengthy updates or instructions will allow your team to stay competitive. If you want to know how to connect to a TeamSpeak server, or want to host one yourself, see Step 1 below..
Download and Install TeamSpeak

Go to TeamSpeak's homepage. You can download the latest version for free from the TeamSpeak homepage. Click the green 'Free Download' button on the home page to download the latest 32-bit version for Windows, or click the 'More Downloads' link to find the link. Download connection for other operating systems.
If you are using a 64-bit version of Windows, download the 64-bit client for better performance.
You will need to download and install the client even if you install the TeamSpeak server.

Accept the license agreement. You will need to accept the agreement before the download session begins. Make sure you read the entire agreement to understand your rights, then check the box labeled "I agree."

Install apps. After completing the download, run the installation file to begin the installation. The installation process is like most other applications. Most users will not have to change any settings during the installation process.
TeamSpeak Configuration Settings

Start the TeamSpeak application. After completing the installation, start TeamSpeak for the first time. Before connecting to a server, you will need to configure TeamSpeak for optimal quality from your headset and speakers.

Start the Setup Wizard. If you have never run TeamSpeak before, the Setup Wizard will appear when you first start the program. If you have ever used TeamSpeak, you can turn on the Setup Wizard by clicking Settings → Setup Wizard.
Create a nickname. This is the name displayed to other users as well as administrators of the TeamSpeak server you connect to. Your nickname is not a username, and has no impact on user accounts or security. A nickname is simply your display name. Enter the name and click Next > to continue.
You should make your nickname the same or similar to your in-game username. This will help your teammates recognize you and make communication easier for everyone on the team.
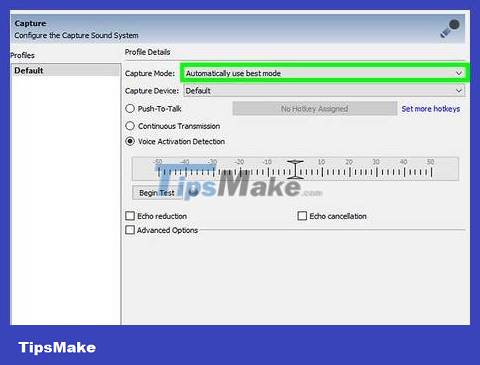
Choose your microphone activation settings. There are two ways to activate the microphone so you can talk: Voice Activation Detection (VAD) and Push-to-Talk (PTT). VAD automatically activates your microphone when it detects sound. PTT requires you to set up a hotkey to activate the microphone when holding that key.
Most TeamSpeak servers prefer users to use PTT to prevent accidental broadcasting or background noise. Using PTT will provide a better experience for both you and your teammates, although it requires you to remember to press the button.
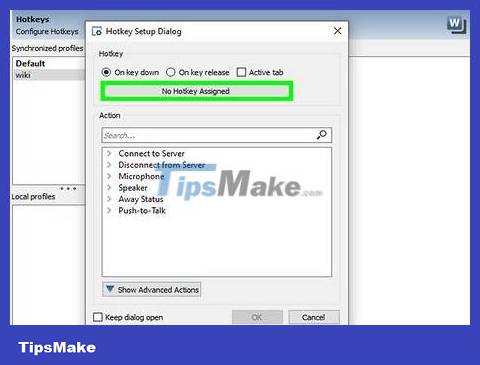
Set up hotkeys. When you select PTT, click on the "No Hotkey Assigned" field. The next key or button you press becomes your PTT button. You can use any key on your keyboard or any button on your mouse. Make sure the key you choose doesn't conflict with any key you'll be using in the game.
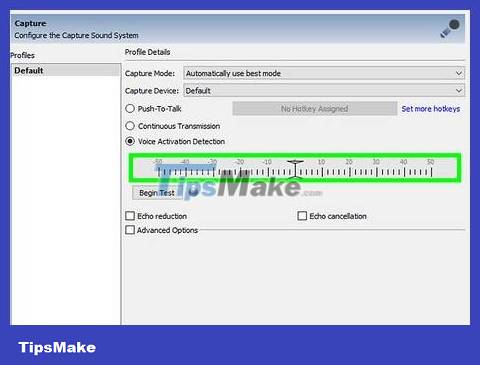
Set microphone sensitivity. If you choose VAD, you will need to set the microphone sensitivity. This will create a volume threshold that you need to overcome before the microphone will start broadcasting. Click the Begin Test button to begin the calibration process. Drag the slider as you speak to set the level at which the microphone activates.
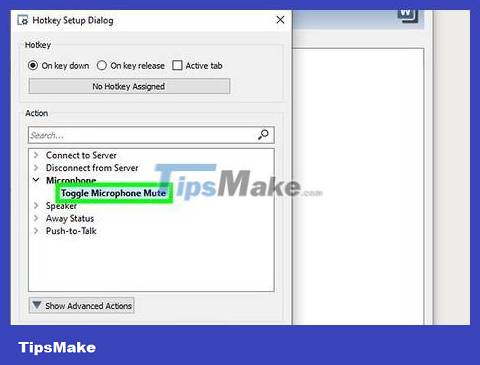
Create hotkeys to mute the microphone (Microphone Mute) and mute the speaker (Speaker Mute). These keys will allow you to mute the microphone or speaker as required. Mute the microphone is very useful when you use a VAD, because you can mute the microphone if the room is too noisy.
Click each button and then press the key combination you desire to assign the function. Click the Next > button when you are satisfied with your choice.

Select sound pack. TeamSpeak will notify you when users join or leave the channel, as well as notify you when someone 'pokes' you. You can choose to announce in a male or female voice. You can listen to each announcement by pressing the Play button.
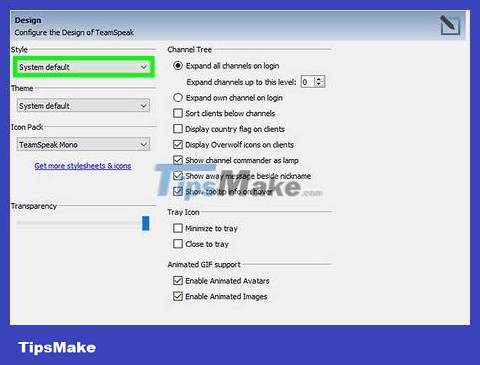
Decide whether you want to enable layering or volume control functions. On this page, you can add a few features to your TeamSpeak program. The Overlay feature allows you to access the TeamSpeak interface above your current program, so you can see who is talking. This feature is especially useful in large groups. Volume Control automatically lowers the game volume when a teammate talks, useful for noisy games or people who play music games.
The Overlay feature requires some additional resources, and may not be a viable option when you're already struggling to get the game running.

Complete the installation. On the final page of the Setup Wizard, you will have the option to open the public server list, bookmark manager, and rent your own server. At this point, the installation is complete and you are ready to connect to a TeamSpeak server. See the next section to connect to your team's server, or the final section to run your own server.
Connect to a Server
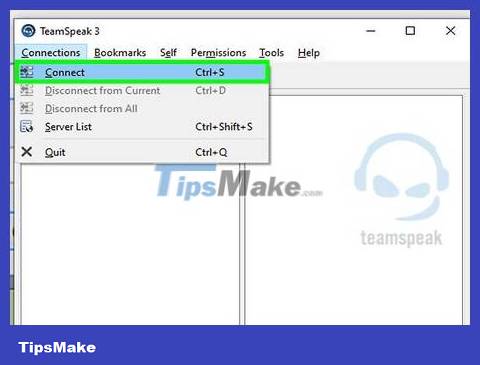
Open the Connect window. Click Connections → Connect to open the Connect window. You can also press the Ctrl+ button Sto quickly open the window. This window allows you to enter server information.
Additionally, you can click TeamSpeak links on the website to automatically launch the TeamSpeak application and connect to the server.
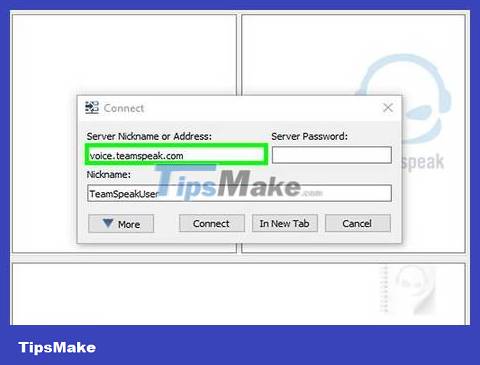
Enter the requested information. You will need to enter the channel address, which can be a name or an IP address. Make sure you include the server's port, indicated by a ":" followed by a port number. If the server requires a password, you will have to enter it in the "Server Password" field. You can choose different profiles to keep your hotkeys and microphone settings, but you may not need to change these right now.
The nickname displayed will be the nickname you requested. If this name is already used by someone else on the server, you will have to change the name.
You can usually find information about the TeamSpeak server on your team's page or forum. Please ask another member if you can't find it.
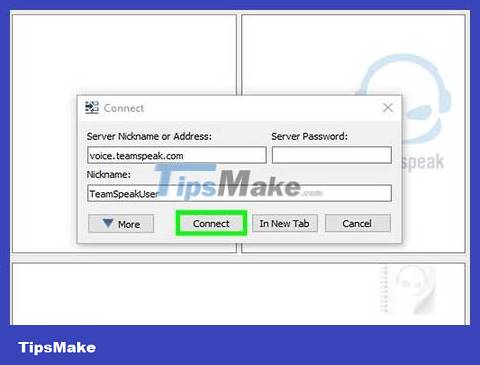
Click the Connect button . TeamSpeak will make a connection to the server, and you will see the main window begin to display information. You can check the connection status in the status pane at the bottom of the window.
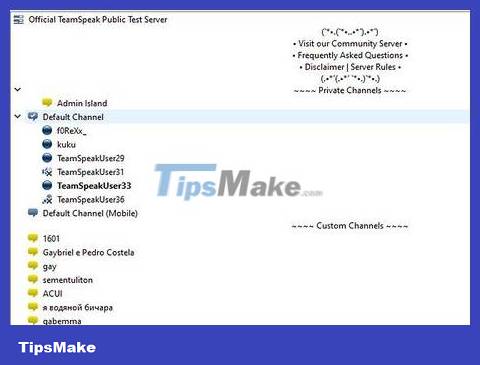
Browse for servers. On the left side of the window, you will see a list of channels on the server. Channels may be password protected, and you may need to be granted access by an administrator. A list of users will be displayed below each channel.
Most large gaming groups will have servers divided into channels for the different games the group plays, along with a section just for veteran players if the group is quite large. Server settings will vary quite a bit between groups.
Double click on the channel to join. You will only be able to talk to users on the same channel as you.
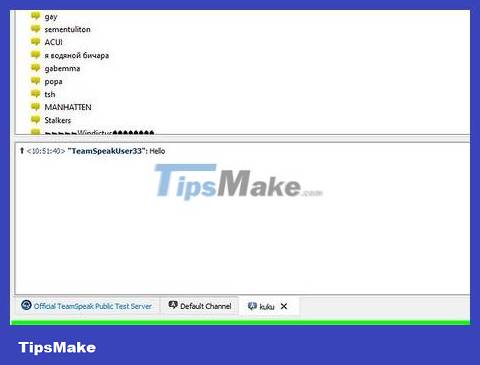
Chat by text with others. In addition to voice chat, each channel also has basic text chat. You can access it by tapping the tab at the bottom of the window. Avoid including important, time-sensitive information or commands in text chat, as many users will not see it in-game.
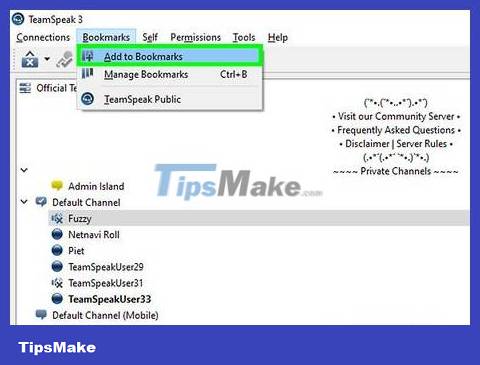
Mark frequently used servers. If you plan to connect to a server you often use, you can make connecting easier by marking it. This allows you to connect in the future with just one click. If you are currently connected to a server, click Bookmarks → Add to Bookmarks to add the current server to the bookmarks list.
If you want to add a server that you are not currently connected to, click Bookmarks → Manage Bookmarks to add the server manually.
Operate a TeamSpeak Server
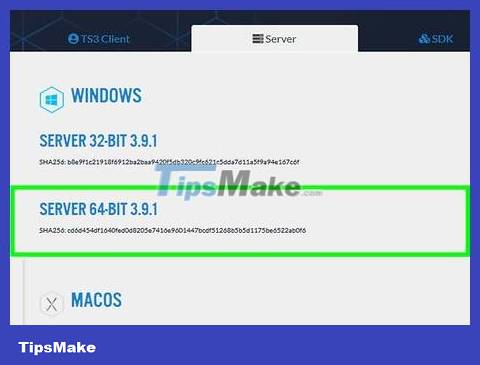
Download the server software. TeamSpeak is free for anyone to use for non-profit purposes, such as gaming groups. You can run the server on your own machine or on rental servers with support for up to 32 people, or run on dedicated rental servers with support for up to 512 people. If you need a server larger than that, you will have to rent one from TeamSpeak.
You can find the server software in the Downloads section of the TeamSpeak website. Make sure you download the correct version for the operating system you install to the server. The files will be downloaded as compressed files.
You will need to agree to the license agreement before proceeding with the download.
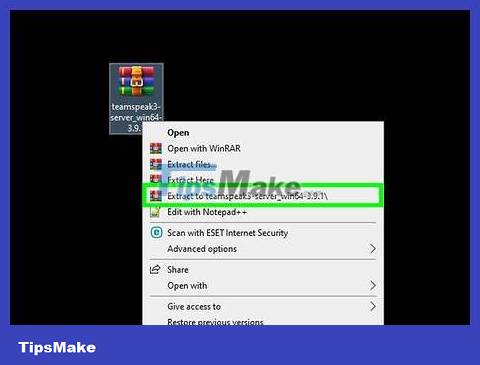
Decompression. The file you download is in compressed form and contains many different files. Unzip so you can use the files inside. Unzip it somewhere you can access it easily, for example on your desktop.
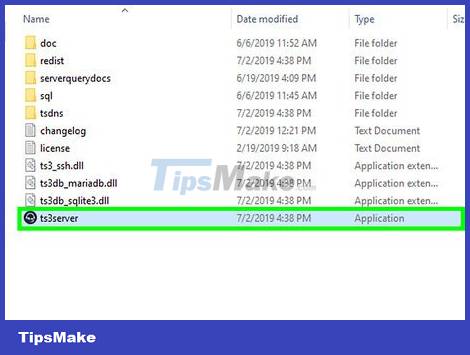
Start the server. Run the application from the folder you extracted. You will see some files and folders created, then a window will appear with some important information. You'll see the machine administrator's username, password, and privilege key.
Copy these values into a blank Notepad document. You can tap the button next to each value to copy it to the clipboard.
At this point, the server is ready to operate. You will need to connect to the server to configure it.
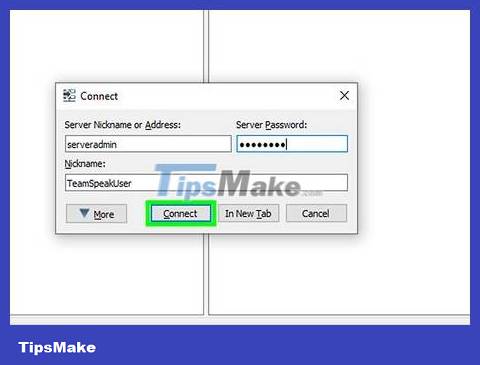
Connect to the server. Open your TeamSpeak app. Open the Connect menu and enter it localhostin the address bar. Change the nickname to whatever you like, and make sure the server password is blank. Click the Connect button.
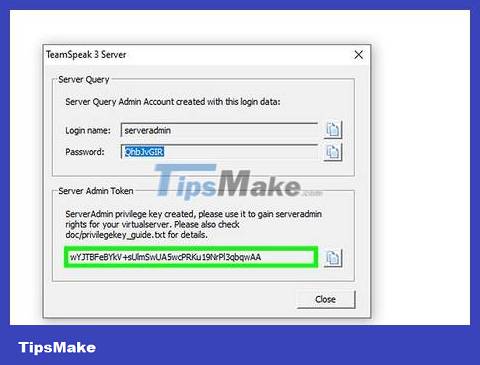
Confirm server administrative rights. When you connect to the server for the first time, you will be prompted to enter the privilege key you copied to Notepad. This will allow you to change the server's configuration and give permissions to other users. After entering the key, a server administrator icon will appear next to your name in the list.
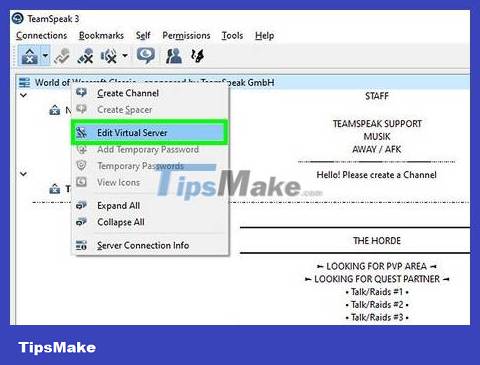
Configure your server. Right-click the server name at the top of the channel list. Select "Edit Virtual Server" from the menu that appears. A window will open, allowing you to customize your server. You have many different options to help you make your server more "yours".
In the Server Name field, enter your server name. Usually this name is based on the name of your playing group.
Set a password for your server in the Password field. This helps ensure that only people you authorize can access the server. Use your forum or private messages to provide passwords to people you want to connect with.
In the Welcome Message field, you can write a short message that is displayed to users each time they connect. Use it to link to your group's latest posts or important forum topics.
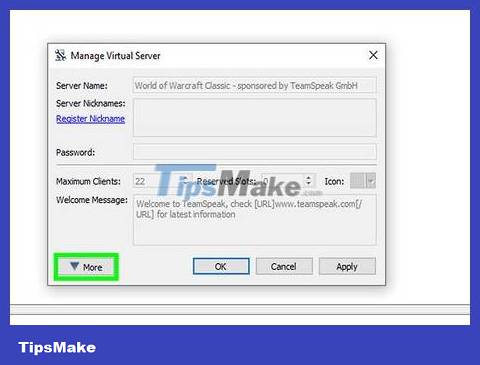
Custom add-ons. Press the button ▼ More at the bottom of the "Manage Virtual Server" window to see deeper options. These options will allow you to fine-tune how the server operates. The most important is the Hosts tag.
In the Host tag, you can place a server banner image that all users will see. You can also create a Host button that will appear in the upper right corner. A lot of hosts use this button to direct users to the group's website.
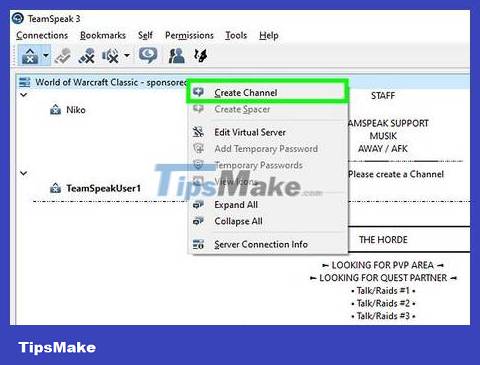
Create channels. If your group has a variety of interests, you may want to create multiple channels to help keep everyone on topic for upcoming games. For example, if your group mainly plays two games, you could create a channel for each game, as well as a general 'lounge' channel. When people join a game, they can jump to the appropriate channel, and when they take a break between games, they can use the shared lobby and not disturb others playing.
To create channels, right-click the server name in the channel tree and then click "Create Channel". You can set the channel name, description, password, as well as channel permanence and categorization for the channel.
You can create subchannels within channels, which is useful for large groups.
The Permissions tab allows you to set what level of permissions users need to perform different operations.
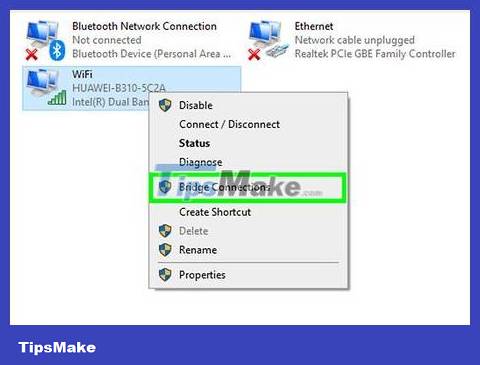
Open the ports. While most client applications can connect to your server, opening a few ports can ensure that most people can connect without problems. Access your router settings, and open the following ports: UDP 9987 & TCP 30033. UDP 9987 helps allow incoming connections, while TCP 30033 allows easier file transfers between users.
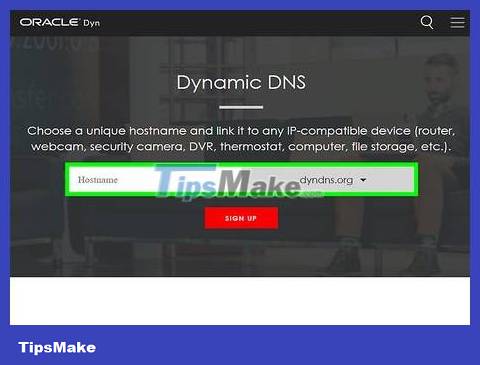
Dynamic DNS settings. You can give your teammates your server IP address so they can connect, but this IP address may change in the future. It's also not easy to remember. You can use services like DynDNS to assign a unique name to your IP address, which will automatically forward users even if your IP address changes.