Table of Contents
This guide explains how to turn Firewall on and Off in Windows 10, with clear steps, practical tips, and important checks before you begin.

Step 1 :
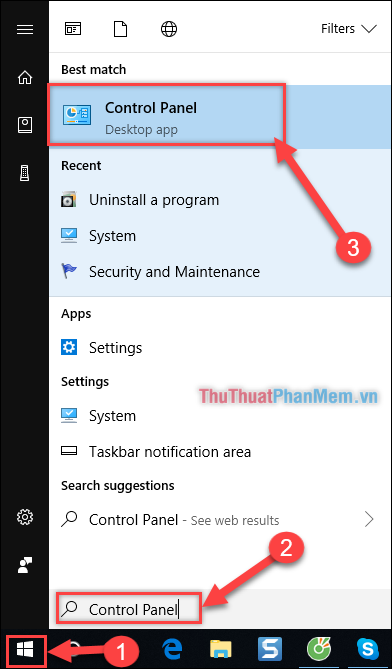
(1) Click on the Start Menu or press the window button (Windows)
(2) You type ' Control Panel ' in the search bar.
(3) When the utility will display, click to open the utility.
Step 2 :
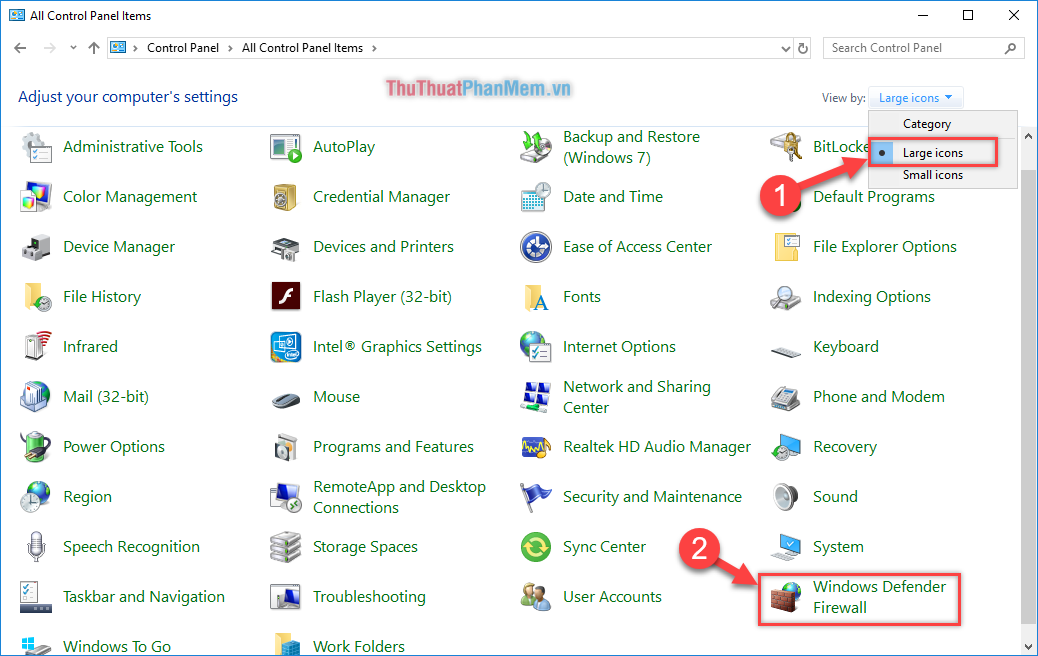
The ' Control Panel ' window appears, Many computers will display the icon in the ' Category ' mode. You need to switch to the ' Large Icons ' display mode (1) → Then select the software ' Windows Defender Firewall ' ( 2)
Step 3:
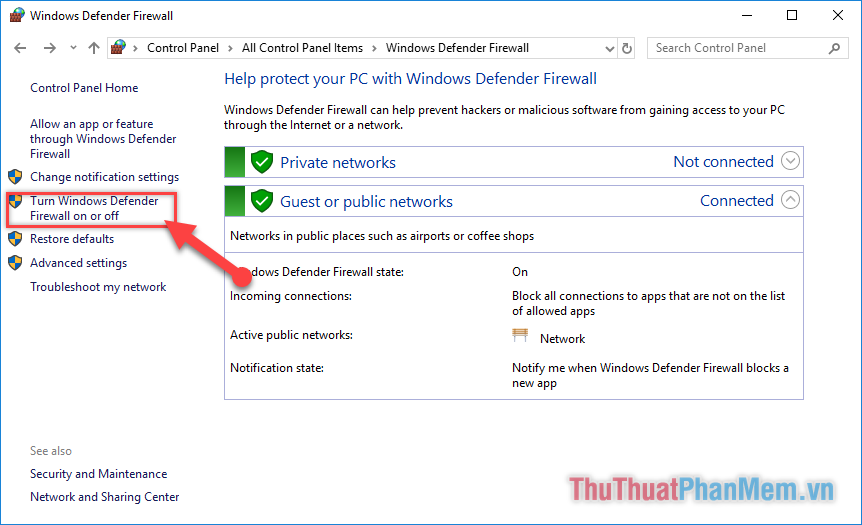
You continue to select ' Turn Windows Defender Firewall on or off '
Step 4:
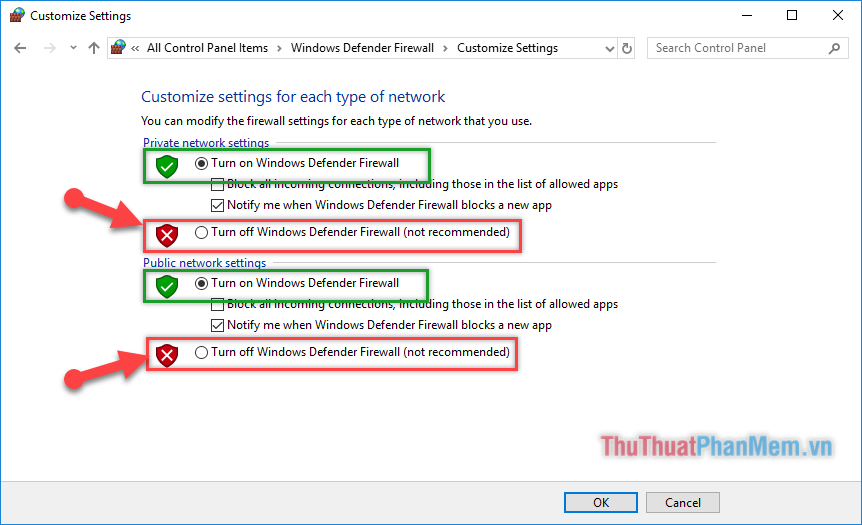
In the next displayed window, usually the device has FireWall - Firewall enabled, click on the 2 red boxes to turn off the firewall.
Similarly, if the firewall is turned off, click on the 2 green boxes to turn on the firewall.
Then click OK to save
After the firewall has been turned off, the interface of the Window Firewall will appear as follows:
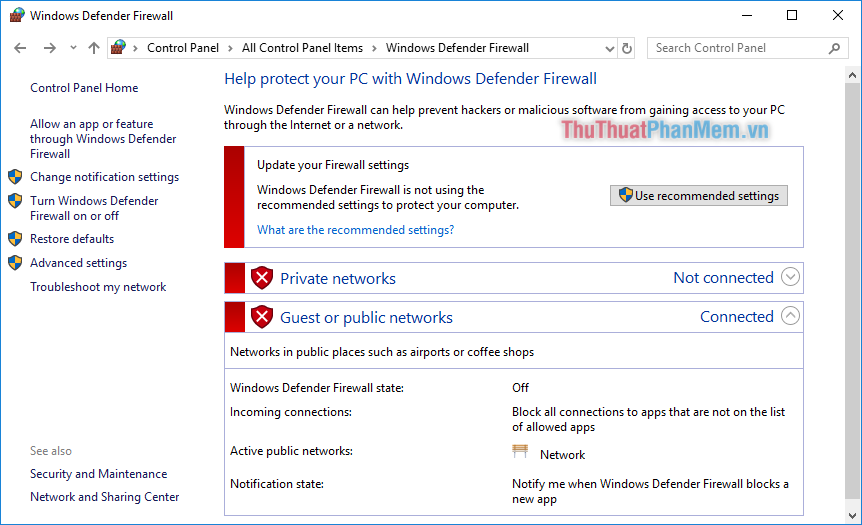
So, having finished turning on / off the firewall on Windows10, it's easy, isn't it? However, only turn off the Firewall - FireWall when needed, because it helps protect your computer from Internet threats. Thank you for watching, TipsMake. com wish you success!
FAQ
What should I know about Turn Firewall on and Off in Windows 10?
Focus on the key features, requirements, limitations, and practical use cases explained in this guide.
How do I get the best results with Turn Firewall on and Off in Windows 10?
Follow the recommended steps, use current software or information, confirm compatibility, and review settings before major changes.
Are there any risks or limitations?
Potential limitations depend on compatibility, data quality, cost, privacy, support, and how the product or method is used.
Related Articles
 Turn Off the Windows Firewall 11: Complete Guide6 minutes read
 Turn Off Windows 10 Firewall: Complete Guide6 minutes read
 How to Turn on // Off Windows Firewall in Windows 7, 8 // 8.1 and7 minutes read
 How to Turn Firewall (Firewall) on Win 72 minutes read
 What Is a Firewall? General Knowledge About Firewall15 minutes read
 Instructions to Enable // Disable Windows Firewall with Command4 minutes read
Reader Comments 0
Sign in with email or Google to join the discussion.