How to use Raspberry Pi to monitor network with Nagios
The best way to monitor networks with a Raspberry Pi is to use a software called Nagios. Nagios is like an error detection tool, it checks something as often as possible (like every 5 minutes) and warns you when this check doesn't work as expected.
Table of Contents
In this post, TipsMake.com will explain how to install Nagios on Raspberry Pi to check network status.
How to install Nagios on Raspberry Pi
Install Raspbian
The first thing you need, is an operating system.
Starting with Raspbian. Raspbian Lite is perfect for this purpose, but choose the desktop version you prefer
Here are the first steps you need to complete before proceeding:
- Install Raspbian on Raspberry Pi
- Change default passwords and set options as you like (language, keyboard, IP, .)
- Enable SSH and configure it for automatic booting
- Verify that you can connect from your computer over SSH
- Update Pi
sudo apt update sudo apt upgrade sudo rebootThat's it, you're ready to get started.
Downloads and prerequisites
Nagios is a web interface, so you need to install Apache and PHP
sudo apt install apache2 libapache2-mod-phpThen there are two things to download and install:
- Nagios Core : This is the main part of the Nagios system
- Nagios Plugins : This will add basic test commands to Nagios, so you won't have to create all the scripts yourself.
Download Nagios Core | Download Nagios Plugins:
http://nagios-plugins.org/download/Finally, download the archive with wget:
mkdir /home/pi/Downloads cd /home/pi/Downloads wget https://assets.nagios.com/downloads/nagioscore/releases/nagios-4.4.2.tar.gz wget http://nagios-plugins.org/download/nagios-plugins-2.2.1.tar.gzNow you're ready to move on to the installation.
Install Nagios
Create groups and users Nagios
You need to create a specific user for Nagios, plus a group for nagios and apache (nagcmd) users.
sudo useradd -m -s /bin/bash nagios sudo groupadd nagcmd sudo usermod -a -G nagcmd nagios sudo usermod -a -G nagcmd www-dataCompile and install Nagios
Now, you have to extract the files from the repository, compile the sources and install Nagios on your Raspberry Pi.
Move to the Downloads folder :
cd /home/pi/DownloadsExtract files from previously downloaded archive.
tar zxvf nagios-4.4.2.tar.gzDon't forget to change the version number if you download a different version
- Translate:
cd nagios-4.4.2/ ./configure --with-command-group=nagcmd make allThis may take a few minutes.
- Setting:
sudo make install sudo make install-init sudo make install-config sudo make install-commandmodeThis is the end of the Nagios Core installation.
Now, you need to configure the Apache section to allow access to the Nagios site.
Configure Apache for Nagios
Activate the CGI module for Apache:
sudo a2enmod cgiCopy the Apache configuration to the Apache directory:
sudo cp sample-config/httpd.conf /etc/apache2/sites-enabled/nagios.confCreate the first user for the web interface:
sudo htpasswd -c /usr/local/nagios/etc/htpasswd.users nagiosadminRestart Apache:
sudo service apache2 restartCheck if you have access to Nagios:
Go to http://// nagios. You should get something like this:
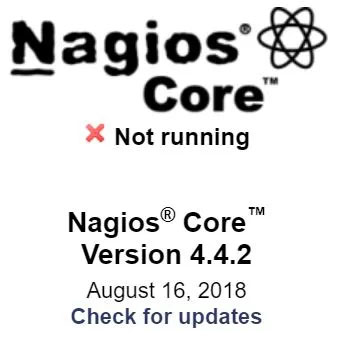
That is normal You will fix that now! The Nagios installation is almost complete, just run the Nagios service again.
Start the Nagios service
Nagios has a background service that launches a test at a predetermined frequency (e.g. every 5 minutes). You need to launch it to complete the installation:
sudo service nagios startAnd to start Nagios automatically on boot:
sudo ln -s /etc/init.d/nagios /etc/rcS.d/S99nagiosIf you refresh the web interface, you should now see ' Daemon running with PID XXX '.
Everything is fine with Nagios. You just need to add the plugin now
Install the Nagios plugin
Follow the procedure below to install the Nagios plugin:
- Extract files from the archive:
tar zxvf nagios-plugins-2.2.1.tar.gz- Compile and install:
cd nagios-plugins-2.2.1/ ./configure --with-nagios-user=nagios --with-nagios-group=nagios make sudo make installAll plugins are available in / usr / local / nagios / libexec / directory and ready to use in Nagios.
You may need to restart Nagios in order to apply the changes:
sudo service nagios restartConfigure Nagios to suit your needs
Nagios vocabulary
Nagios uses a specific vocabulary to define each of the objects in the configuration
So, first of all, need to make sure you know that:
- Command : A command is a script basically from Nagios Plugins folder. You define it in Nagios to use it later with parameters (eg check_load is a command).
- Service : Service is the test applied to one or many computers and use the command to run specific verification (eg check load greater than 10 on the Raspberry Pi is not a service).
- Host : Host computers, servers, anything that has an IP address.
- Hostgroup : You can define a group of hosts, like 'Raspberry Pi' and apply the same service to all hosts within this group.
Now let's see how to configure each one in the Nagios configuration file.
For example, we will follow the Raspberry Pi Zero from the Raspberry Pi 3B + where Nagios is installed.
Prepare the host
Nagios mainly uses SNMP to connect with other hosts and receive all the necessary information. So you need to install SNMP on every new host before adding it to the configuration file.
This is not required, but depends on the service you will create for this host. In the example case, follow these steps on the Raspberry Pi Zero:
Connect to the host via SSH
- Install snmpd:
sudo apt install snmpd- Move to configuration directory:
cd /etc/snmp- Delete (or backup) snmpd.conf file:
sudo rm snmpd.conf- Create a new snmpd.conf file:
sudo nano snmpd.conf- Paste these lines in:
com2sec readonly default RASPBERRYTIPS group MyROGroup v1 readonly group MyROGroup v2c readonly view all included .1 80 access MyROGroup "" any noauth exact all none none sysName Pi ZeroReplace RASPBERRYTIPS with the community you want to use, sysName with the host name or description. There are a lot of options available in snmpd.conf , but for this test you need nothing more than that.
- Save and exit ( CTRL + O, CTRL + X )
- Restart snmpd:
sudo service snmpd restartNow, you can add this host in Nagios.
Add host
- Go back to the Raspberry Pi host Nagios.
- Navigate to Nagios's object configuration directory:
cd /usr/local/nagios/etc/objects- Create a new file for the host, such as pizero.cfg:
sudo nano pizero.cfg- Paste these lines in:
define host { use linux-server ; Host group to use host_name Pi Zero ; Name of this host alias pizero ; Alias address 192.168.1.18 ; IP Address }This is actually the basic host definition, with hostname, alias and IP address. The example also adds it to the Linux server host group to inherit the services defined for the group, if you add it later.
- Save and exit ( CTRL + O, CTRL + X )
- Now, you need to tell Nagios that you have added a new file.
- Add this line in /usr/local/nagios/etc/nagios.cfg (just below localhost.cfg ):
cfg_file=/usr/local/nagios/etc/objects/pizero.cfg- Restart Nagios:
sudo service nagios restart- Back in the Nagios web interface, in the Hosts menu , you will have a new line like this:
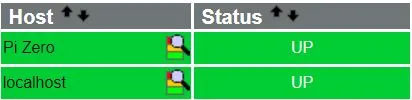
Nagios has been monitoring ping responses for new hosts, but you want more. So you need to add a service inside, but first, define the command to use.
Add an order
Previously, in this guide, you downloaded and installed the Nagios plugin. The Nagios plugin provides a lot of commands to check the local host, but not many commands against the remote host.
You can also download a lot of other commands on this site (especially when looking for SNMP plugins):
https://exchange.nagios.org/directory/Plugins/For our example, we will track the time synchronization between two Raspberry Pis.
To add a command in Nagios, follow these steps:
- Navigate to plugin directories:
cd /usr/local/nagios/libexec- Run the command without parameters:
./check_ntp- Note the help message and the parameters you need to pass. In the example case, this error message appears:
Usage: check_ntp -H [-w ] [-c ] [-j ] [-k ] [-4|-6] [-v verbose]Therefore, the host IP must be specified in the -H argument, which can be a warning threshold and is important to -w and -c. Other options don't seem suitable.
- Open the command configuration file:
sudo nano /usr/local/nagios/etc/objects/commands.cf- Check if the command is inside and if not, add it like so:
define command { command_name check_ntp command_line $USER1$/check_ntp -H $HOSTADDRESS$ -w $ARG1$ -c $ARG2$ }- Save, exit and restart Nagios.
sudo service nagios restart- Check if the command is available in Nagios:
- Go to web interface.
- Click Configuration in the menu on the left.
- Select Commands and click Continue.
- You should now see check-ntp in the list (or any commands you add).
The command is now ready for use by the host, but a new service needs to be created to apply it.
Add a service
To create a new service, follow these steps:
- Open the host configuration file:
sudo nano /usr/local/nagios/etc/objects/pizero.cfg- Adjust the filename according to what you created earlier.
- Paste these lines:
define service { use local-service ; Name of service template to use host_name Pi Zero service_description Time synchronization check_command check-ntp!1!5 }Don't forget to adjust these lines to match your previous configuration.
On the check_command line , define all the arguments, separated by an exclamation point.
- Save and exit.
- Check configuration:
sudo /usr/local/nagios/bin/nagios -v /usr/local/nagios/etc/nagios.cfgThis can be helpful to determine if you have a configuration error before restarting Nagios.
- Restart Nagios:
sudo service nagios restartNow, in the status details from the host, you should see the new service:

If you understand how to create a host, commands, and services, then you are ready to do everything in Nagios. Feel free to download new plugins on the Internet or even write code for your own plugins (it's no different from a basic script to test something).
Was this article helpful?
Your feedback helps us improve.
Related Articles
 5 best IT infrastructure monitoring tools10 minutes read
 How to boot Raspberry Pi 4 from USB or over the network8 minutes read
 How to use Raspberry Pi to monitor temperature with Sense HAT8 minutes read
 10 best Ping monitoring software and tools18 minutes read
 10 best IP monitoring tools20 minutes read
 Network testing with Network Monitor 3.4 - Part 17 minutes read
Reader Comments 0
Sign in with email or Google to join the discussion.