How to use Raspberry Pi to monitor temperature with Sense HAT
There are several ways you can monitor the ambient temperature using a Raspberry Pi single-board computer..
You can use external sensors connected to the GPIO pins of the Raspberry Pi, and today's article will explain how to monitor temperature using a Raspberry Pi equipped with Sense HAT.
What is Sense HAT?
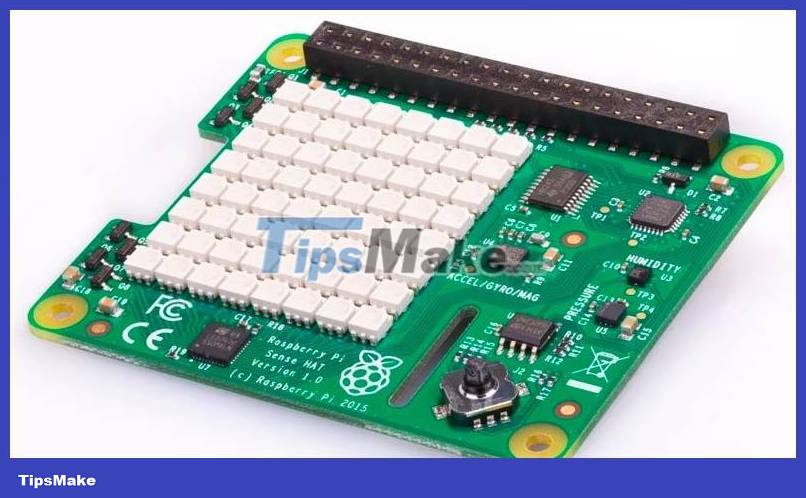
An official Raspberry Pi HAT (Hardware Attached on Top) add-on board designed and manufactured by the Raspberry Pi company, the Sense HAT was originally created for use by astronauts on the International Space Station . Since 2015, two Raspberry Pi computers equipped with Sense HAT have been used in science experiments designed by students participating in the Astro Pi challenge. These two devices have since been replaced by upgraded versions based on the Raspberry Pi 4 and equipped with a high-quality camera. .

Although it lacks the special silver case designed for use in space, the standard Sense HAT panel has exactly the same functionality. Compatible with any Raspberry Pi model with a 40-pin GPIO header, it has a series of built-in sensors that allow it to monitor its surroundings and detect its own direction and movement. Additionally, it also has an 8x8 RGB LED matrix to display text, data, and images. There's also a small 5-way joystick.
The full sensor functions of Sense HAT are as follows:
- Humidity : The STMicro HTS221 sensor has a relative humidity range of 0 to 100%, plus temperature sensing from 32°F to 149°F (0°C to 65°C ± 2°C).
- Barometric pressure : The STMicro LPS25HB sensor has a measurement range of 260 to 1260 hPa, plus a temperature sensor from 59°F to 104°F (15°C to 40°C ±0.5°C).
- Temperature : This value can be read from a humidity or pressure sensor or measured by taking the average of both readings.
- Gyroscope : The STMicro LSM9DS1 IMU can measure the Sense HAT's rotation relative to the Earth's surface (and its rotation rate).
- Accelerometer : Another function of the IMU, this function can measure acceleration force in multiple directions.
- Magnetometer : By sensing the Earth's magnetic field, the IMU can determine magnetic north and thus give a compass reading.
Now that you have a good understanding of what this versatile Raspberry Pi HAT can do, it's time to get started with the project.
How to use Raspberry Pi to monitor temperature with Sense HAT
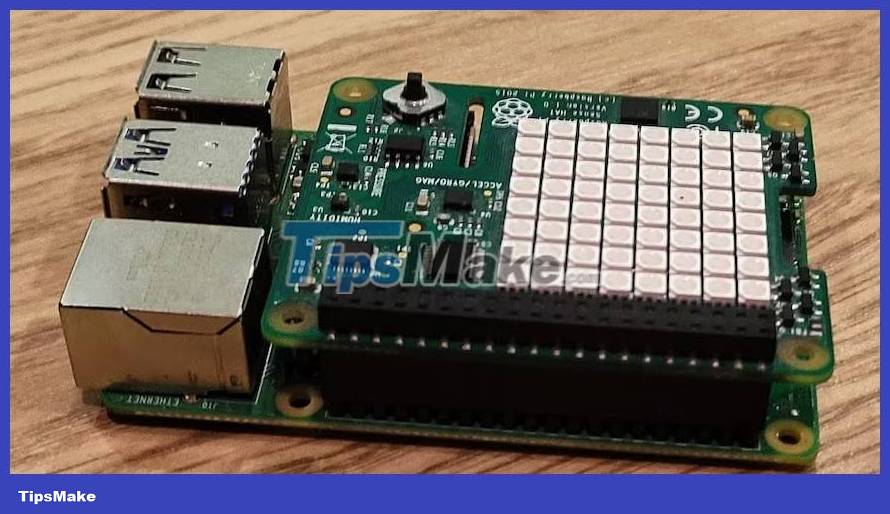
Step 1: Attach the Sense HAT
To connect the Sense HAT, first make sure your Raspberry Pi is turned off and disconnected from the power source. Then carefully push the Sense HAT into the Raspberry Pi's 40-pin GPIO header. Make sure all pins are aligned. You can also use screw-in brackets to help secure it.
You can use any standard Raspberry Pi model with a 40-pin GPIO header. However, one of the main limitations of the Raspberry Pi 400 is that its GPIO header is located behind the integrated keyboard. This means the Sense HAT will face the rear, so you may want to use a GPIO extension cable to connect it.
Step 2: Set up Raspberry Pi
Like any other project, you should plug in a USB keyboard and mouse, then connect the Raspberry Pi to a monitor or TV. You should also insert a microSD card with the standard Raspberry Pi OS on it - if you haven't done this yet, see how to install the operating system on a Raspberry Pi. You are then ready to power it on.
Additionally, you can use the Raspberry Pi with the Sense HAT in headless mode without connecting a display and connect to the Raspberry Pi remotely using SSH from another computer or device. If you do this, you will not be able to use the Thonny Python IDE, buyers can still edit programs with the nano text editor and run them from the command line.
Sense HAT software must be installed by default. To double check, open a Terminal window and enter:
sudo apt install sense-hatThen, if the package was newly installed, restart the Raspberry Pi:
sudo rebootStep 3: Start programming in Python
You can use the Raspberry Pi Sense HAT with the Scratch block-based programming language, and the article will use Python to read and display its sensor indicators.
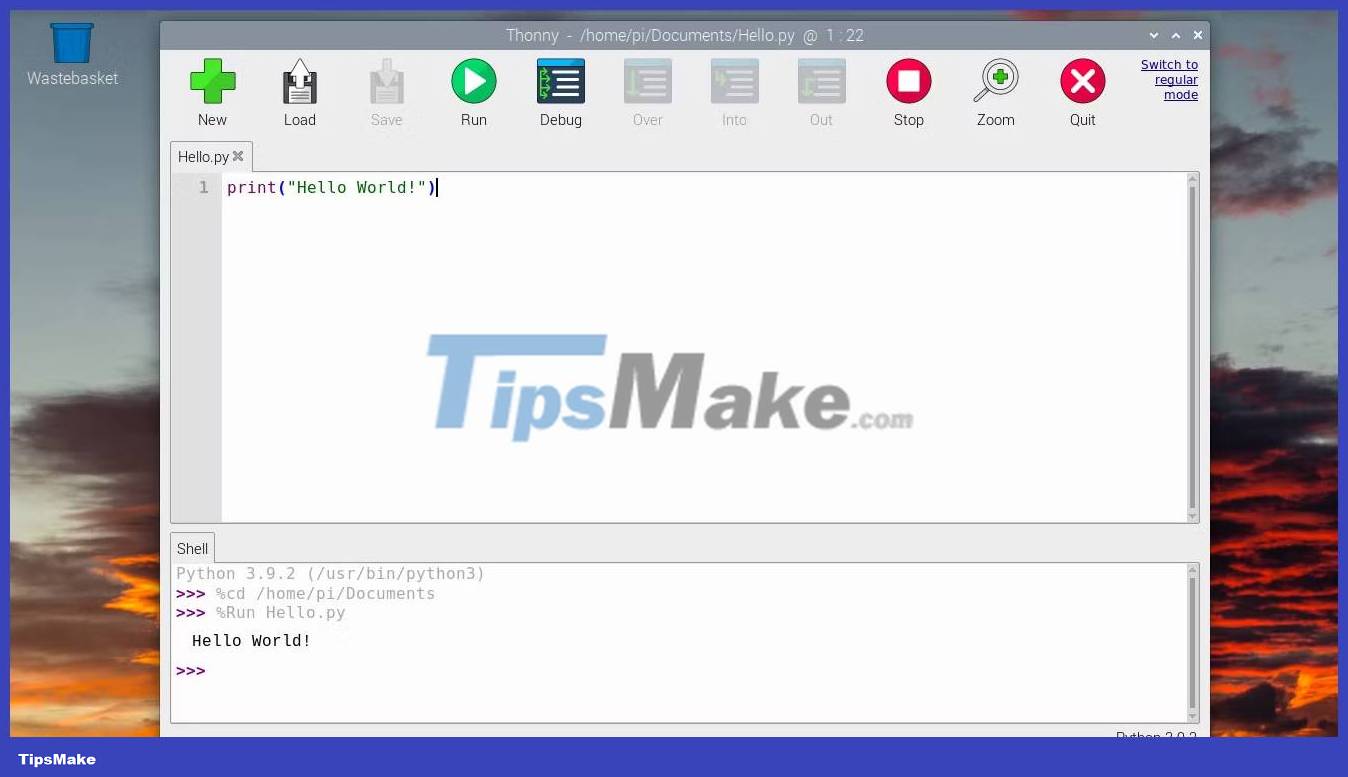
Thonny IDE (integrated development environment) is a good way to program Python on Raspberry Pi, as it has a lot of functionality including useful debugging features. In the Raspberry Pi OS desktop GUI, go to Menu (top left raspberry icon) > Programming > Thonny IDE to launch it.
Step 4: Measure temperature
In the main Thonny IDE window, enter the following lines of code:
from sense_hat import SenseHat sense = SenseHat() sense.clear() temp = sense.get_temperature() print(temp)The first line imports the SenseHat class from the Python library sense_hat (pre-installed in Raspberry Pi OS). This is then assigned to the variable sense . The third line clears the Sense HAT's LED matrix.
Then, take the temperature measurement and print it to the Shell area of the Thonny IDE. This is in Celsius, so you may want to convert it to Fahrenheit first:
temp = (sense.get_temperature() * 1.8 + 32)The temperature sensor reading will have a few digits after the decimal point. So we will use the round function to round it to one decimal place:
temp = round(temp, 1)Note :
The sense.get_temperature() function reads the temperature sensor built into the humidity sensor. Alternatively, you can get the temperature from the pressure sensor using sense.get_temperature_from_pressure() or even take both readings and calculate the average (by adding them up and dividing by two).
Step 5: Display temperature on Sense HAT
Exporting a single temperature reading to the Python Shell is a bit boring, so instead, take a new temperature reading every so often and display it on the Sense HAT's RGB LED matrix. To display scrolling text messages, the article uses the show_message function with a while: True loop to continue reading new data every 10 seconds - using the sleep function from the time library .
Here is the complete program:
from sense_hat import SenseHat from time import sleep sense = SenseHat() sense.clear() while True: temp = (sense.get_temperature() * 1.8 + 32) temp = round(temp, 1) message = "Temp: " + str(temp) sense.show_message(message) sleep (10)Run this code and you will see each new temperature value scrolling across the LED matrix. Try blowing into the Sense HAT to see if the temperature changes.

Note :
The temperature reading may be affected by the heat transferred from the Raspberry Pi's CPU directly underneath, so adjustments may be needed to get a more accurate number. Another solution is to use a stacking header to elevate the Sense HAT above the Raspberry Pi.