How to use IFTTT with Raspberry Pi
In this article, you'll learn how to build a custom applet that you can use with the Raspberry Pi, including how to connect to IFTTT, set up the internal Webhook, and how to enable it.
- Hardware requirements
- Set up IFTTT account and take action
- Use IFTTT from Raspberry Pi
- 1. Create an account
- 2. Create an action
- 3. Create a trigger
- 4. Select service
- 5. Select the trigger
- 6. Assign the event name
- 7. Create an action
- 8. Select an action service
- 9. Choice of action
- 10. Write the message you want to send
- 11. Find the API key
- 12. Copy the keys
IFTTT stands for IF This Then That, and is a free web service that allows users to build their own custom applets. In this article, you'll learn how to build a custom applet that you can use with the Raspberry Pi, including how to connect to IFTTT, set up the internal Webhook, and how to enable it.
This can be used for a lot of projects and applications, but for the purposes of this article, the goal is to build an applet that sends notifications to the phone when motion is detected.
Hardware requirements
- Raspberry Pi with operating system installed on SD card (available on official website)
- Power cable
- Screen
- HDMI connector
- USB or Bluetooth mouse
- USB or Bluetooth keyboard
- WiFi or Ethernet connection
Set up IFTTT account and take action
1. Create an account
To create an IFTTT account, open the website here.
On this page, sign up through certain options or click Sign Up to create an account.
2. Create an action
To create an action, click the Profile option in the top right corner to open the drop-down list.

On the list, click Create.
3. Create a trigger
When you click Create , a page similar to the following opens:

On this page, click + This .
4. Select service
The article will use the Webhook service for the trigger and choose the option named Webhooks from the list provided.
After selecting Webhooks, click the Connect button .
5. Select the trigger
Some services offer more than one type of trigger, but Webhooks only provides one option.
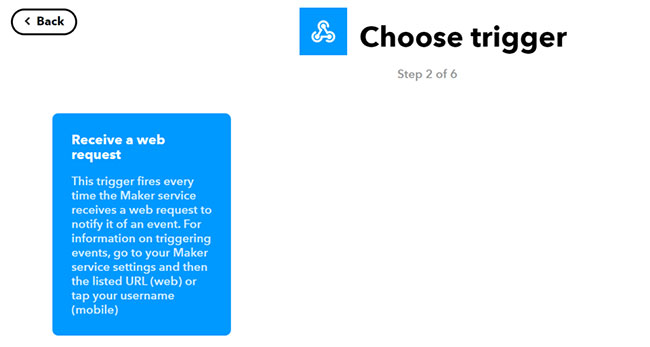
Click the option box that appears, as shown in the image above.
6. Assign the event name
The trigger will only be fired if an event is true. Therefore, you need to assign the Event name to the trigger.
The name cannot contain any spaces or special characters, except the underscore _.
7. Create an action
Now, you have to choose the action service, to do this, first click + That on the page.

8. Select an action service
As discussed, you want a notification to be sent to the phone when motion is detected, that is when the event is true, the action will be a notification. Therefore, choose a notification from the list provided.
Then, press the Connect button to see the action provided.
9. Choice of action
Since you want to just send a simple notification to your phone, select the option Send a notification from the IFTTT app.
10. Write the message you want to send
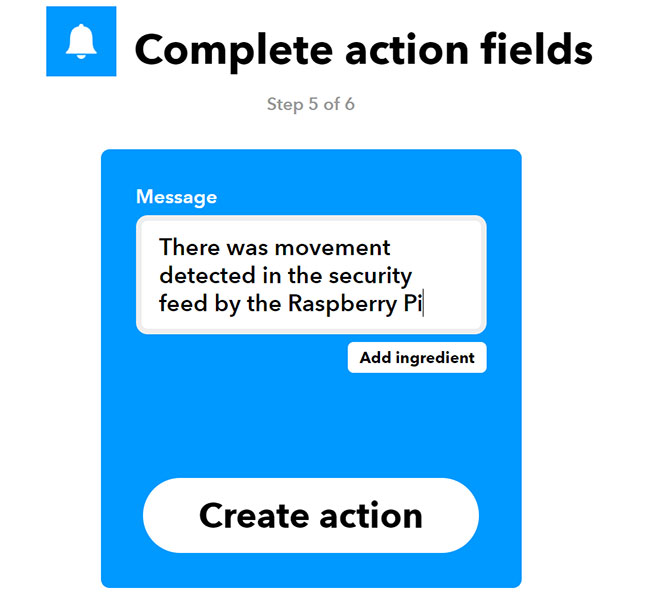
IFTTT notifications are customized so you can write the content you want to see in it. After you clicked on the blue option box in the previous step, you will see a message option open, where you can enter the text you want, then click the Create action button .
11. Find the API key
The Webhooks page will open by itself, otherwise double-click the icon. On this page, click Documentation (in the right corner).
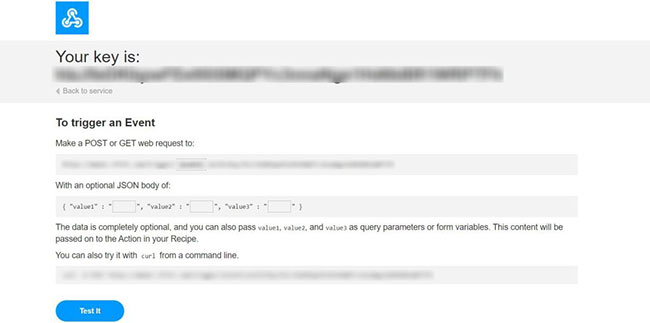
12. Copy the keys
When you open this page, the first line is the API Key.
The URL you must send the Webhook call to is specified below Make a POST or GET web request to .
Use IFTTT from Raspberry Pi
Make sure to update and upgrade the software before starting. The article also assumes that you have installed Python on a Pi with code for the project, in this case a motion detector.
Step 1. Install the Python requests module:
sudo pip install requestsStep 2. Modify the code to include the following statements at the beginning:
import time import requestsStep 3. At the bottom of the script, add the following line:
request.post requests.post('https://maker.ifttt.com/trigger/event name/with/key/apikey')In the line above, make sure to replace event name and apikey with the name you typed and found respectively.
Step 4. Install the IFTTT app on your smartphone:
You must download the IFTTT app for Android | IFTTT for iOS.
Step 5. Save and run Python code on Raspberry Pi
When the event, here motion detection, is true, you'll get a notification on your smartphone.
- Raspberry Pi Zero vs Model A and B, how are they different?
- How to boot Raspberry Pi 4 from USB or over the network
- What is the Raspberry Pi and how is the Raspberry Pi used?
- How to start Raspberry Pi 3 from USB
- Why should people try Raspberry Pi 4?
- Raspberry Pi AI Kit: Bring AI to Raspberry Pi
- Learn Pi Imager, How to Use Raspberry Pi Imager
- How to use Raspberry Pi Imager to install Raspberry Pi OS
- How to install Windows 10 IoT Core on Raspberry Pi 4
- 3 ways to boot multiple operating systems on Raspberry Pi
- How to build Android TV Box with Raspberry Pi
- How to install OBS Studio on Raspberry Pi OS
- How to use HDMI-CEC on the Raspberry Pi
- Instructions on 2 ways to install MongoDB on Raspberry Pi
- How to turn off WiFi of Raspberry Pi
- How to install a virtual keyboard in a Raspberry Pi
- 3 ways to edit file boot / config.txt on Raspberry Pi
- 8 best lightweight operating systems for Raspberry Pi


-
 Create an AI voiceover for poems and inspiring stories.
-
Instructions on creating a Froggy Jumps game on Educaplay
-
How to make a piano game using Scratch
-
Instructions on how to add ChatGPT to Google Sheets
-
How to rotate any page horizontally in Word
-
How to install SPSS on a MacBook: A step-by-step guide.
 Create an AI voiceover for poems and inspiring stories.
 Instructions on creating a Froggy Jumps game on Educaplay
 How to make a piano game using Scratch
 Instructions on how to add ChatGPT to Google Sheets
 How to rotate any page horizontally in Word
 How to install SPSS on a MacBook: A step-by-step guide.