Table of Contents
This updated guide explains how to Use Gmail for Newbies - Receive & Send Mail, Organize through clear steps, practical examples, and important checks that help prevent common errors.
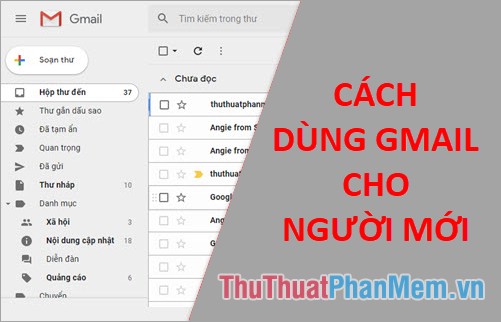
Similar to other applications, if you may need to use Gmail you also need to have a Gmail account, this account will help you can send and receive mail with others. Once you have a gmail account, you can perform actions on gmail.
Create a Gmail Account
To create a gmail account you do the following:
Step 1 : Visit the Google account creation page https://accounts. google. com/signup
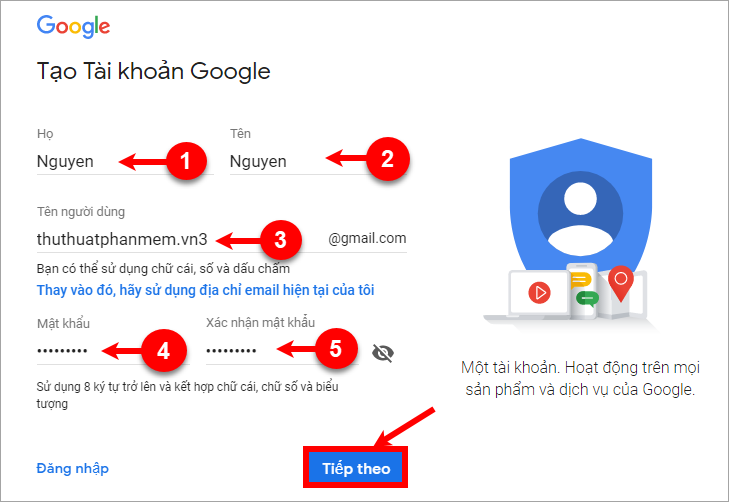
Step 2 : On the interface of Create a Google Account, enter the information as required:
- Enter a last name.
- Enter name.
- Enter your username, this is your gmail account name that can use letters, numbers and punctuation.
- Enter the password for the gmail account.
- Retype the password for gmail account.
Then click Next.
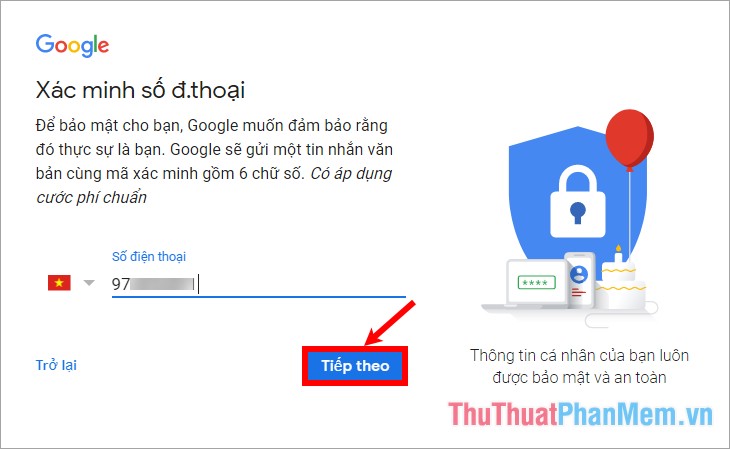
Step 3 : Next in the section Verify phone number , enter your phone number and click Next.
Note: The phone number you enter will be used to protect gmail, or to retrieve your gmail password when you forget your password.
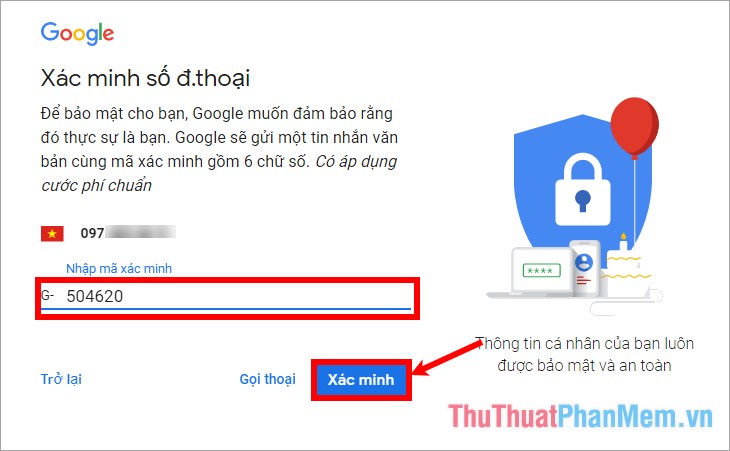
Step 4 : Google will send a confirmation code to the phone number you enter, enter it in the white box and select Verify.
Step 5 : After verifying the phone number you have created your Gmail account, you need to enter some basic information, recovery email address and click Next.
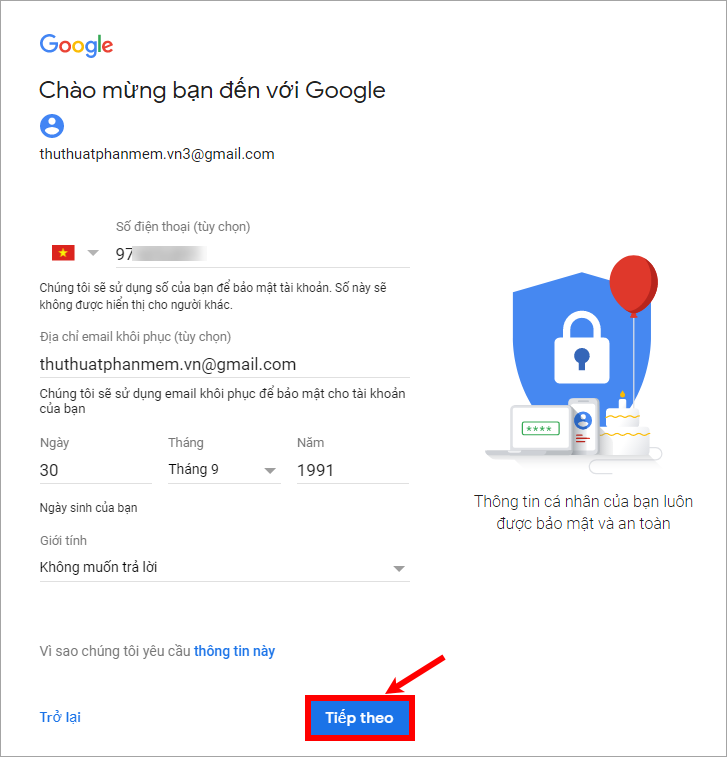
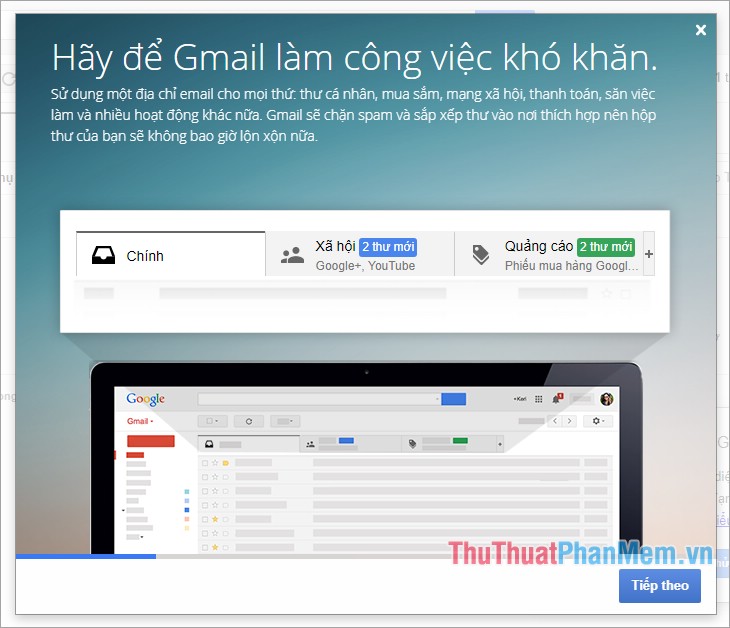
A few other messages appear and select I agree to finish creating a Gmail account. After you have a Gmail account you access and log in to https://mail. google. com, the first time you access Gmail will have a basic instruction window you can view and click Next follow or you turn off.
Send, Receive, Reply and Forward Mail in Gmail
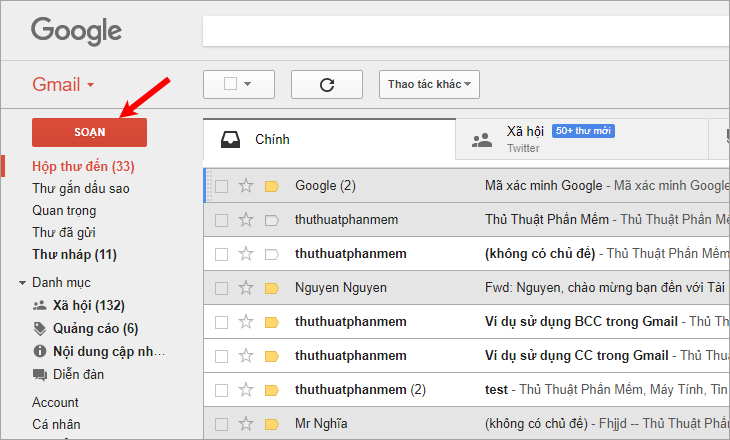
Step 1 : To send mail in gmail, on the Gmail interface you select Compose .
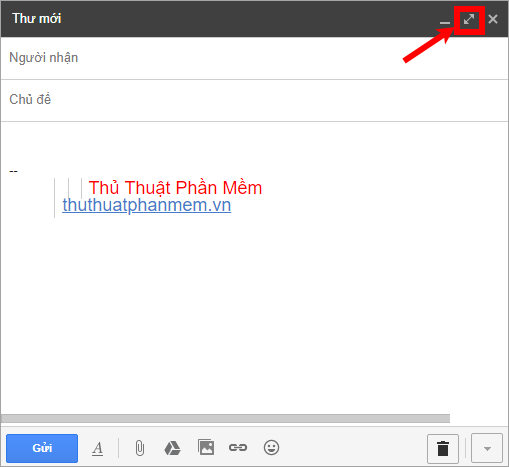
Step 2: Compose interface is displayed on the bottom right of Gmail, to expand you choose the two-way arrow icon as shown below.
Step 3 : Compose mail.
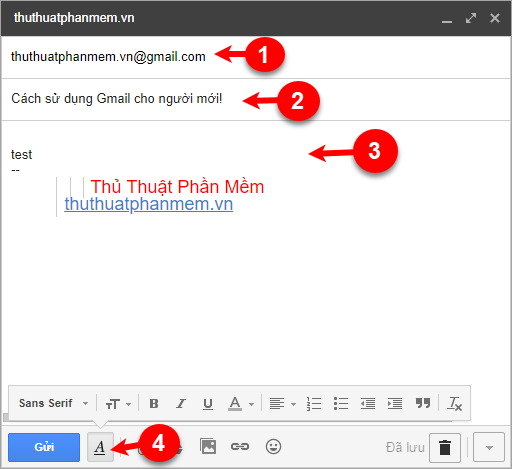
In the New Mail interface, enter the recipient's email in the To (1) section, enter the subject of the message in the Subject (2) section, then compose the message in the wide space below (3), you can edit correct the letter in the letter by accepting the letter A (4).
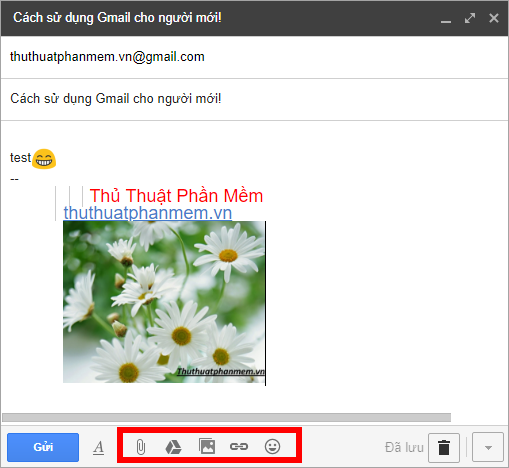
To attach files, attach images, links, and emoticons by getting to select the icons next to Send .
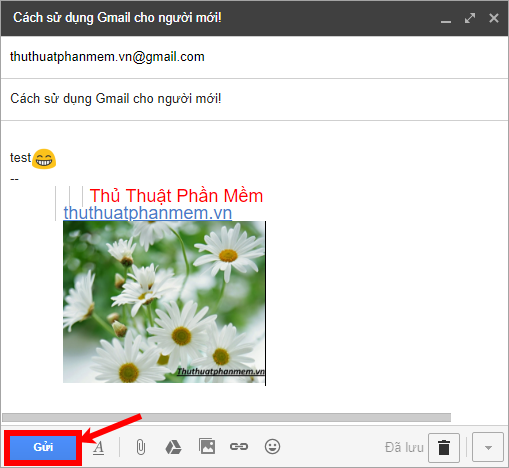
Step 4: After composing the message, attaching the file. you click Send to send the message.
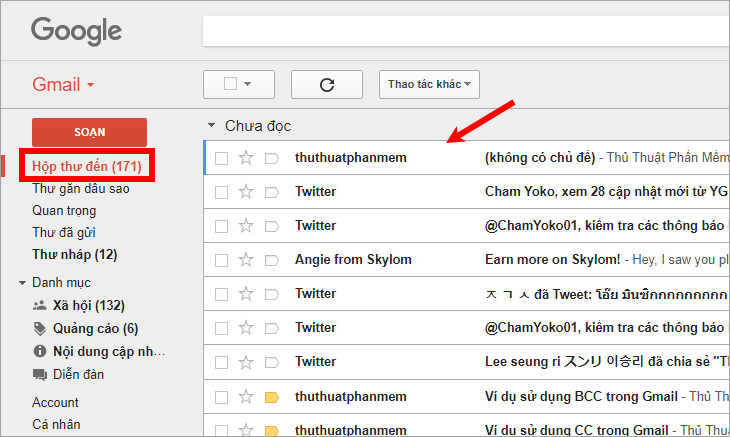
To receive mail from everyone you send to select Inbox on the left menu, the right side will appear a list of mail you click the mailbox you may need to read to open the mail.
If you may need to reply to the message then select the Reply arrow icon as shown below.
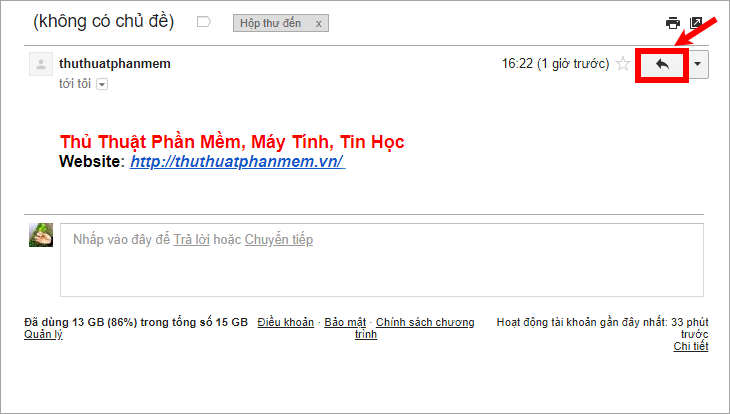
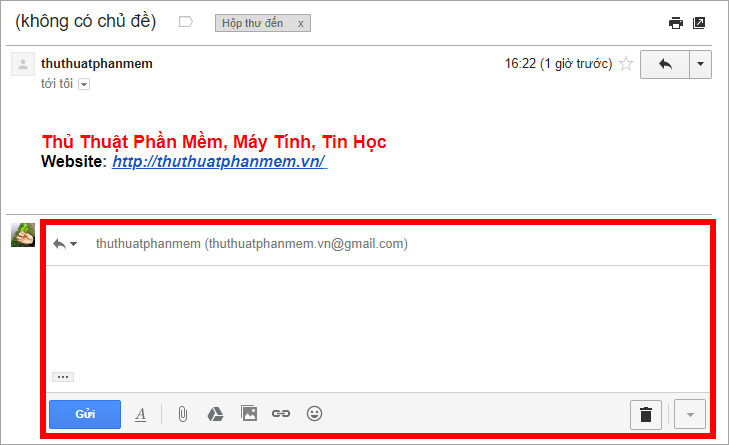
Now you will see the compose box at the bottom, you just compose and click Send .
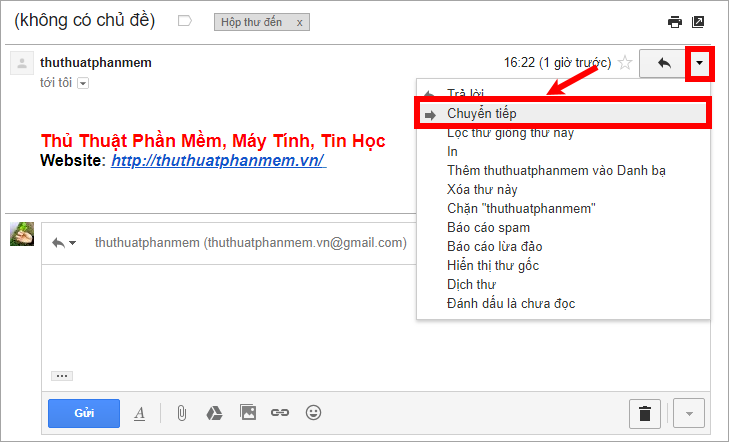
And if you want to forward mail , on the contact line, select the black triangle icon and choose Forward.
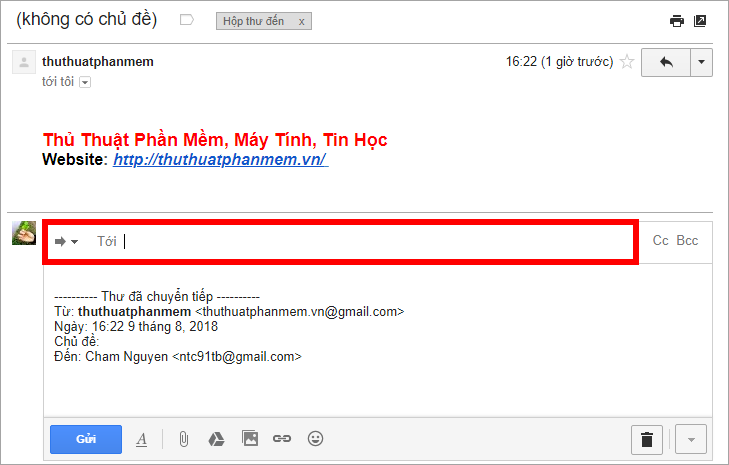
Cursor will be placed in the position to , you enter the email you may need to forward mail for it and click Submit .
Organize Mail in Gmail
You can arrange gmail by labels ( Labels ) based on gmail filter, so when a new mail matches the conditions, that email will be labeled with specific labels, you just need to go to the label name will see all emails with the same condition. You do the following:
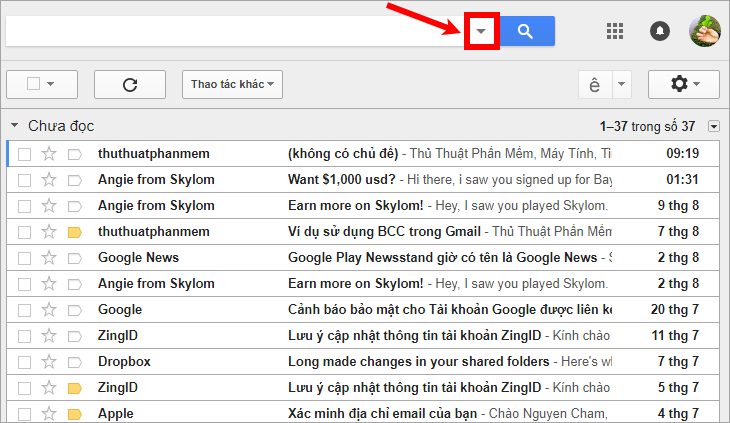
Step 1 : Select the black triangle icon to the right of the search box in gmail to open advanced search.
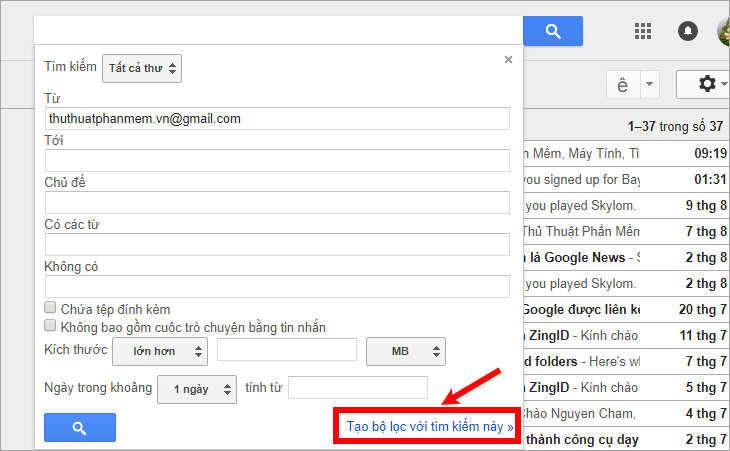
Step 2 : You enter or select specific conditions to filter out emails that meet conditions. Then select Create filter with this search.
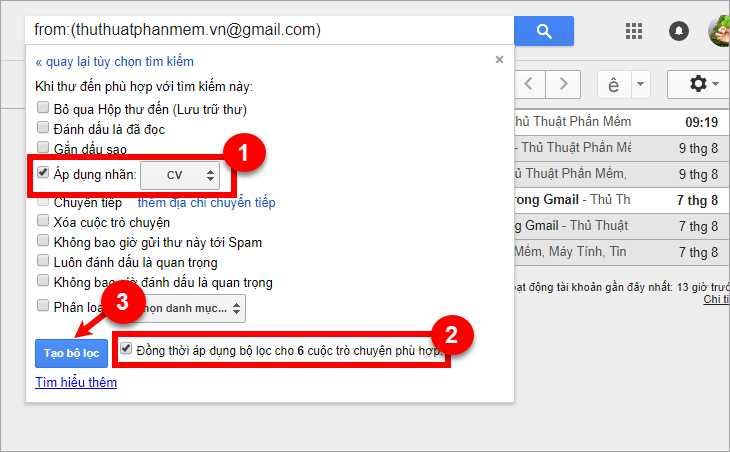
Step 3 : So gmail will filter all emails that match the conditions you enter, next you select the tick first Apply the label and choose the label you may need to move these emails into. To apply to all other email in gmail you choose Also apply filter to? suitable conversation . Finally select Create filter.
That way you will see emails that match the conditions you enter will be labeled before the subject of the email.
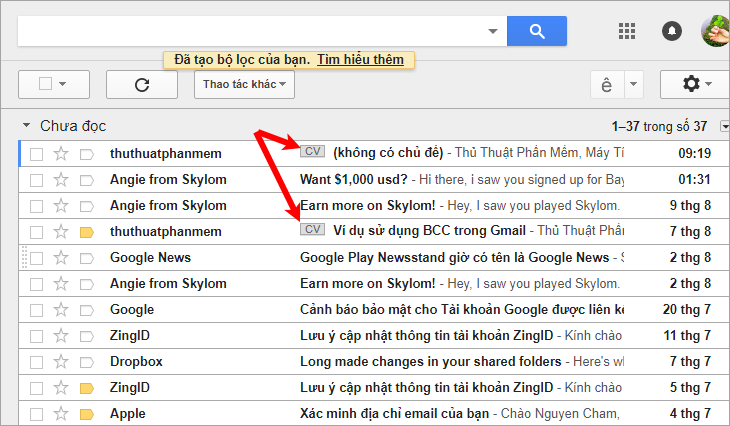
You choose the label name on the left of gmail will see in this label contains all emails matching conditions.
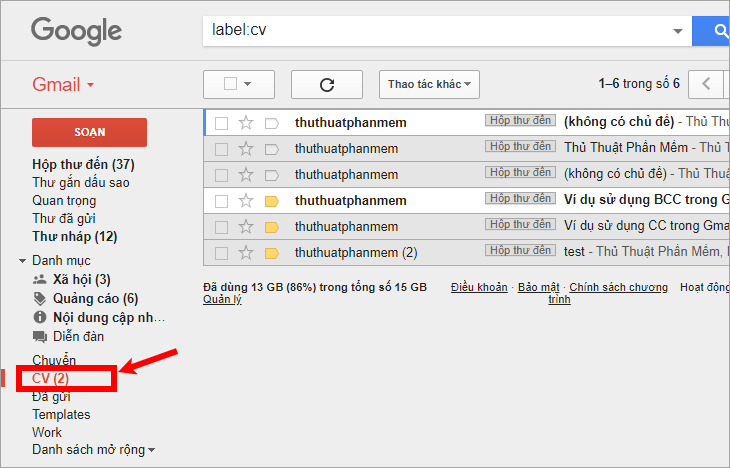
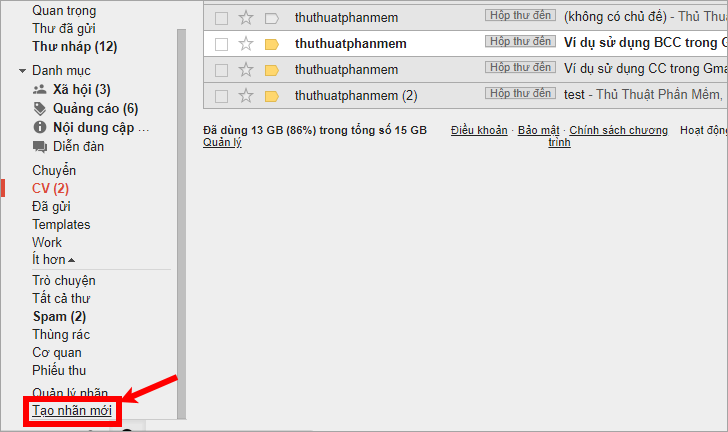
From now on if any email sent to you that matches the condition, it will be labeled and added to this label itself. You can add multiple labels by selecting Expand List -> Create new labels.
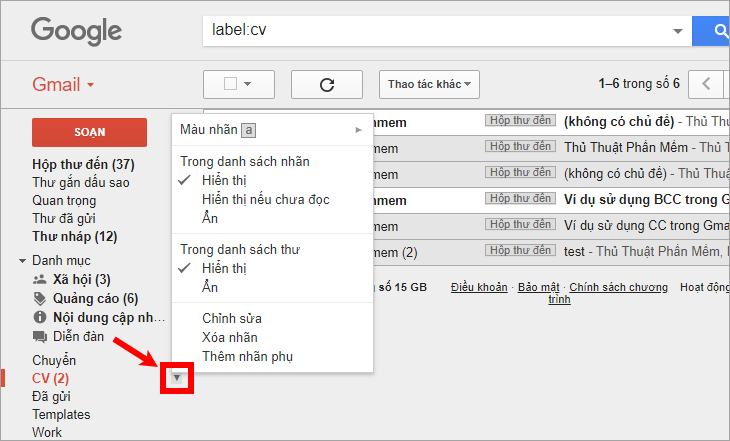
To customize the label or delete the label you choose the triangle icon next to the label name appears context menu you select the appropriate content.
Delete Sent Messages
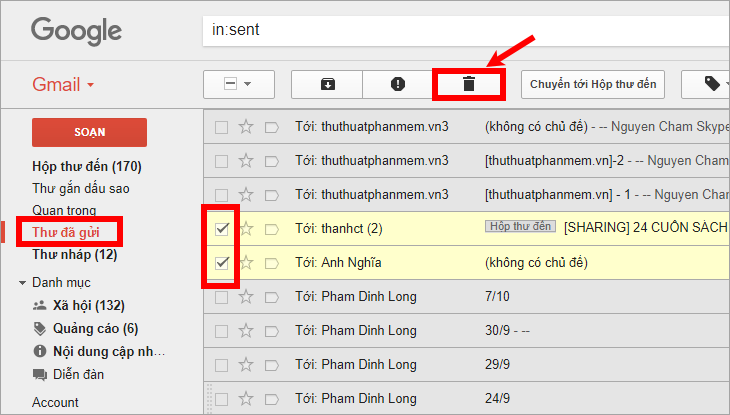
If you may need to delete sent messages, then select the Sent part in the left menu. Next, select the boxes in front of the emails you may need to delete, then select the trash icon above to delete messages.
A message appears and select OK .
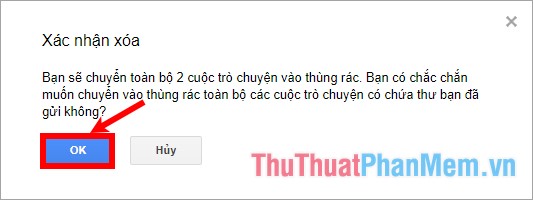
And if you may need to cancel the message just sent in Gmail (undo), you need to enable the Undo Send feature . You refer to the detailed instructions for inserting links to cancel sent messages in Gmail, when you post on the web.
Recover Deleted Messages
If you may need to recover deleted messages, then in the menu on the left you select Expand List -> Trash.
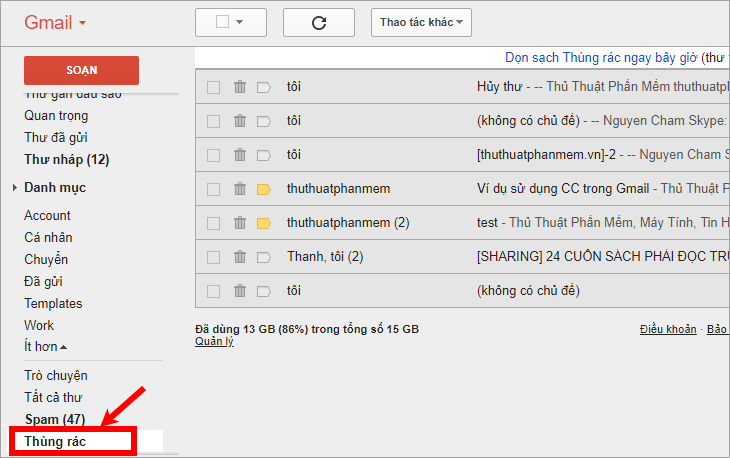
you may need to recover any mail, select the box before the message and select the icon Move to -> select the location to transfer mail to recover. For example, you move to the inbox, the mail will be restored and displayed in the inbox.
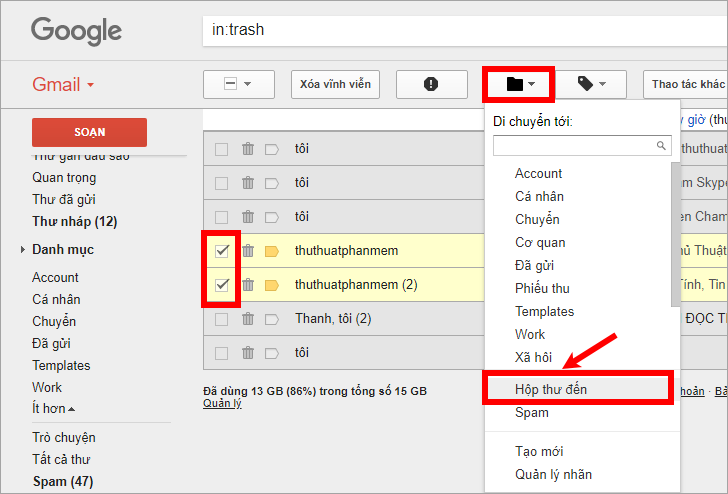
So you just need to go back to the location you chose to see the message restored.
Note: Trash only stores deleted messages for 30 days.
Above the article has instructed some basic steps to help you get started getting used to Gmail, you can see more Gmail tips here http://TipsMake. vn/tag/gmail /.
FAQ
What is the easiest way to Use Gmail for Newbies - Receive & Send Mail, Organize?
Start with the requirements in this guide, then follow each step in order. Check the result after every major change so problems are easier to identify.
Can beginners follow these instructions?
Yes. The process is organized into practical steps, and you can repeat any step before moving forward.
What should I check if the method does not work?
Confirm your software or device version, permissions, settings, file format, and internet connection when the task depends on online services.
Related Articles
 Recover Deleted Gmail Messages in Just 3 Steps2 minutes read
 How to Send and Receive Email with Gmail: Step-by-Step Guide3 minutes read
 How to Recover Deleted Messages in Gmail Quickly3 minutes read
 Send and Receive Gmail Messages with Outlook: Send and Receive Mail5 minutes read
 Recover Deleted Contacts in Gmail2 minutes read
 How to Send Mail with Gmail: Step-by-Step Guide6 minutes read
Reader Comments 0
Sign in with email or Google to join the discussion.