How to Use FaceApp on Android
This wikiHow teaches you how to edit your selfies and other people's faces in your pictures in FaceApp, using Android. Open FaceApp on your Android. The FaceApp icon looks like a blue-and-orange figurehead on a white background. You can...
Table of Contents
Part 1 of 2:
Editing a Picture
-
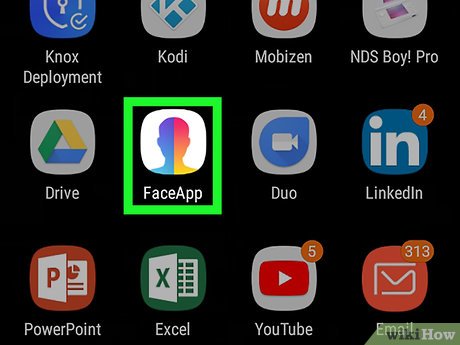 Open FaceApp on your Android. The FaceApp icon looks like a blue-and-orange figurehead on a white background. You can find it on your Apps menu.
 -
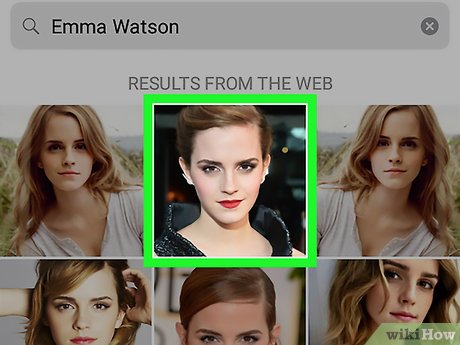 Take or select a picture. You can point your camera to somebody's face and tap the white circle button to take a photo, or select a picture from the gallery panel at the bottom of your screen.
- The gallery panel automatically pulls all the face pictures from your Android's gallery.
- You can browse different folders by swiping left on the panel.
- You can also search the web for celebrity pictures in the CELEBS tab here.
-
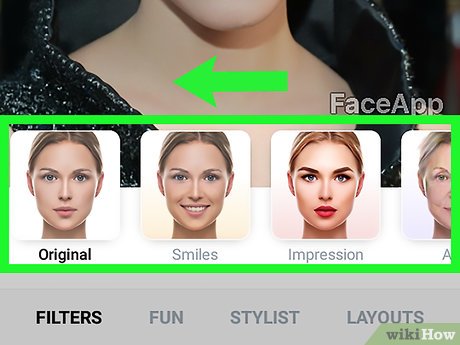 Swipe left across the effects menu. You'll find a list of all the available effects at the bottom of your screen.
- Tap on an effect to preview it.
-
 Select an effect from the menu bar. This will apply the selected effect to your picture.
- Some effects are only available in collage mode. If you're prompted, you can tap the ADD TO COLLAGE button to start creating a new collage with two or four pictures.
- If you start a new collage, tap the "+" sign in one of the other squares, and select another effect to add another picture.
- If you only want two pictures in your collage, tap the "2:2" icon on the top-right.
-
 Tap theicon on the top-right. This will save the picture to your Android's Gallery app.
-
 Tap one of the social media icons to share your image. You can share the picture on your Instagram, Facebook or Twitter feed.
- If you want to share the picture in another app or send it as a message, tap the "..." icon here. It will show all your options.
- You can also share your picture without saving it. You'll find Instagram, Facebook, and icons next to
 on the top-left corner of the editing page.
Part 2 of 2:
Upgrading to Pro
-
 Tap the Style tab on the bottom-right. You'll find it in the lower-right corner of the editing page.
 -
 Tap the GO PRO button. This will open the Pro version's details and extra features on a new page.
 -
 Tap the blue GO PRO button. This will open your subscription options.
 -
 Select a subscription plan. You can subscribe to the Pro version for 1 month, for 12 months, or forever.
 -
 Tap CONTINUE. This will confirm your choice of subscription.
 - Tap the green SUBSCRIBE button to complete your purchase. You'll be charged on your saved method of payment on the Google Play Store.

Was this article helpful?
Your feedback helps us improve.
Related Articles
 Revealing about the person behind FaceApp application: Technology millionaire used to work for Microsoft4 minutes read
 Application shifts the old face in a flash4 minutes read
 Guide to creating slides using Faces app AI3 minutes read
 Warning: Appeared fake FaceApp application to install malicious code on users' devices3 minutes read
 Warning: FaceApp, the hot face change application for young people, contains a hidden danger3 minutes read
 Android SDK - Download Latest Android SDK4 minutes read
Reader Comments 0
Sign in with email or Google to join the discussion.