How to use DNS over TLS on Ubuntu Linux
You can use DNS in which all DNS queries are processed through the encrypted TLS (Transport Layer Secure) protocol. However, most operating systems do not work with DNS over TLS.
Table of Contents
If you are interested in computer security, you probably know how standard DNS isn't. Why? Because, by default, DNS queries are not encrypted. That means DNS can (and often is) exploited. To overcome that weakness, DNS can be used in which all DNS queries are processed via the encrypted TLS (Transport Layer Secure) protocol. However, most operating systems do not work with DNS over TLS (DoT).
Fortunately, Linux users can simply make this a reality.
Today's article will show you how easy it is to add DNS over TLS on Ubuntu 18.04. To do this, the article will use Stubby, an open source primitive DNS handler, that encrypts the DNS queries sent from the client to the DNS Privacy resolver, helping to enhance the privacy of people. end use. The installation process will be done on Ubuntu Desktop 18.04. All you need is the latest version of this Ubuntu platform and the user account with sudo rights. Find out the installation process right away!
Setting
Installing Stubby is easy. Open a terminal window and enter the following commands:
sudo apt-get update sudo apt-get install stubby
When the installation is complete, start and activate Stubby with the following commands:
sudo systemctl start stubby sudo systemctl enable stubby
Check the settings
Use the netstat tool to make sure Stubby is properly installed. If netstat is not installed, do so with the following command:
sudo apt-get install net-tools
When this installation is complete, enter the following command:
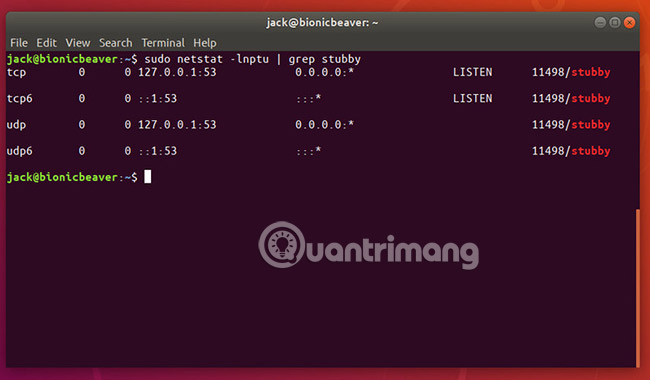
sudo netstat -lnptu | grep stubby
You will see that Stubby is 'listening' to localhost (127.0.0.1) on port 53.
Stubby configuration
Stubby is running perfectly well. If you want to make any configuration changes, look for the configuration file in /etc/stubby/stubby.yml. In that file, you will notice, Stubby uses (by default) the DNS services that support TLS:
- dnsovertls.sinodun.com
- dnsovertls1.sinodun.com
- getdnsapi.net
Below, you will find the Additional servers section. There are several DNS servers over other TLS available here, such as:
- dns.quad9.net
- unicast.censurfridns.dk
- dnsovertls3.sinodun.com
- dnsovertls2.sinodun.com
- dns.cmrg.net
- dns.larsdebruin.net
- securedns.eu
Some additional servers are listed with conditions that describe weaknesses or features that do not work. Users can also add additional DNS over TLS servers in this section. For example, Cloudflare DNS over TLS servers can be added as follows:
#CloudFlare DNS over TLS servers - address_data: 1.1.1.1 tls_auth_name: "cloudflare-dns.com" - address_data: 1.0.0.1 tls_auth_name: "cloudflare-dns.com"
Use Stubby
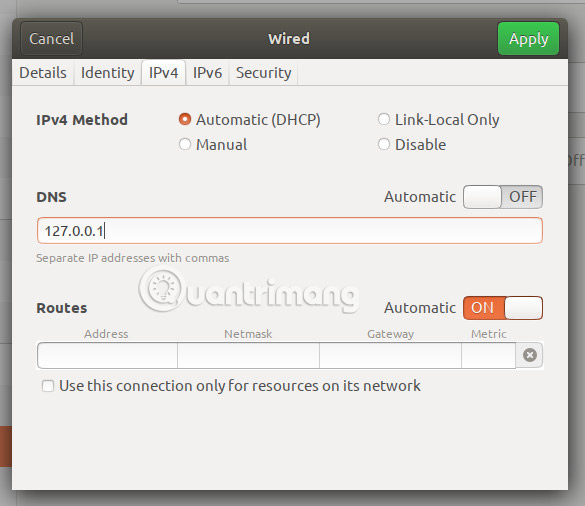
At this point, users need to notify Systemd to actually use Stubby for DNS queries. To do so, open the Network Settings application and click the gear icon associated with your network connection. In the results window, click the IPv4 tab and set DNS Automatic to OFF. Next, in the DNS text field, enter 127.0.0.1. Click Save to apply the changes.
To help the system identify changes, enter the command:
sudo systemctl restart NetworkManager
That's all the steps to do. Stubby is currently responsible for handling DNS over TLS. Your DNS queries are now encrypted, so you can be a bit more secure about Ubuntu Desktop.
Good luck!
See more:
- Set up ProFTPd with TLS on Ubuntu 11.04
- How to change Google DNS on Linux
- How to configure DNS Server on Ubuntu Server 11.04
Was this article helpful?
Your feedback helps us improve.
Related Articles
 How to troubleshoot Ubuntu problems does not start9 minutes read
 8 ways Ubuntu changes and improves Linux10 minutes read
 Tips and tricks after installing Ubuntu49 minutes read
 Is Arch Linux better than Ubuntu?7 minutes read
 Distinguish Ubuntu and Linux Mint13 minutes read
 Following many other Linux employees, Ubuntu stopped providing 32-bit ISO Images2 minutes read
Reader Comments 0
Sign in with email or Google to join the discussion.