How to use Copy Space to manage Windows 10 clipboard content
Copy Space is an application to save and manage content copied in clipboard on Windows 10 or Windows 10 Mobile. Interface of Copy Space in Fluent Design style throughout. In particular, the application also has many other useful features, to help users convenient when browsing the web, that is to allow drawing images, syncing files through OneDrive, . The following article will guide you how to read Copy Space on Windows 10.
- How to extend Clipboard on Chrome with Multi Copy Paste
- How to use the Clipboard Master to save files and documents to the Clipboard
- How to use Office Clipboard speeds up copying on Word
Instructions for using Copy Space on Windows 10
Step 1:
Users click on the link below to install the Copy Space application on the computer.
- Download the Windows 10 Copy Space application
Step 2:
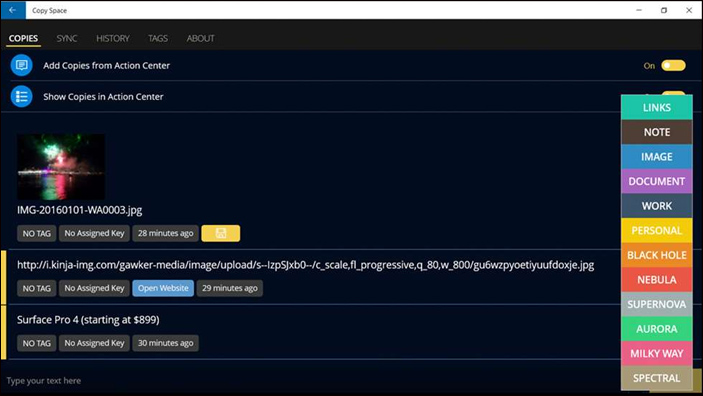
Then the user accesses the application interface. With the Copies section first we will see all the archived content added to Copy Space manually.
At this interface we can add different types of content. With the text you enter the content in the Type your text box below and then press the tick button or press Ctrl + Enter to save to the application.

Or you can copy the content and drag to the interface of Copy Space.
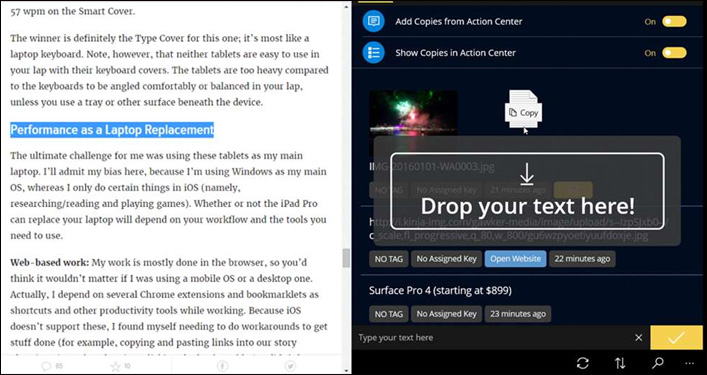
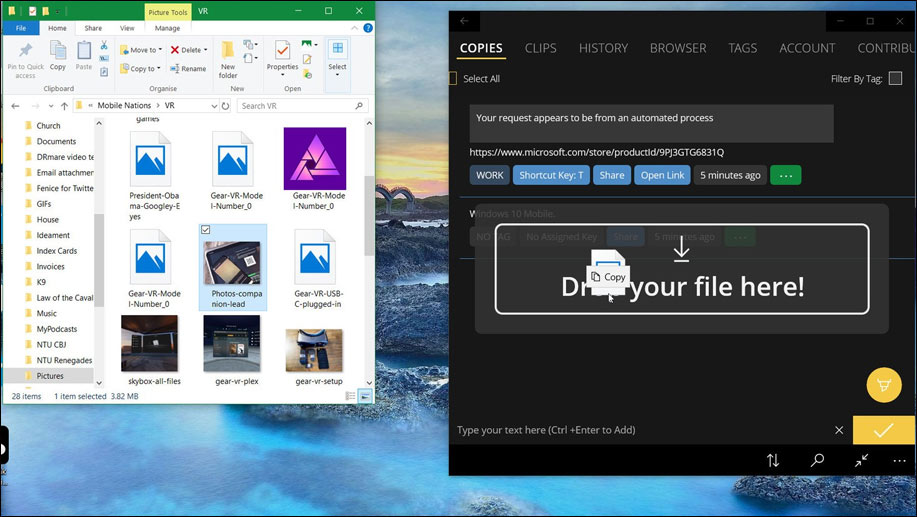
Not only with text, Copy Space also stores files and images by clicking on the archived content and then dragging to the Copy Space interface.
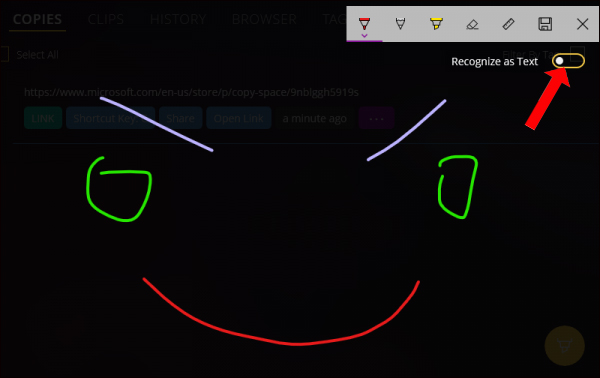
With link replication, we can enter the link in the frame Type your text here. To save the drawing click on the pen icon and draw a picture. Also the application will extract text from drawings. Activate Recognize as text and then draw the image and see the content shown below. Finally press the save icon to save the content.
Step 3:
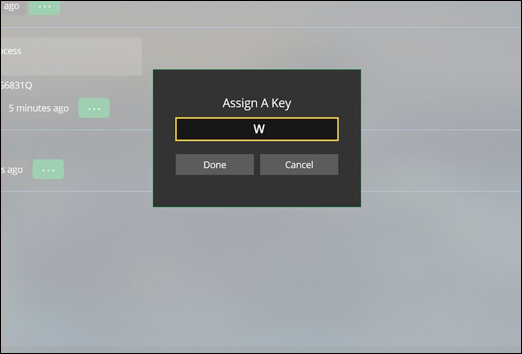
For each stored content, users can add shortcuts for copying, saving files, sharing, viewing / saving, editing, deleting, etc. Click No Assigned Key at the content you want to add a shortcut and enter the shortcut key . This shortcut will copy the content, file name, save the image with the content corresponding to that shortcut.
Step 4:
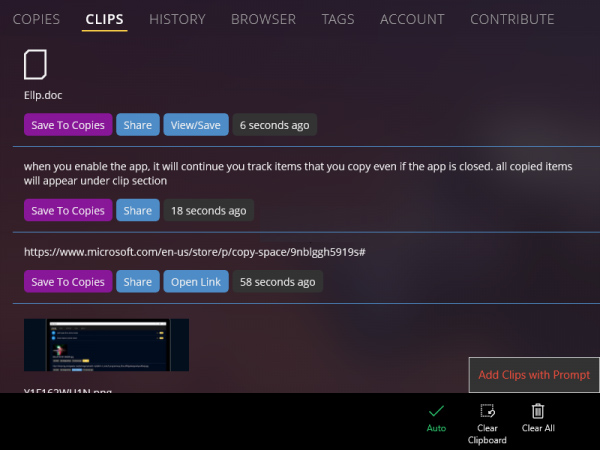
Next section Clips will be the place to manage and store all contents copied in the clipboard, including files, text, links, . The content will be saved automatically. You can click Open link to open the link, copy to Copies by clicking Save to Copies.
Step 5:
History section will be the place to store the content you press delete. With this item you can retrieve content easily. If you want to delete it completely, click the trash icon, select Yes continue .

Step 6:
With Browse section, it will be used for web browsing with simple website interface. Enter the full website URL to access.
The Tags section will be used to manage the labels on the application. These labels will manage the content that users have previously tagged.
See more:
- How to use the Insert key to insert copied text in Word?
- How to use TeraCopy to speed up file copying
- Use multi-threaded Robocopy feature to speed up file copying on Windows 10
I wish you all success!
You should read it
- ★ The clipboard management software on Windows
- ★ Instructions for synchronizing Clipboard between Android device and PC
- ★ How to extend Clipboard on Chrome with Multi Copy Paste
- ★ How to copy the file list of folders with the right mouse button
- ★ Windows + V: Useful keyboard shortcuts that many Windows users don't know