Table of Contents
Windows 11 provides several levels of camera control. You can block camera access for the device, choose which supported apps may use it, or disable a particular webcam. Use the privacy controls when you only want to restrict software access; use the device control when you want Windows to stop using a specific camera.
Turn camera access on or off for Windows
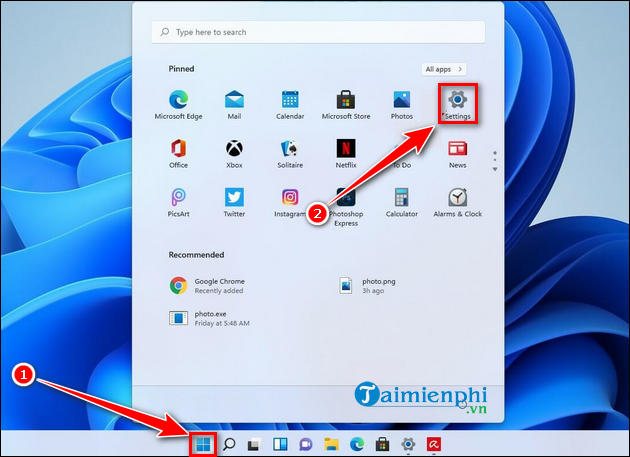
- Press Windows + I to open Settings.
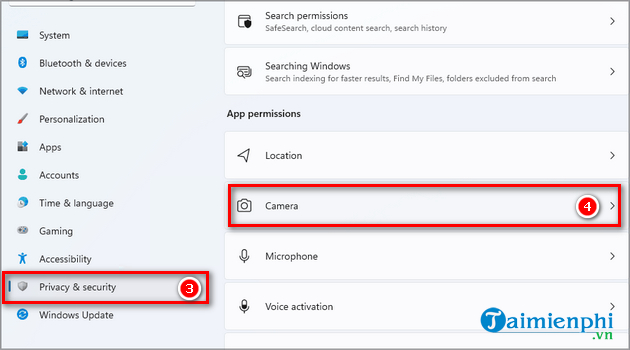
- Select Privacy & security, then choose Camera under App permissions.
- Use the Camera access switch to allow or block camera access on the device.
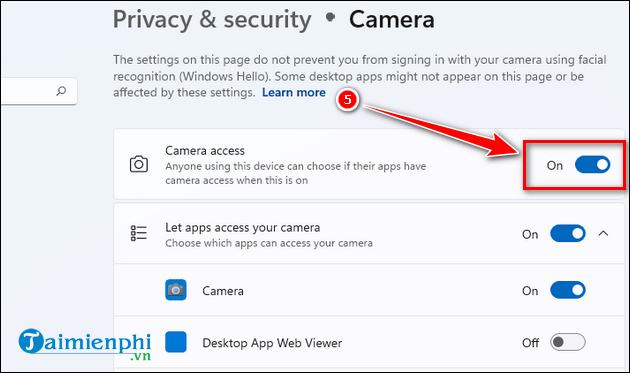
Turning off Camera access is the broadest software setting. Apps will be unable to use the camera until access is restored. This setting does not physically cover or disconnect the lens, so use a built-in privacy shutter or camera cover when you need a visible physical safeguard.
Choose which apps can use the camera
Leave Camera access on, then use the controls on the same page to limit apps:
- Let apps access your camera controls Microsoft Store apps. Expand the list and switch access on or off for each listed app.
- Let desktop apps access your camera controls traditional desktop programs as a group. Windows generally does not offer a separate switch here for every individual desktop program, so also check the privacy or video settings inside apps such as a browser or meeting client.
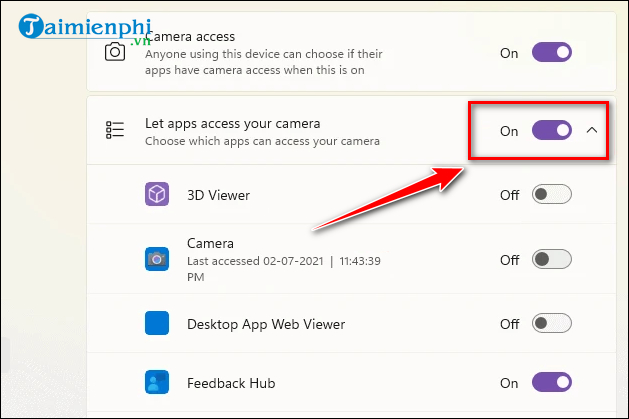
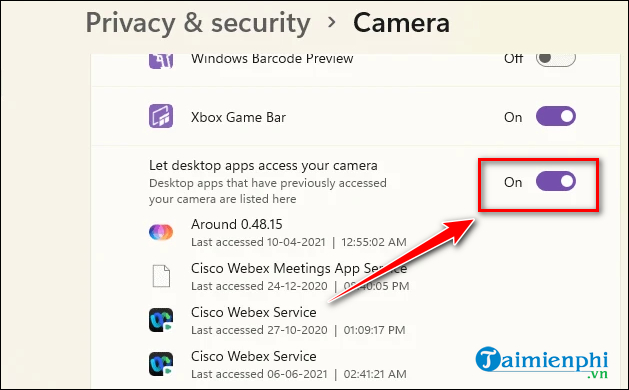
An app can use the camera only when the relevant Windows permission and the app's own permission are both enabled. Browsers also ask for per-site camera permission, which you can change in the browser's site settings.
Disable or enable a specific camera
This method is useful when a computer has more than one camera or when you want Windows to stop using one device.
- Open Settings > Bluetooth & devices > Cameras.
- Select the camera under Connected cameras.
- Choose Disable and confirm. To restore it later, return to the camera list and select Enable.
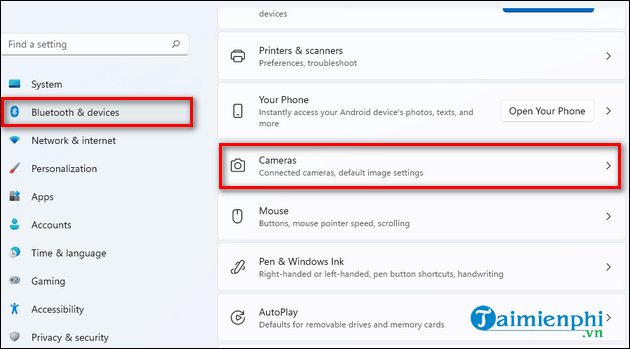
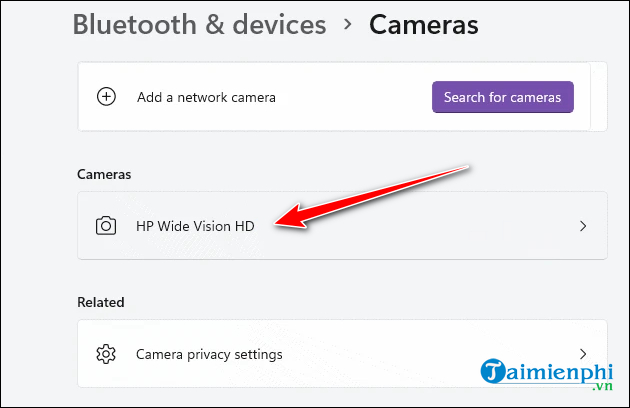
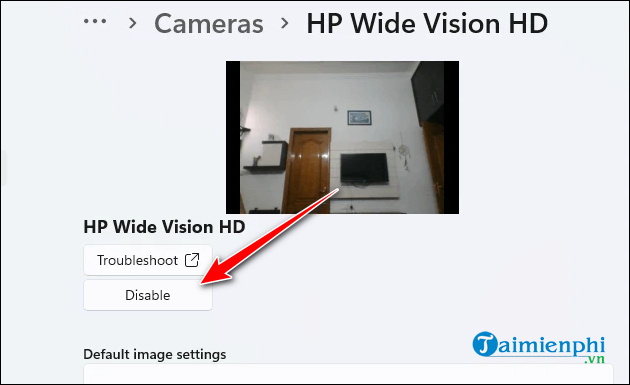
If your Windows build or camera does not show this option, open Device Manager, expand Cameras, right-click the correct device, and choose Disable device. Avoid uninstalling the device unless you are specifically troubleshooting its driver.
If the camera still does not work
- Make sure a physical shutter, keyboard privacy key, or laptop privacy switch is open.
- Check that Camera access, the relevant app category, and the app's own camera permission are all enabled.
- Close other video apps that may already be using the webcam.
- For a USB webcam, reconnect it directly to another USB port.
- Open the Windows Camera app to determine whether the issue affects every app or only one.
If the preview remains blank, work through these webcam black-screen troubleshooting steps. If the camera works but you need different recording or effects features, compare webcam software for Windows 10 and 11.
Privacy points to remember
Windows normally shows an indicator when the camera is active, but permissions are only one part of camera privacy. Keep Windows and video apps updated, review browser site permissions, and use the camera's physical shutter when it is not needed. If a work or school administrator manages the PC, organization policies may override settings or make some switches unavailable.
Related Articles
 How to Turn on the Camera on Windows 7,8,10 Laptops8 minutes read
 How to Turn on the Camera on a Mac: Step-by-Step Guide5 minutes read
 How to Turn Off the Camera Shutter Sound on Samsung Phones5 minutes read
 How to Turn Your Old Phone into a Security Camera: Step-by-Step Guide8 minutes read
 How to Turn Off Audio Capture on iPhone Lock iOS 104 minutes read
 The Simplest Guide to Turn on and Off Laptop Camera7 minutes read
Reader Comments 0
Sign in with email or Google to join the discussion.