How to partition a hard drive on Windows 11 without losing data, safely.
Looking to optimize storage space and better protect your data on Windows 11? Partitioning your hard drive helps you manage files efficiently and reduces the risk of data loss in case of system failures. Let Taimienphi help you discover how to do it simply and quickly..
Important notes before partitioning your hard drive on Windows 11
- Back up your data: Before partitioning your hard drive, back up important data to avoid loss.
- Perform the operation carefully: Handle the process cautiously to avoid unexpected errors.
- Check free space: Ensure your hard drive has enough free space before partitioning.
==> Refer to how to check your computer's free hard drive space here.
Guide to partitioning a hard drive in Windows 11 without software.
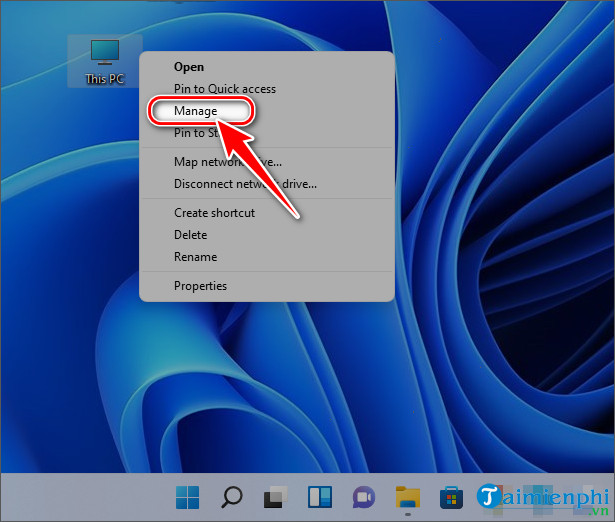
Step 1: Right- click on the This PC (My Computer) icon on the Desktop => select Manage in the new window that appears.
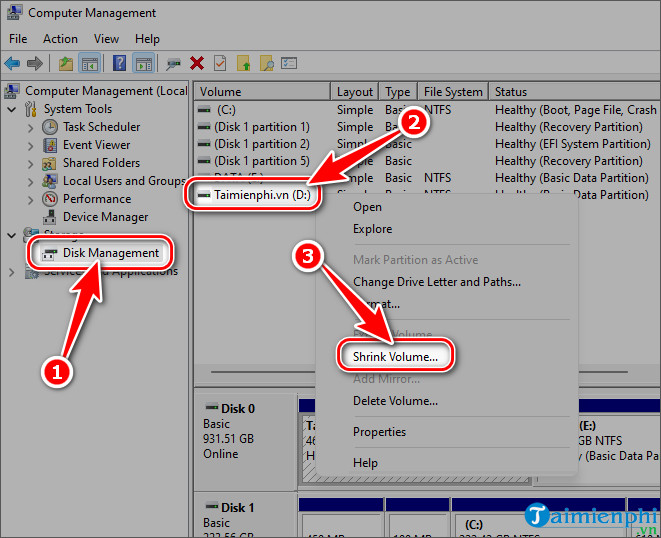
Step 2: In the Computer Management window , select Disk Management under the Storage tab . Right- click on the drive you want to partition in the right-hand pane and select Shrink Volume .
- Example: We want to partition the Taimienphi.vn (D:) drive as shown below.
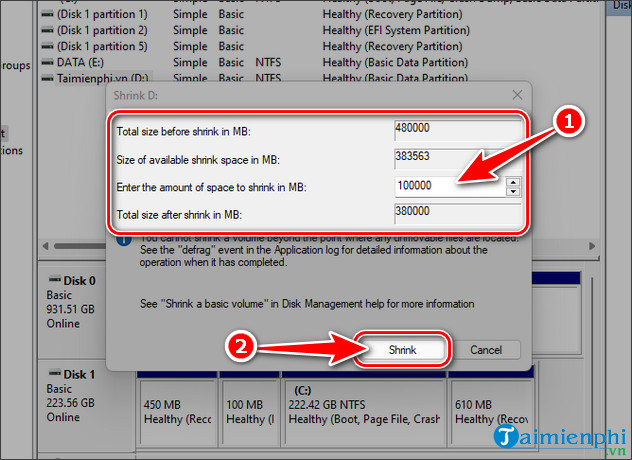
Step 3: Enter the new hard drive capacity in the " Enter the amount of space to shrink in MB" field in Megabytes ( 1GB = 1024MB ) and select Shrink .
- Total Size before shrink in MB: The size of the partition before partitioning (in MB)
- Size of available shrink space in MB: The remaining free space (in MB)
- Enter the amount of space to shrink in MB: The size of the new partition (MB)
- Total size after shrink in MB: The remaining space of the old partition after partitioning the new partition.
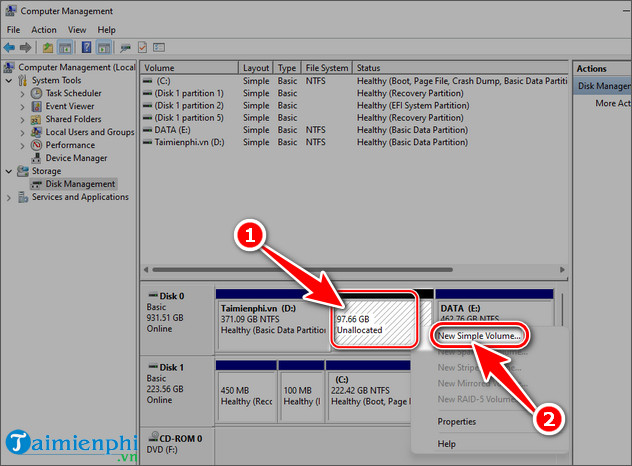
Step 4: Next, right- click on the newly appeared Unallocated empty partition => select New Simple Volume.
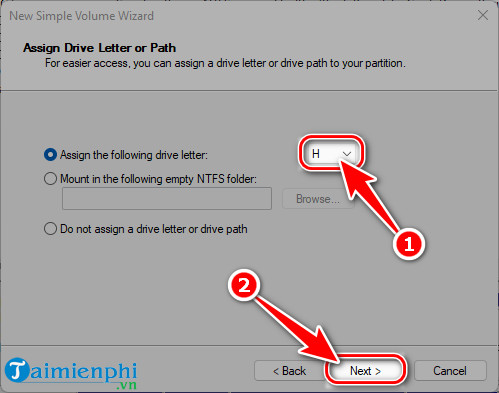
Step 5: Click Next => Next => set the partition name in Assign the following drive letter (e.g., H) => select Next .
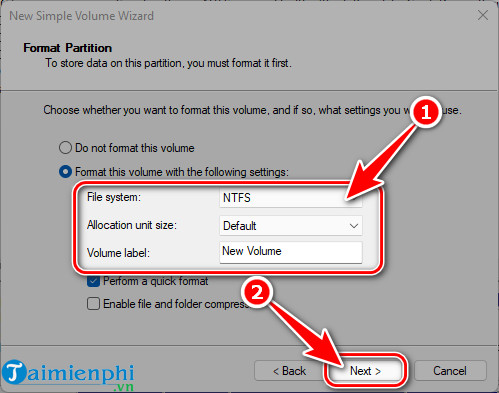
Step 6: Choose the new partition format ( NTFS or FAT32) in File System => Name the partition => Click Next => Click Finish to create the new partition.
- Note: NTFS format allows you to store files larger than 4GB, while with FAT32 you cannot store or copy data larger than 4GB.
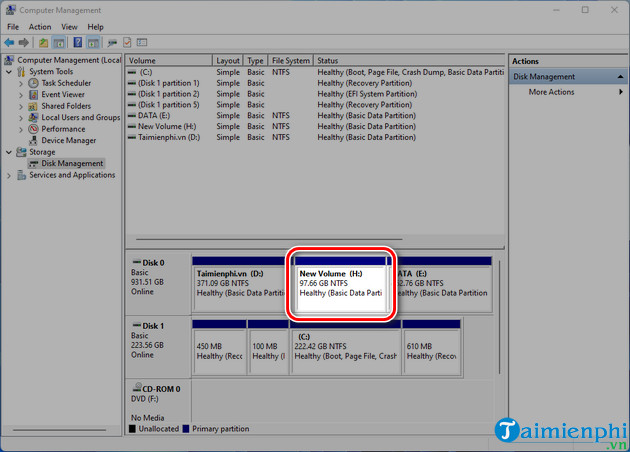
- Immediately after creation, you will see the new H partition with the selected capacity.
- If you want to delete the newly partitioned hard drive to change its format or size, simply right- click on the drive, select Delete Volume => Yes , and it will return to the Unallocated state .
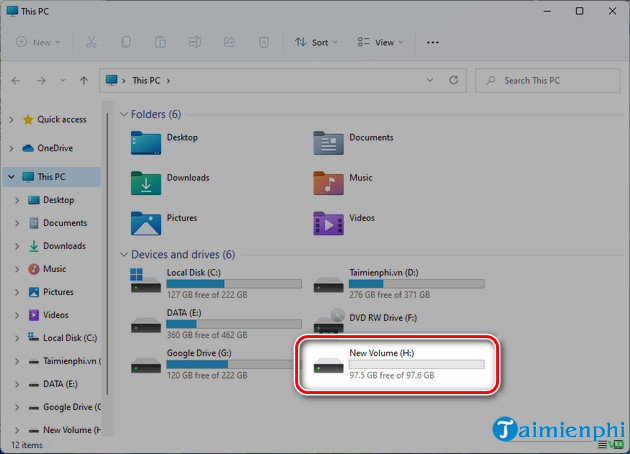
- After partitioning your hard drive on Windows 11, you will see the new partition in This PC (My Computer).
The above are the steps to partition a hard drive on Windows 11 without using software. This method is often used by technology experts and computer experts due to its convenience and speed. Alternatively, you can also partition the drive using EaseUS Partition Master software if your computer has it installed.