Table of Contents
This guide explains how to take Screenshots Zalo, with clear steps, practical tips, and important checks before you begin.
1. Screen capture on Zalo Desktop
1.1. Screenshot with Zalo window
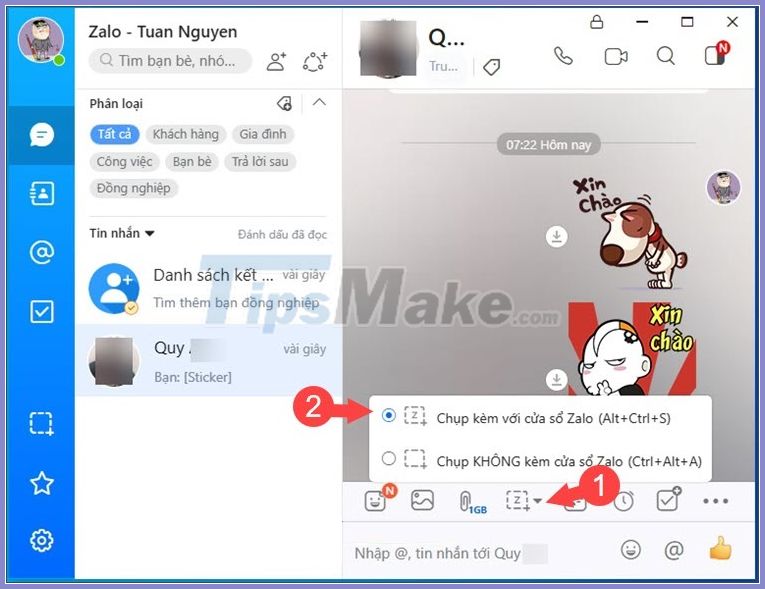
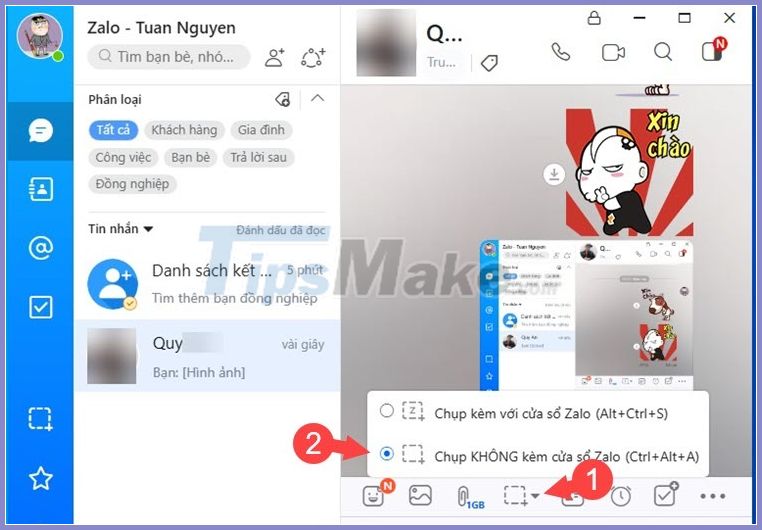
Step 1: Open the Zalo application on your computer. Next, you click on the screenshot icon (1) => Capture with window Zalo (2) .
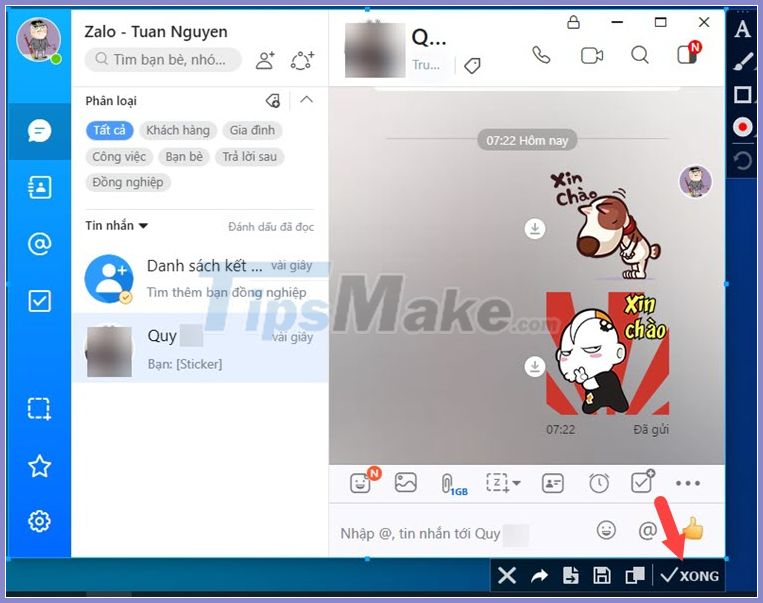
Step 2: Click Done to finish taking pictures.
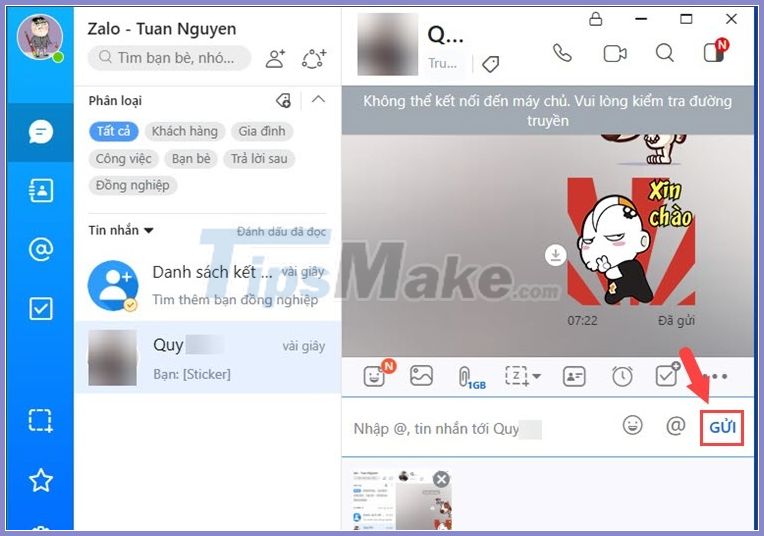
Step 3: Click Submit to send the screenshot.
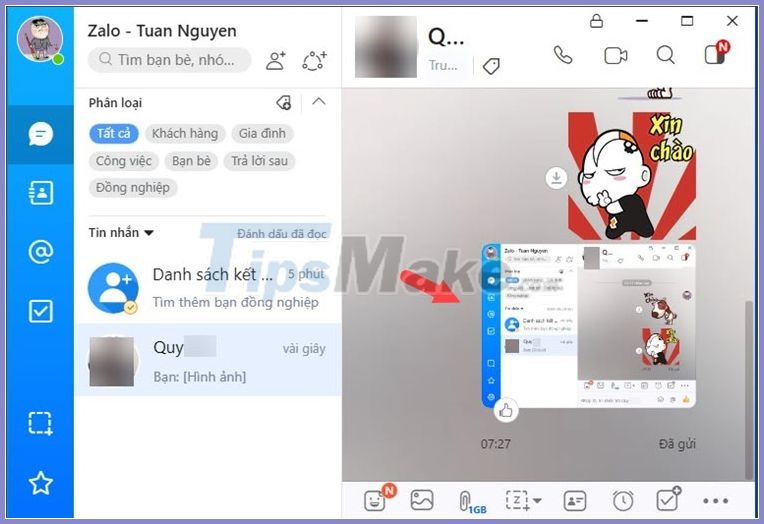
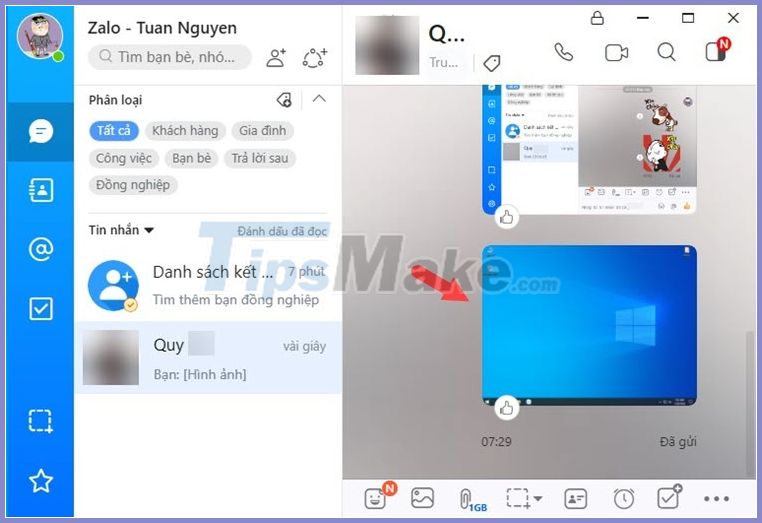
Once sent, you will see a message with a screenshot as below:
1.2. Take a screenshot without Zalo window
This way you can take a panoramic picture of the desktop without showing Zalo's working window. Proceed as follows:
Step 1: You click on the screenshot icon (1) => Capture without Zalo window (2) .
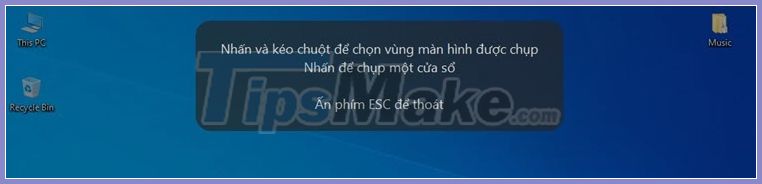
Then, the screen will darken and the message shown in the image above appears.
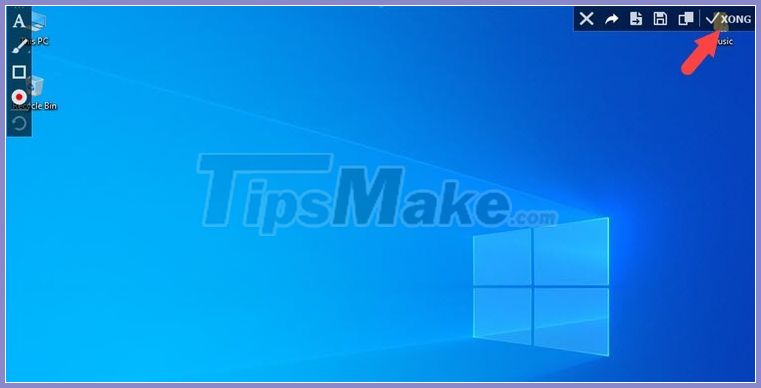
Step 2: Click the Done button to finish taking pictures.
Step 3: Then, click Submit .
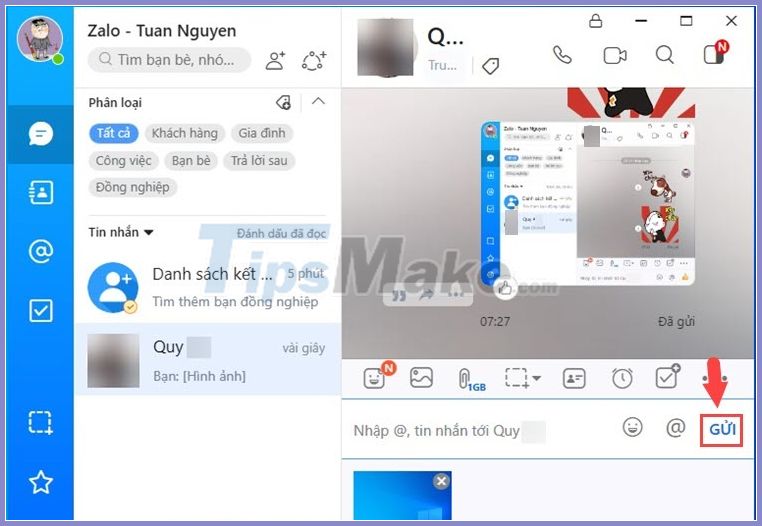
Then you will see the screenshot attached message sent as shown below.
2. Take screenshots of Zalo on the phone
Zalo version on the phone will not support screen capture like the desktop version of Zalo. You can share a screenshot by taking a screenshot and sharing it from Photo album.
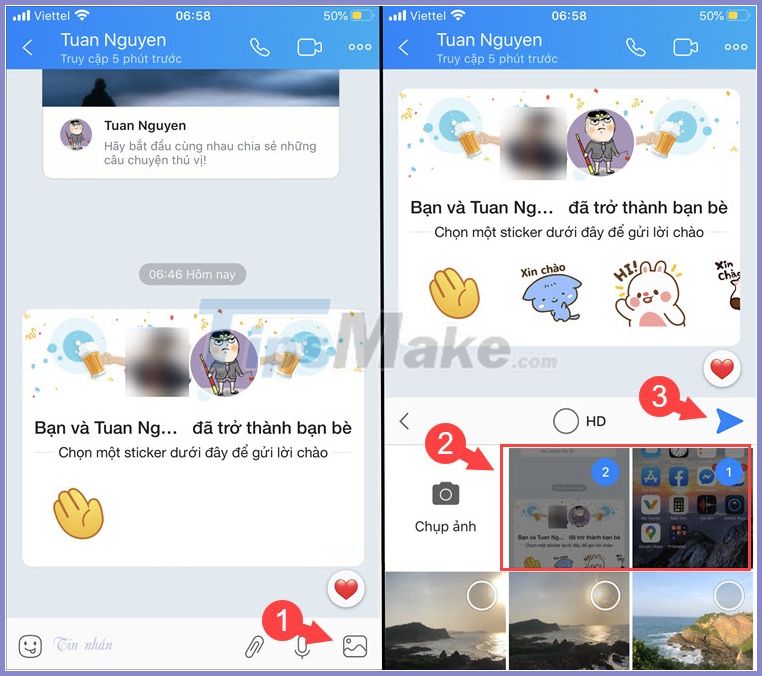
After taking a screenshot, open Zalo and open the message to the sender. Next, you touch the icon Photo (1) => select screenshot (2) => click Send (3) .
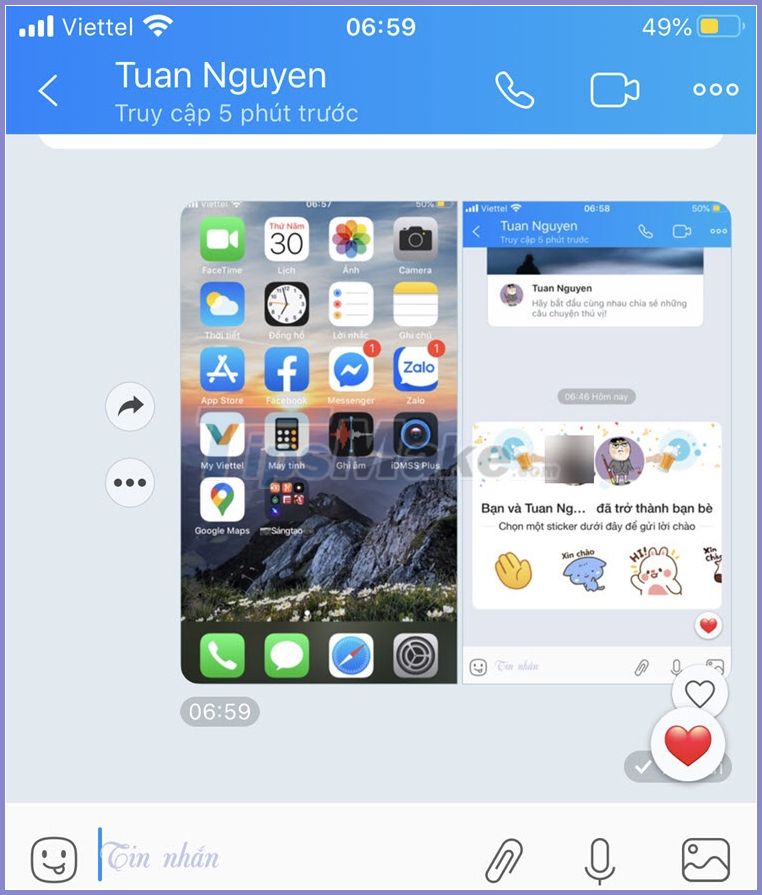
Then you will see the message sending the screenshot attached as shown below is successful!
With the instructions above, you can easily share screenshots from Zalo without any difficulty. Good luck!
FAQ
What should I know about Take Screenshots Zalo?
Focus on the key features, requirements, limitations, and practical use cases explained in this guide.
How do I get the best results with Take Screenshots Zalo?
Follow the recommended steps, use current software or information, confirm compatibility, and review settings before major changes.
Are there any risks or limitations?
Potential limitations depend on compatibility, data quality, cost, privacy, support, and how the product or method is used.
Related Articles
 Zalo Could Not Access It Again, the Entire VNG System Collapsed3 minutes read
 Tips for Using Zalo Are Useful for Users8 minutes read
 How to Use Zalo Web Without Installing Software6 minutes read
 How to Insert Stickers into Videos, Images on Zalo5 minutes read
 How to Read Newspapers on Mobile Using Zalo Channel4 minutes read
 Experience with 4 Exciting New Features on Zalo: Zalo iOS5 minutes read
Reader Comments 0
Sign in with email or Google to join the discussion.