How to install Proxmox on Intel NUC or x86 PC
Proxmox is an open source server management platform that allows you to deploy, manage, and monitor virtual machines. With Proxmox, you can run multiple operating systems or services on a web interface using any web browser.
So whether you are a student, tech enthusiast or business owner, you can install Proxmox on Intel NUC hardware or x86-based mini PC to create a do-it-yourself lab at home and manage it. various services, including home automation software, media servers, NAS storage, etc. from the Proxmox web interface.
Prerequisites for installing Proxmox
To install and run Proxmox on an Intel NUC or x86 alternative to the Intel NUC Mini PC, you will need an Intel NUC that meets the following system requirements:
- At least 4 CPU cores
- Minimum 4GB RAM (8GB or more recommended)
- 64GB or more free disk space, preferably
The example is using Intel NUC10I3FNHN. It's a simple mini PC powered by a 10th generation Intel i3 processor. Also, installed example:
- RAM DDR4 16GB (2 sticks of 8GB)
- 1TB M.2 PCIe4 SSD
- 1TB SATA3 SSD
You will also need:
- Windows, macOS or Linux PC to create bootable USB installation media
- USB (8GB or larger)
Once you have a mini PC that meets these hardware requirements and other mandatory things, follow the steps below to install Proxmox.
How to install Proxmox on Intel NUC or x86 PC
Step 1: Create Proxmox USB installation media
To create the Proxmox USB installation tool:
- Visit the official Proxmox Downloads section and select the Proxmox version for your Intel NUC or x86 PC.
- Click the Download button. This will download the ISO image on your system.
- Once the download is complete, launch Rufus and select the connected USB media. Browse and select the Proxmox ISO file and click Start.
- Make sure there is no important data in the USB media, then click Yes to confirm.
This will create a Proxmox USB installation tool that you can use to install Proxmox on your Intel NUC or any x86 PC. You can also use balenaEtcher to burn the Proxmox ISO image file to USB.
Step 2: Prepare your Intel NUC or x86 mini PC to install Proxmox
To prepare your Intel NUC or x86 PC for Proxmox installation, you need to power on the Intel NUC and open the BIOS. Normally, you need to continuously press the Del or F10 key to enter the BIOS.
Once you're in the BIOS, make the following changes:
- Make sure the BIOS is up to date.
- Turn off Secure Boot and turn on Legacy Boot .
- Enable Virtualization Technology , such as Intel VT-x or AMD-V (in other x86 mini PC).
- Save these changes and then power off/off.
After updating the BIOS and enabling virtualization technology, you can proceed to install Proxmox on your Intel NUC or x86 PC.
Step 3: Install Proxmox on Intel NUC or x86 mini PC
After creating a bootable USB, plug it into your Intel NUC or x86 PC and reboot the system.
1. Immediately begin pressing the options menu/boot order key (usually F8 ) to view the USB drive.
2. Use the arrow keys to select USB and press Enter.
3. You will see the Proxmox welcome screen. Here select Install Proxmox VE (Graphical) and press Enter.

. Click I agree and select the destination drive. Then click Next .

5. Choose your location, time zone, and keyboard layout. Then click Next .

6. Set up a password (write it down or remember it) and then enter your email ID. Continue by clicking Next .
7. Then set up the FQDN name and leave everything else as default. Click Next .
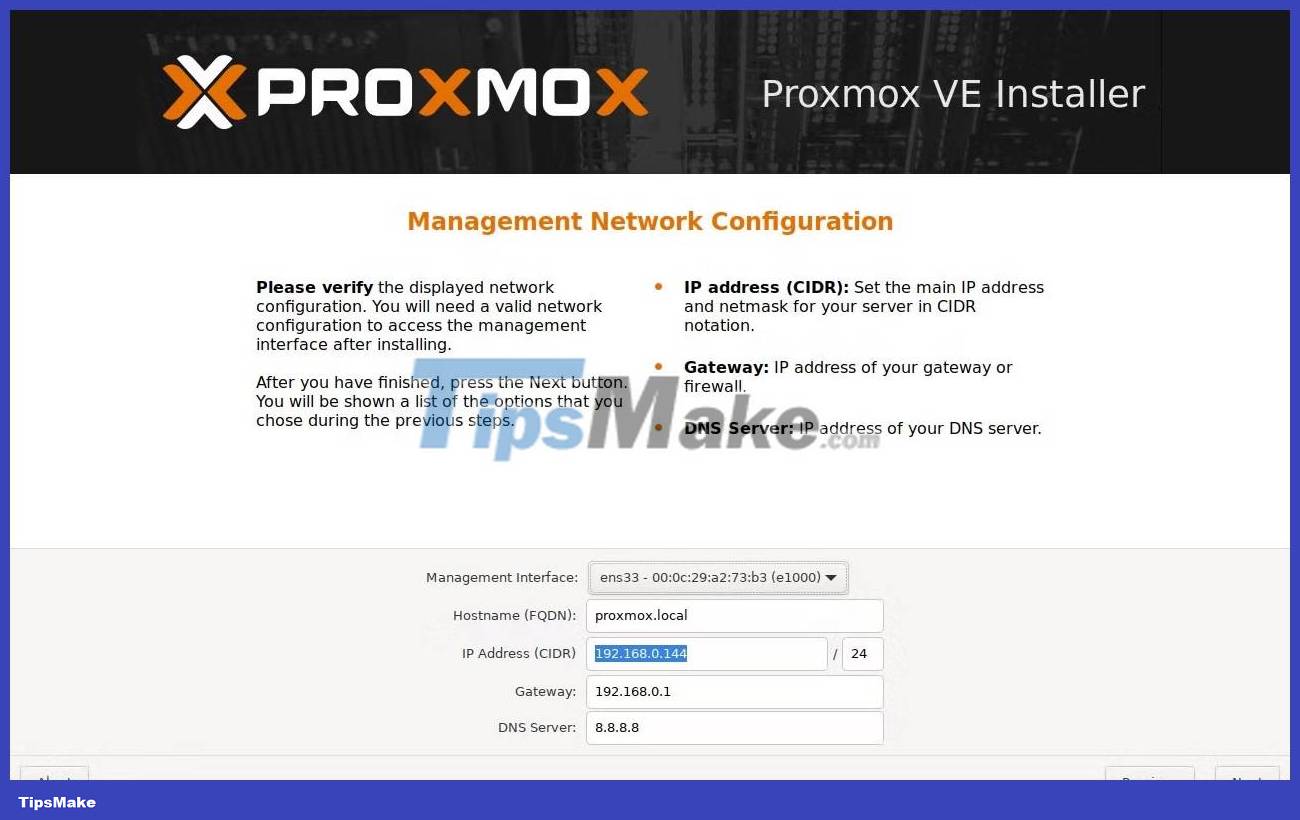
8. Finally, click Install .
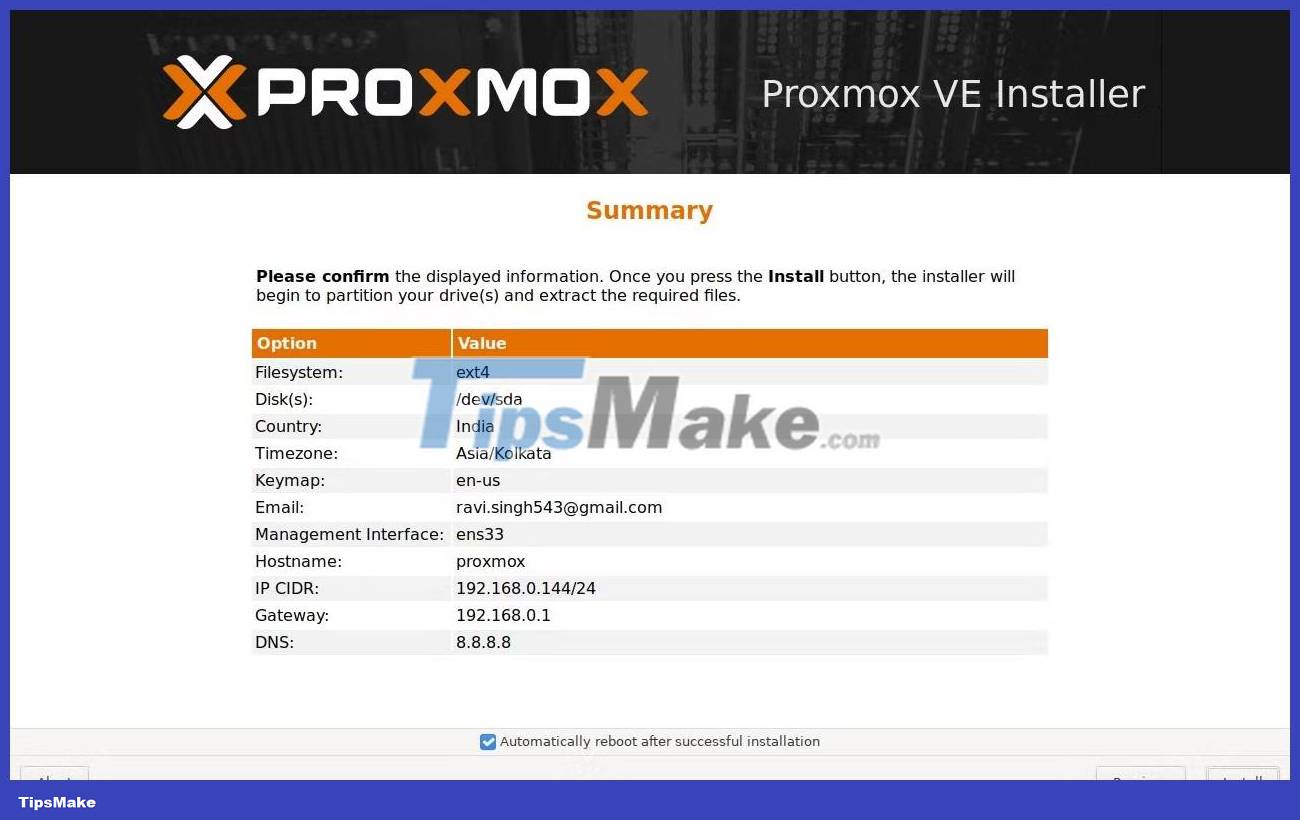
Step 4: Configuration steps after installing Proxmox
After successfully installing Proxmox on your Intel NUC or x86 PC, you can access the Proxmox web interface using your favorite web browser by entering the IP address of the Proxmox server at port 8006. For example, https : //192.168.0.144:8006.
1. You will see an SSL warning. Click Advanced > Proceed .
2. Enter root as the username and password that you set during installation. Click Login .
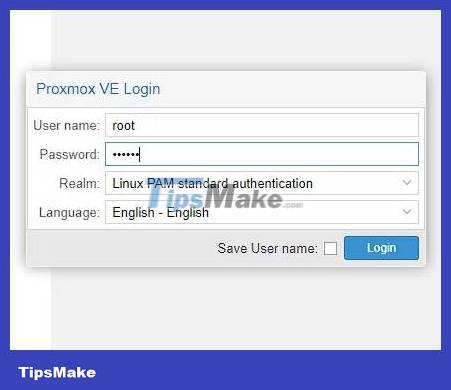
3. After logging in, you will receive a warning message. Click OK and ignore it because you don't have an enterprise license.

4. Click on the Proxmox default node. In the case of the example, it was named Proxmox during installation.
5. Click the Updates button in the left pane and then click Refresh .
6. Next click on the cross icon to close the window.
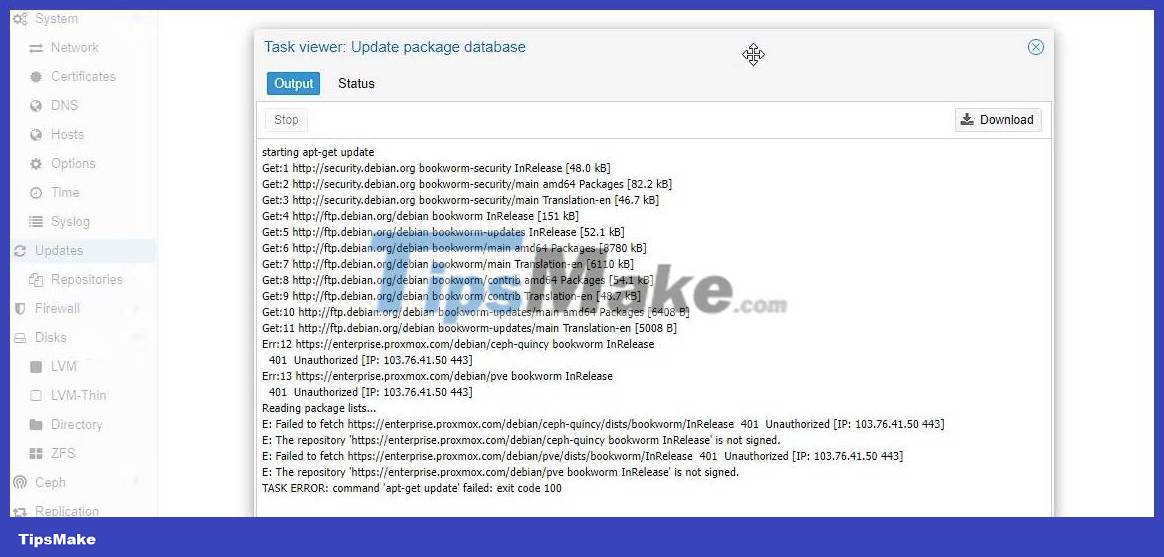
7. Click the Upgrade button at the top (next to the Refresh button ). This will open a new terminal window.

8. When prompted, enter Y and press the Enter key to confirm and continue the upgrade. This may take a while to complete, so please be patient.
Step 5: Create VM and install operating system in Proxmox
With Proxmox, you can create and manage virtual machines from your web browser using the Proxmox web interface. You can install and manage a variety of operating systems on these virtual machines, including Linux, Windows, and FreeBSD.
To create a VM and install the operating system using the Proxmox web interface, follow these steps:
1. Once the upgrade is complete, close the terminal window. Then, click Shell.
2. Navigate to the following location. You can download and store operating system ISO/IMG files at this location to set up and install VMs in Proxmox. For this tutorial, install Home Assistant on Intel NUC Proxmox Server .
cd /var/lib/vz/template/iso/ wget https://releases.ubuntu.com/22.04.3/ubuntu-22.04.3-desktop-amd64.iso 
3. Click the Create VM button in the upper right corner.
4. In the General section , enter a name for your virtual machine.
5. Then click Next , select the Ubuntu ISO file in the ISO image option and click Next again.
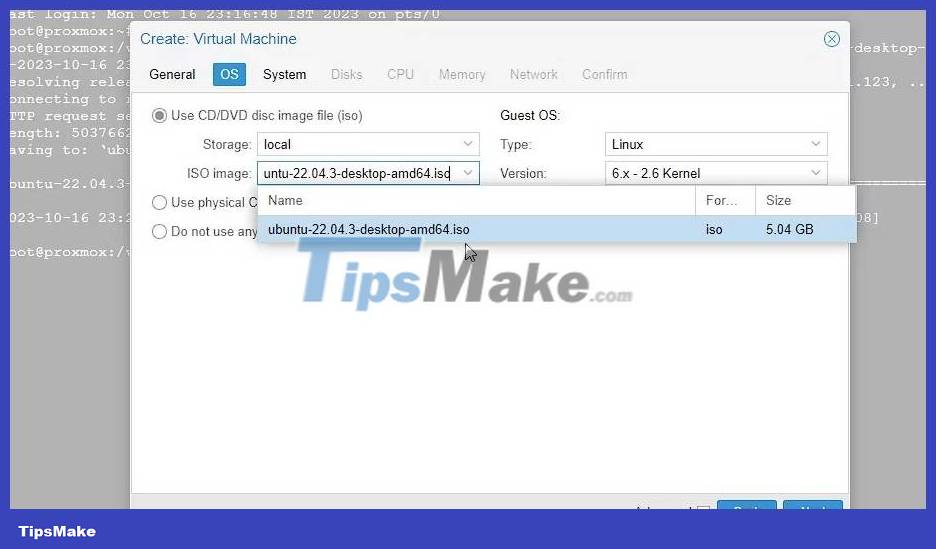
6. Leave everything default in the System section . Under Disks , adjust the drive size (if necessary) and click Next .
7. In the CPU section , select the processor core to assign and click Next. Increase the memory to the desired or required size and press Next .
8. Select network adapter. You can also keep the default settings by clicking Next > Finish .
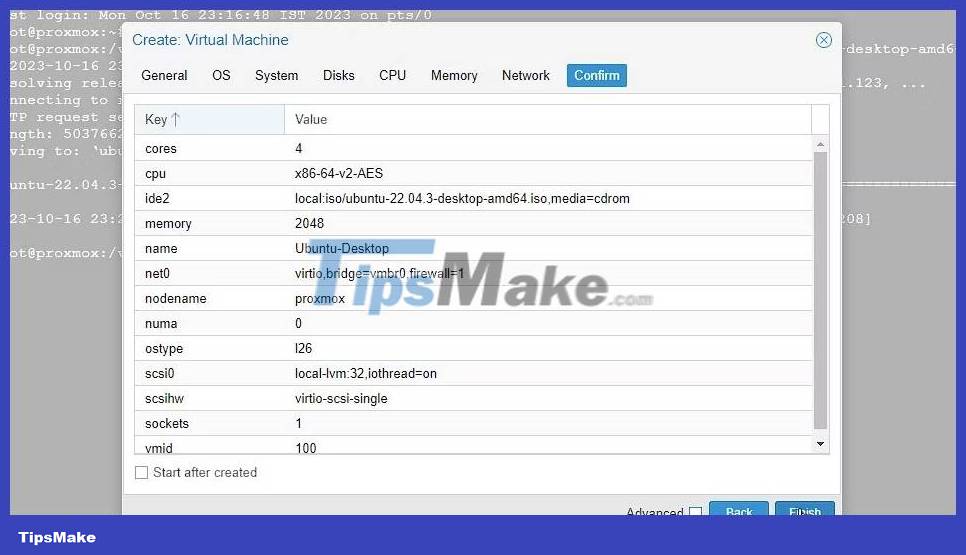
9. After configuration, select the new VM and click Start .

10. Click Console to view, install, and manage operating system settings. Once installed, you can start the Ubuntu VM and use the operating system in a web browser from any device on the network.
Once you have created a virtual machine, you can start, stop, or move it to another Proxmox server.
Proxmox provides live migration capabilities that allow you to move virtual machines between servers without downtime. This feature is useful for load balancing or hardware maintenance purposes.
You should read it
- ★ Top 5 best Intel CPUs 2022
- ★ Serious security vulnerability on Intel chips
- ★ What's the difference between Intel Core and Intel Core X CPUs?
- ★ Intel ARC Xe-HPG 'Alchemist' GPU Leak: High Performance, Launching in 2022
- ★ What is Intel HD Graphics Control Panel? Steps to install and fix Intel HD Graphics Control Panel error