How to split hard drive, Set Active, Fix MBR before GHOST
If you have just bought a computer, the first thing to do is to divide the hard drive partition (you can divide 2, 3 . depending on your needs and total hard drive capacity).
Next is Set Active for the primary partition (usually drive C ). Then fix MBR before GHOST or install Windows for your computer (if you install win, you can skip the MBR loading step).
And in this article, blogchiasekienthuc.com will use Partition Wizard free software to perform the above tasks.
Perhaps this software is no stranger to you, an excellent hard drive partition management software that helps us divide the hard drive extremely fast, without data loss but extremely safe.
I. Using Partition Winzard software
There are 2 ways to use the Partition Wizard software, that is, you can use it directly on the Windows environment or use it in the Mini Windows environment (WinPE).
+ Case 1: If you use it in a Windows environment, first you need to download Partition Wizard software here (Link backup here). If the computer you are using and can enter Windows normally, you can operate directly on Windows.
+ Case 2: In case your computer is completely new, is a blank drive and generally does not have anything, or you cannot access Windows, the first job is to prepare a BOOT disk, or create a 1-click USB BOOT. Then enter Mini Windows for easy implementation and already have Partition Wizard software in it already.
After opening the Partition Wizard software, the interface will be as shown below.
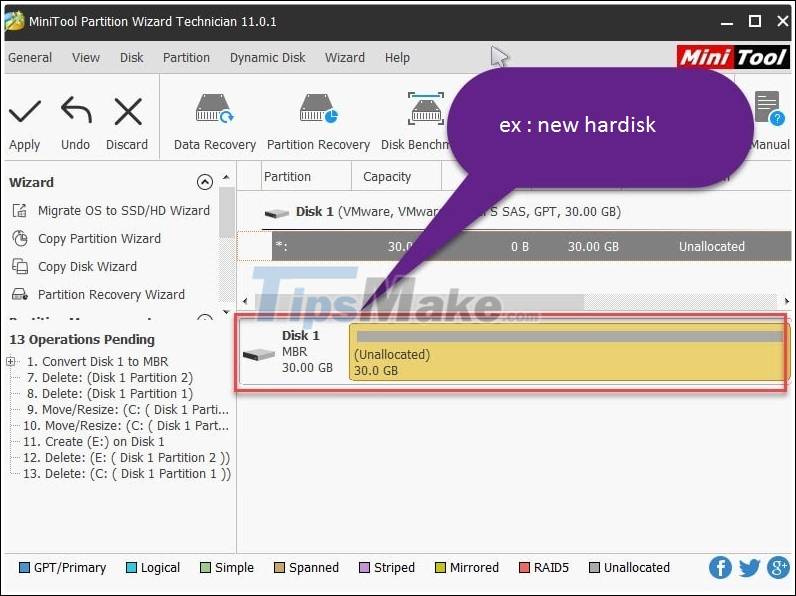
1 / Split hard drive partition with Partition Wizard
As you can see, here is an empty drive with a capacity of 30 GB. Now to create a new partition => right-click the drive to divide and then click select Createto start.

A new window appears. First, you will partition the drive containing the previous operating system.
You fill in information such as:
- Partition Label: Name the partition.
- Create As: Select Primary means that the primary partition contains the operating system.
- Driver Letter: Select the drive letter, this part is usually drive C, but because my computer has 2 hard drives, it's like that.
- File System: Select NTFS or FAT 32 format. We recommend using NTFS.

Then press OK=> and Applyto apply changes.
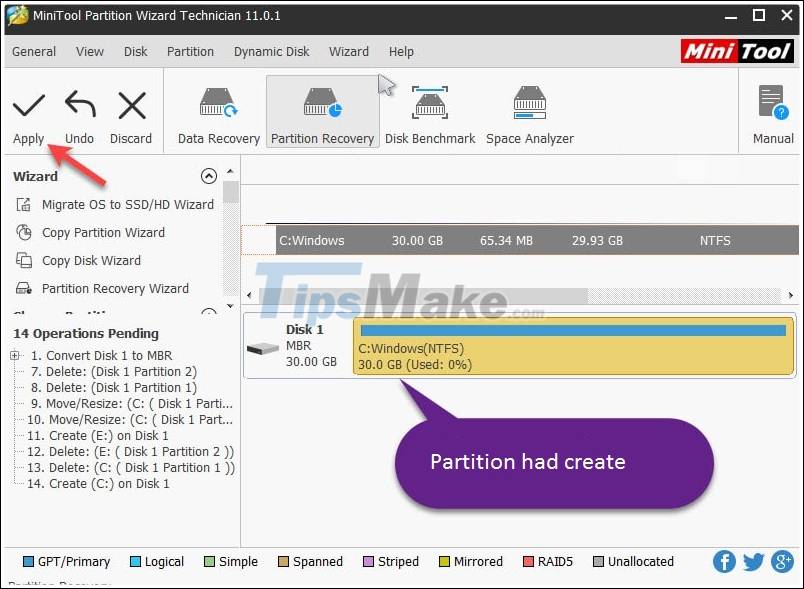
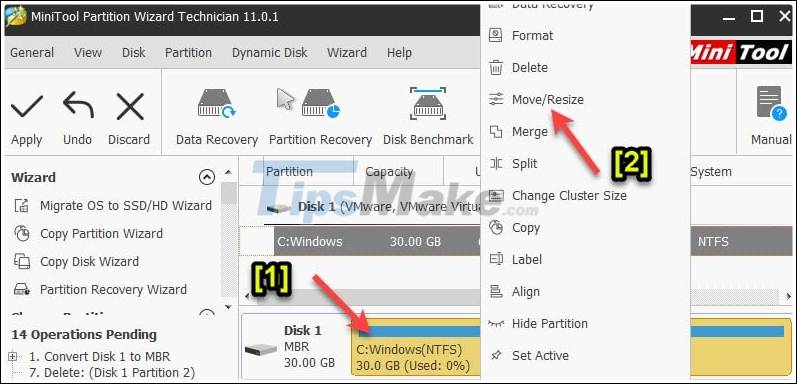
Now, if you want to divide the created partition one more partition, then right-click on that partition => and choose Move/Resizeto resize the partition.
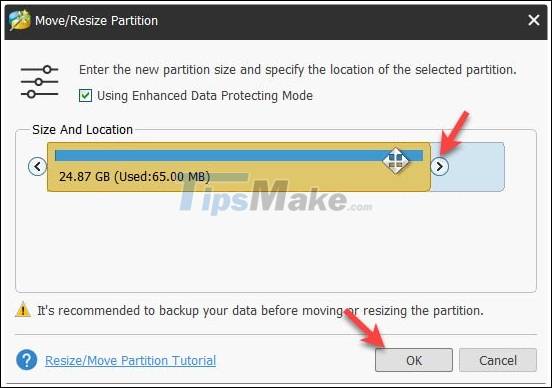
Then, you use your mouse and drag to the left (new partition size will be displayed in the section Unallocated Space After) => then click OK.
A new partition will be created, but it is not yet formatted ( Unallocated). To create a partition to be usable, you right-click on that partition => and select Create.

Enter the name of the hard drive, and note that this partition we will leave the section Create asas Logical or Primary . The other parts do not need any further modification.
Here, because my hard drive capacity is low, I will divide it into 2 drives only. If you want to divide more, then do the same as the above step is to drag from right to left.
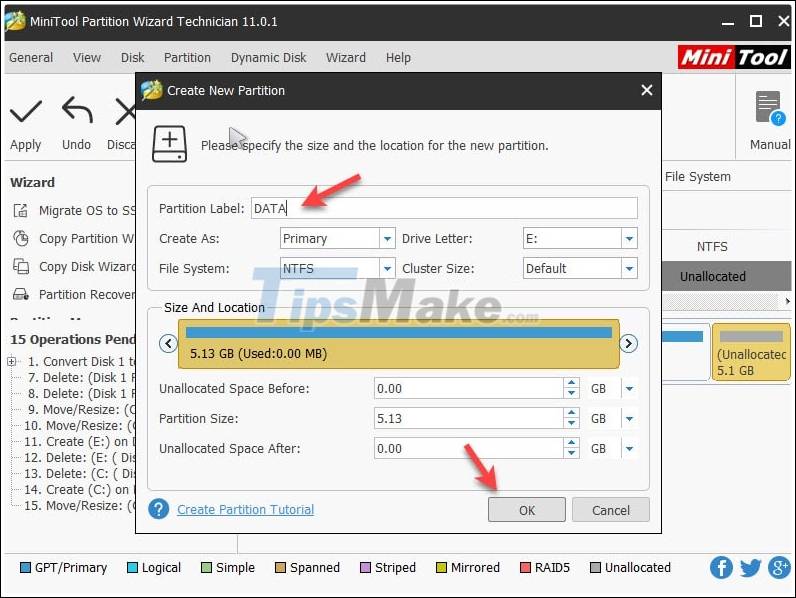
Click OKto proceed. Then press Apply => Select Yesto perform all the processes. If you forget this step, you will be happy ^^!

Done, 2 partitions have been created .

2. Set Active instructions for primary partition.
If you decide to install Win, you can skip this step, but if the Ghost you do not Set Active , it will definitely fail. To Set Active for primary partition you do the following:
Implementation: Right-click the main partition you just divided, then selectModify => Select NextSet Active. In the new version of Partition Wizard, you chooseSet Activealways.
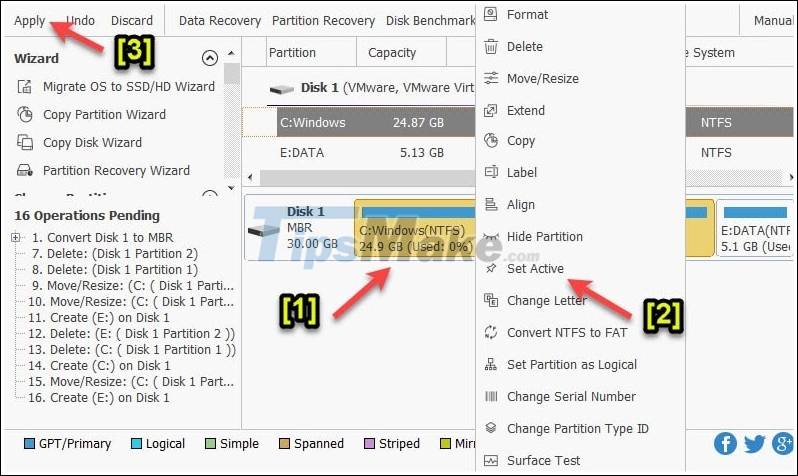
Then press Applyto execute. And wait a while for Set Active to be successful.
3. Load the MBR to the hard drive.
Another error that many of you also encounter in the process of ghosting is not loading MBR for the hard drive, leading to the inability to BOOT into Win. .
To load MBR you left-click Basic=> next right-click and Basicselect Rebuild MBR.

Finally click Applyto perform the MBR loading process for the partition.
So all the steps are complete before implementing GHOST. Now you can find a ghost version to use without worrying about errors. Hopefully this article will be useful for you.