It offers a fast and lightweight alternative to traditional VPNs like IPsec and OpenVPN. Today's article will show you how to install Wireguard and create a simple VPN setup using 3 Linux machines.
Download Wireguard
The first step to setting up Wireguard on Linux is to download its core tools from the distribution's repository. This allows you to control the built-in Wireguard kernel module using userspace commands.
To install core tools in Ubuntu and Debian, run the following command:
sudo apt install wireguard wireguard-toolsIn Fedora you can use the dnf package manager:
sudo dnf install wireguard-toolsFor Arch Linux, you can run pacman to load Wireguard's core tools:
sudo pacman -S wireguard-toolsConfirm that you have correctly installed the Wireguard tools by loading its help screen:
wg -h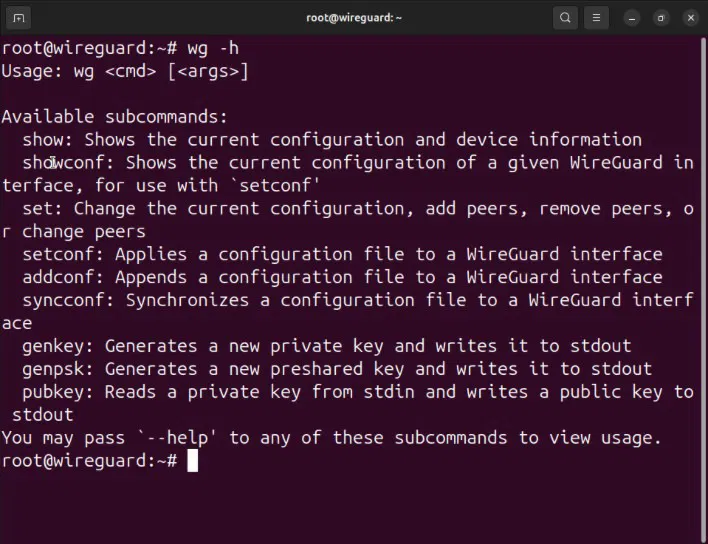
Set Up Wireguard Server
Assumptions : This article assumes that you are installing the Wireguard server on a Linux system with a publicly accessible IPv4 address. The instructions will still work on the server behind a NAT, but it will not find nodes outside of its subnet.
With the Wireguard core toolkit on your Linux machine, you can now set up a VPN server node. This node will act as the Internet gateway for client nodes in the network.
Start by navigating to the Wireguard configuration folder and setting its default permissions to "root only":
cd /etc/wireguard sudo umask 077Note : Some systems may prevent you from accessing the "/etc/wireguard" directory as a regular user. To fix that, switch to the root user with sudo -s .
Create public and private keys for Wireguard server:
sudo sh -c 'wg genkey | tee /etc/wireguard/server-private-key | wg pubkey > /etc/wireguard/server-public-key'Create a server configuration file using your favorite text editor:
sudo nano /etc/wireguard/wg0.confPaste the following code block into the server configuration file:
[Interface] PrivateKey = PASTE-YOUR-SERVER-PRIVATE-KEY-HERE Address = 10.0.0.1/32 ListenPort = 60101 PostUp = iptables -t nat -I POSTROUTING -o NETWORK-INTERFACE-HERE -j MASQUERADE PostDown = iptables -t nat -D POSTROUTING -o NETWORK-INTERFACE-HERE -j MASQUERADEOpen a new terminal session, then print the server's Wireguard private key:
sudo cat /etc/wireguard/server-private-keyCopy the server's private key to the clipboard.
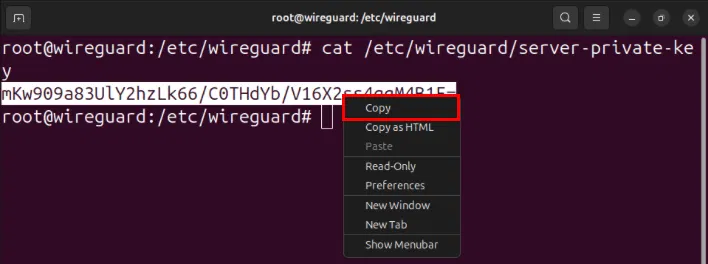
Replace the value of the PrivateKey variable with the key on the clipboard.
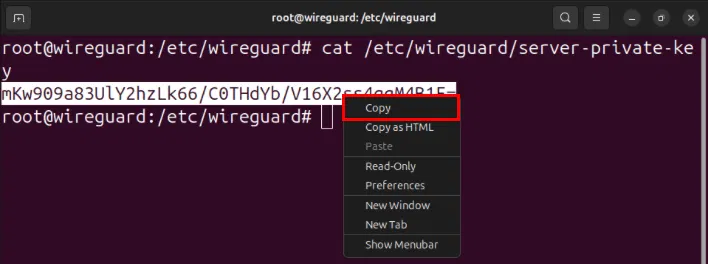
Find the network interface that has Internet access using the ip command:
ip route get 8.8.8.8
Set the value of the -o flag on both the PostUp and PostDown variables to an interface with Internet access, then save the configuration file.

Open the server's "/etc/sysctl.conf" file with your favorite text editor:
sudo nano /etc/sysctl.confScroll down to the line containing net.ipv4.ip_forward=1 , then remove the pound sign (#) in front.
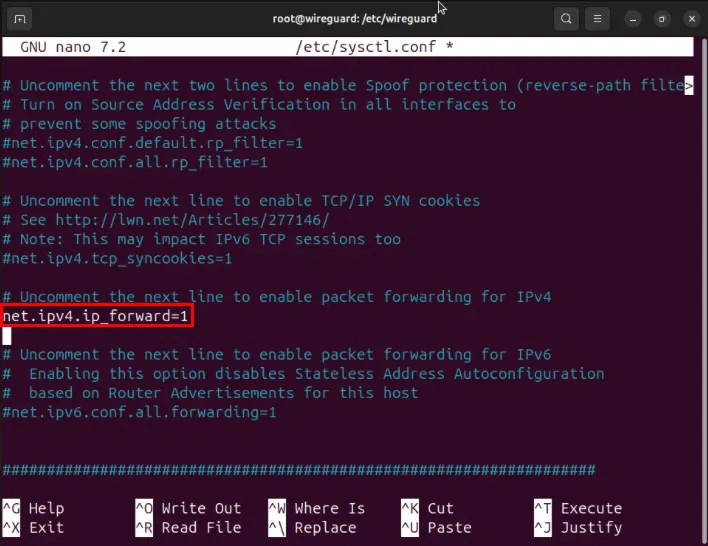
Reload the new sysctl configuration by running: sudo sysctl -p .

Set Up and Connect the Wireguard Client
You now have a properly configured Wireguard server without any peers. To use it, you need to set up and connect your first Wireguard client.
Navigate to the client system's Wireguard configuration directory and set its default permissions:
cd /etc/wireguard sudo umask 077Create the client's Wireguard key pair with the following command:
sudo sh -c 'wg genkey | tee /etc/wireguard/client1-private-key | wg pubkey > /etc/wireguard/client1-public-key'Create the client's Wireguard configuration file using your favorite text editor:
sudo nano /etc/wireguard/wg0.confPaste the following code block into the client configuration file:
[Interface] PrivateKey = PASTE-YOUR-CLIENT1-PRIVATE-KEY-HERE Address = 10.0.0.2/32 ListenPort = 60101 [Peer] PublicKey = PASTE-YOUR-SERVER-PUBLIC-KEY-HERE AllowedIPs = 0.0.0.0/0 Endpoint = PASTE-YOUR-SERVER-IP-ADDRESS-HERE:60101 PersistentKeepalive = 25Replace the PrivateKey variable with the client's private key.

Open the Wireguard server's terminal session, then print its public key:
sudo cat /etc/wireguard/server-public-keySet the value of the PublicKey variable to the server's public key.
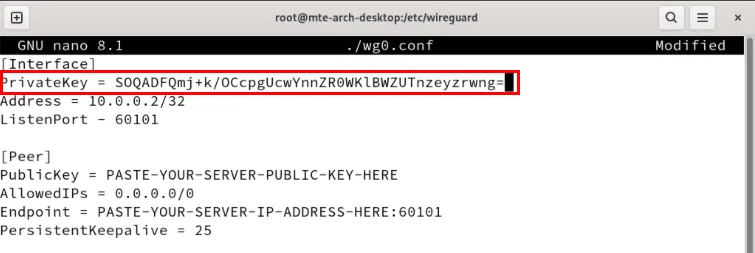
Change the Endpoint variable to the IP address of the Wireguard server.

Save the configuration file, then use the wg-quick command to start the Wireguard client:
sudo wg-quick up wg0
Note : This command will disable the client's network connection until you start the Wireguard server. To get back to the original network, run sudo wg-quick down wg0 .
Link the Wireguard Server to the Client
Access the Wireguard server's terminal session, then open the server's configuration file:
sudo nano /etc/wireguard/wg0.confPaste the following block of code after the [Interface] section:
[Peer] PublicKey = PASTE-YOUR-CLIENT1-PUBLIC-KEY-HERE AllowedIPs = 10.0.0.2/32 PersistentKeepalive = 25Set the PublicKey variable to the Wireguard client's public key.
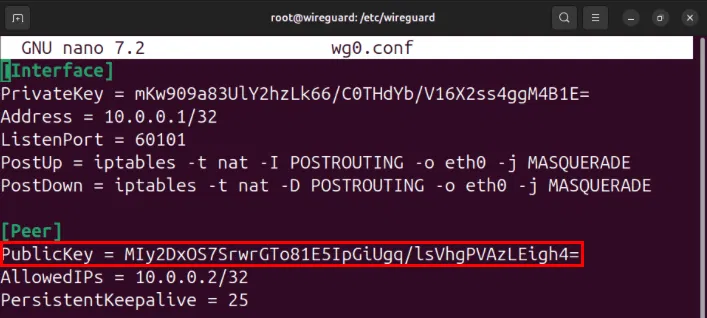
Note : You can get the public key by running sudo cat /etc/wireguard/client1-public-key on your client.
Save the configuration file, then run the following command to start the Wireguard service on the server:
sudo wg-quick up wg0




Reader Comments 0
Sign in with email or Google to join the discussion.