How to set up staging environment to develop WordPress
Usually, you will start developing a website in a local server, then upload it to a staging site (test). When everything is confirmed, you will push the website to the live server..
Usually, you will start developing a website in a local server, then upload it to a staging site (test). When everything is confirmed, you will push the website to the live server. Everything sounds simple, but in fact, developing a website can be a very long process.
In this article, TipsMake.com will see how to deploy and configure these stages effectively when developing websites on WordPress, using a handy plugin called WP Local Toolbox.
When the plugin is enabled, it displays some PHP constants. These constants will tell you whether you are currently in a live website or on a local website, ensuring unnecessary plugins in a certain period are still disabled and notifying you when new content added to the live website.
Development stage
This is the place to start. You build your website in a localhost - a web server running in the computer. If you're using OS X, you can easily set up a localhost with MAMP. Windows users have a few more options like MAMP (for Windows), WAMP and XAMPP.
At this stage, you can use development tools like Codekit, Grunt or Gulp. You can work with your colleagues, using Git version control. You are also free to perform some tests and create errors without causing any damage.
During the development phase, you are encouraged to activate WP_DEBUG and install some WordPress plugins such as Query Monitor, RTL Tester and User Switching, in addition to the plugins that will be deployed in the live website. A few additional plugins are available to facilitate the development and testing process. Note that we will not activate these plugins at the staging or live page.
Open wp-config.php and add the following line below define ('WP_DEBUG', true); :
define('WP_DEBUG', true); define('WPLT_SERVER', 'dev');
This line marks your WordPress installation in localhost as ' development' (in the development phase). When logging in to the WordPress dashboard, you will see that the Admin bar, by default, now returns green. tree, with the server written as DEV SERVER.
Checking to install WordPress to activate the 'Discourage search engines from indexing this site' option prevents the website from being accidentally indexed in the Search Engine .

If you don't like the default green, you can change it by specifying WPLT_COLOR. Colors can be identified with a color tag or in Hex format as below.
define('WPLT_COLOR', '#7ab800');
In addition, you may also want to deactivate some unnecessary plugins during development, such as cache creation plugins, backup plugins, and Akismet.
To do so, specify each plugin in an array with WPLT_DISABLED_PLUGINS:
define('WPLT_DISABLED_PLUGINS', serialize( array( 'w3-total-cache/w3-total-cache.php', 'akismet/akismet.php', ) ));Â
Staging Stage
The staging page is where you check your website. Ideally in an environment that is similar to live web content (content, server specifications, etc.) to find errors you may have missed during the development phase. .
Websites can usually only be accessed by some people including customers, to show them the final version of the site.
Some plugins are deactivated, such as the plugins you used during the development phase, cache creation plugins and backup plugins. The staging page can be placed in a sub domain, for example staging.coolsite.com or in a separate domain like coolsitestaging.com.
You 'define' the staging page in wp-config.php as follows.
define('WP_DEBUG', true); define('WPLT_SERVER', 'testing'); define('WPLT_DISABLED_PLUGINS', serialize( array( 'w3-total-cache/w3-total-cache.php', 'akismet/akismet.php', 'debug-bar/debug-bar.php', 'debug-bar-extender/debug-bar-extender.php', 'debug-bar-console/debug-bar-console.php', 'simply-show-ids/simply-show-ids.php', 'monster-widget/monster-widget.php', 'theme-check/theme-check.php', 'wordpress-beta-tester/wp-beta-tester.php', ) ));
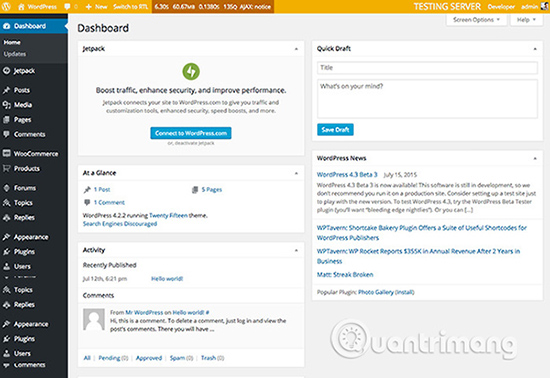
Now, set the server to be staging or testing. The Admin bar color will now turn orange.
At this stage, you can also deactivate some of the plugins used during the development phase. Some other development plugins are kept in the active state and WP_DEBUG is also enabled because you need to detect errors while checking in the staging server.
Live stage
This is the final stage, where you publish your website in a live server and allow people to view the website. During this period, you should also deactivate all plugins to develop and finally enable the plugin to create cache and backup, etc.
define('WP_DEBUG', false); define('WPLT_SERVER', 'live'); define('WPLT_DISABLED_PLUGINS', serialize( array( 'developer/developer.php', 'debug-bar/debug-bar.php', 'debug-bar-extender/debug-bar-extender.php', 'debug-bar-console/debug-bar-console.php', 'simply-show-ids/simply-show-ids.php', 'regenerate-thumbnails/regenerate-thumbnails.php', 'rewrite-rules-inspector/rewrite-rules-inspector.php', 'rtl-tester/rtl-tester.php', 'user-switching/user-switching.php', 'monster-widget/monster-widget.php', 'theme-check/theme-check.php', 'query-monitor/query-monitor.php', 'wordpress-beta-tester/wp-beta-tester.php', ) ));
During the Live stage, the default Admin bar turns red (this may change). Follow new content in live server to update the test server database with new content like in live server. That will help check more accurately and ensure that new content is displayed OK.
Add the following line to live server wp-config.php to do that:
define('WPLT_NOTIFY','me@outlook.com');
Once set up, you will receive an email notification whenever customers add new content (posts and pages) to the live server.
If the test server and live server are hosted in the same server, visit phpMyAdmin. Then, select the wp_posts database and select the Operations tab . In the Copy table to box (database.table) , select the staging page database and make sure that the Add DROP TABLE option is selected, so that it will overwrite the existing database.

Everything is complete. Now, you've got the logical stages to develop a WordPress website. Everyone has their own working style, so feel free to share your best workflow while in the staging phase and the tools you are using in the comment section below!
Good luck!