Table of Contents
To post photos and videos in WordPress successfully, begin with the right preparation and follow each step carefully. The guide also covers common issues you may encounter.
Posts with images or video can make the content more engaging. On WordPress, you can add any media file to the post to highlight the tutorial steps, or make the content more engaging, break up long blocks of text. The steps below explain how to add images and videos to WordPress.
- Instructions for creating websites with WordPress from A to Z (Part 1)
- Set up copyright in WordPress
- 15 Versatile WordPress Theme for web designers
Instructions to upload photos to WordPress
Step 1:
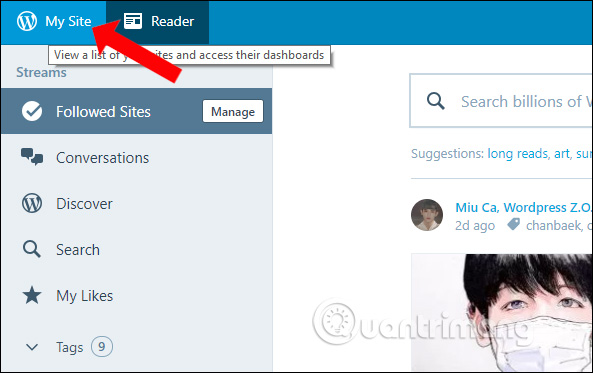
You access your WordPress account. In the main interface click the My Site Section to access your personal interface.
Step 2:
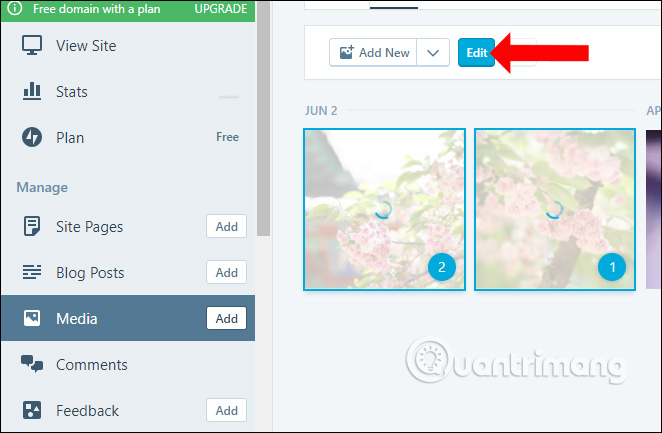
Switch to the new interface and click Media In the Manage section.

Looking to the right, click the Add New Item to add images to WordPress.

Step 3:
Appears a folder on your computer to find the image you want to upload to WordPress, click the image and click Open. Images will then be uploaded to the website.
To edit the image, click the image and then click The Edit button Above.
Step 4:
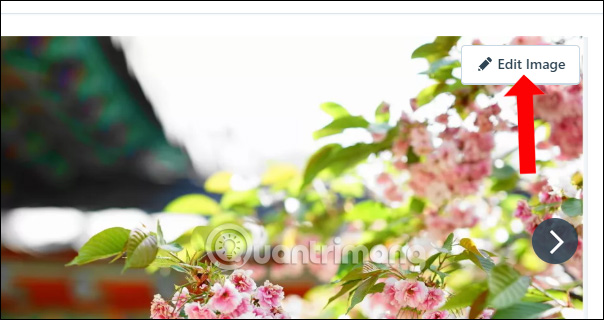
In the image editing interface, to crop or rotate the image when needed to click the Edit Image Button.
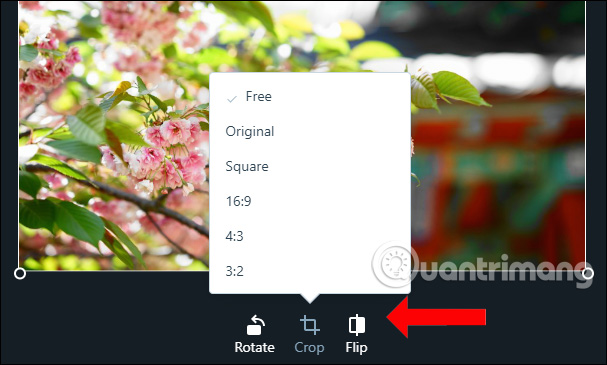
There will be options below the image to edit as Rotate rotates the image according to the angle, Crop cuts the image to different sizes. Reset button to return to the original image. When finished, click the Done button to save.
Step 5:
Next you can change the image name, add content to the image. Finally click Done to save.
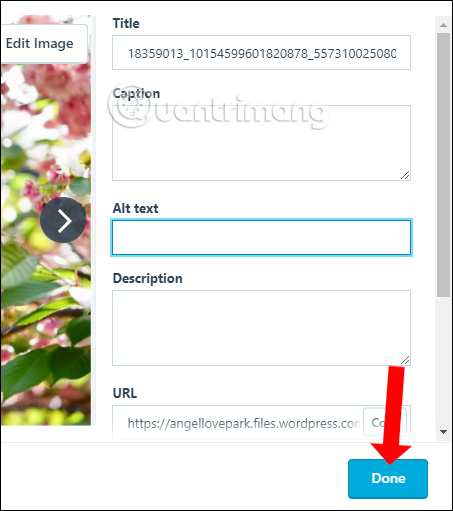
So after posting the image on WordPress, we can change the size of the image, or add content such as photo name, image content for the image if desired. When posting articles on WordPress, just click Media section to get the image posted to WordPress inserted into the content is finished.
- 15 tools to help build a website for beginners (no code required)
- Instructions for installing WordPress on localhost
- Keyboard shortcuts for editing on WordPress
I wish you all success!
FAQ
What should I prepare before I post photos and videos in WordPress?
Review the requirements in the guide, confirm that your device or software is compatible, and save important work before changing settings related to post photos and videos in WordPress.
Why might post photos and videos in WordPress not work as expected?
The most common causes are incompatible versions, missing permissions, incorrect settings, or an interrupted internet connection. Recheck each step and restart the app or device when appropriate.
Can beginners follow these post photos and videos in WordPress steps?
Yes. Follow the steps in order, avoid skipping confirmation screens, and compare your interface with the screenshots because labels may differ slightly between versions.
Related Articles
 How to Post Photos to Instagram: Clear Instructions14 minutes read
 How to Add New Posts on Wordpress: Wordpress Installation4 minutes read
 Instructions on How to Post 360-Degree Videos on Facebook5 minutes read
 20 Wordpress Plugins for Photo Websites (2018)9 minutes read
 How to Post Photos and Videos from Other Accounts on Threads3 minutes read
 Which Platform Is Better for Wordpress. Com and Wordpress. Org?13 minutes read
Reader Comments 0
Sign in with email or Google to join the discussion.