Instructions for installing WordPress on Bluehost
Installing WordPress on Bluehost is extremely simple with Bluehost WordPress 1-Click. However, there may be instances where Bluehost WordPress 1-click installation is not suitable for your situation.
In this article, you will learn how to install WordPress on Bluehost using different methods. The article will also mention what makes BlueHost a unique hosting for WordPress.
Instructions for installing WordPress on Bluehost
- Install Bluehost WordPress 1-Click
- Transfer domain to Bluehost
- Transfer website to Bluehost
- Step 1: Back up the previous WordPress page
- Step 2: Back up the previous WordPress database
- Step 3: Enter the database
- Step 4: Import WordPress files
- Install a new WordPress theme
Install Bluehost WordPress 1-Click
On any web server without the 1-click WordPress installation option, you will need to set up WordPress manually.
You will need two things: Domain name and web hosting. Bluehost provides both of these. Best of all, Bluehost's basic web hosting package is very cheap ($ 2.95 / month, equivalent to about VND 70,000 / month).
When you click the 1-Click Install sign-up button on the Bluehost website, you will see a screen where you can set up a domain name for your new website.
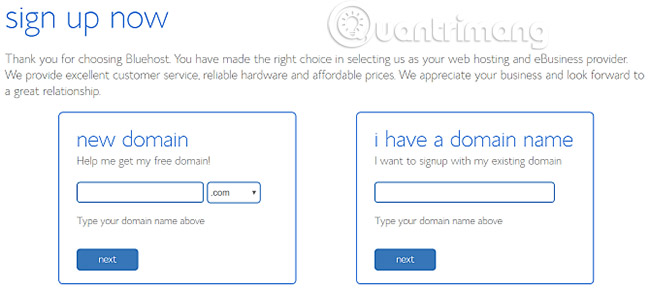
If you do not have a domain name, select the New Domain option . You will be free a domain name in the first year using Bluehost hosting.
The only point is that your domain name needs to be available for registration.
If you already have a domain name, enter it in the field I have a domain name .
The next steps are very simple. Just fill in your personal information, choose the hosting package you want and fill in your payment details.
Finally, enter a secure password to access the controls of your site.
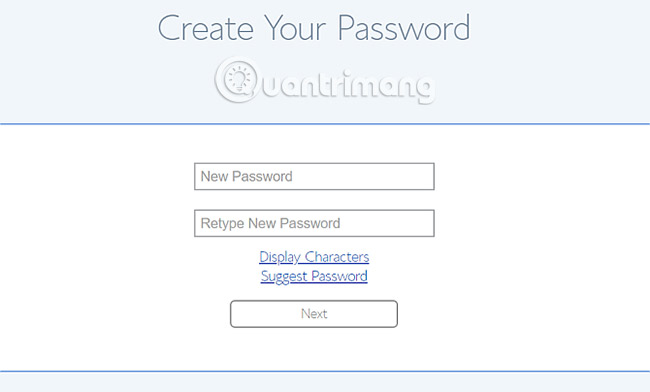
When you're done, you'll see your main website portal screen.
If you are familiar with Cpanel on most web servers, you will find this panel much simpler (you can click Advanced to see a more traditional Cpanel).
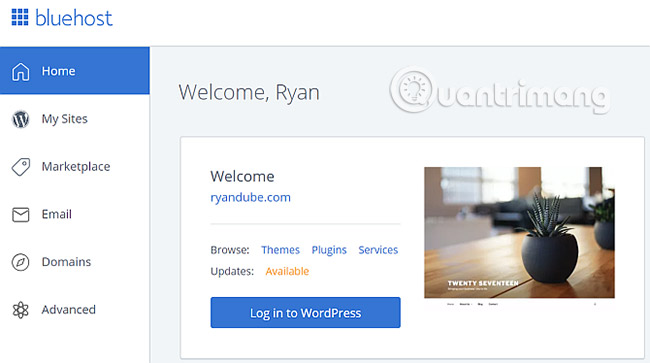
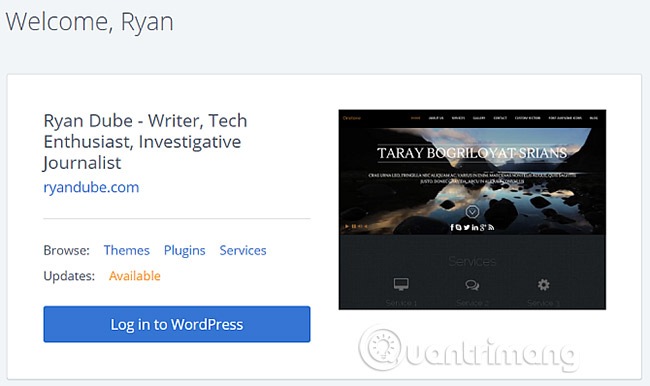
You will see a Log in to WordPress button. This is because the WordPress website with the domain you choose is already installed and ready to use.
It is a 1-click installation (one-click installation). You have completed almost everything at this time.
Transfer domain to Bluehost
If you choose to take advantage of registering a free domain name, you can stop here. The WordPress website is directly connected to that domain.
However, if you have registered a domain, you will need to point or transfer that domain to Bluehost.
- Assigning : This means that you change the nameserver settings at your current domain registrar to point to Bluehost.
- Transferring : This means you change the previous domain registrar to Bluehost.
If you want to transfer domain from old registrar to Bluehost:
- Click Domains in the left navigation bar.
- Select Transfer a new domain to your account .
- Enter the Enter domain to transfer field .
After that, Bluehost will manage the domain transfer for you. This is the easiest approach if you don't know how the domain transfer will happen or simply you don't want to care about it.
If you want to keep all your domains with the same registrar or don't want to change your domain registrar for any reason, then you don't need to do so.
Just visit the domain registrar's website where you bought your domain and edit nameservers there. You will usually find this in your Domain settings by clicking Manage DNS.
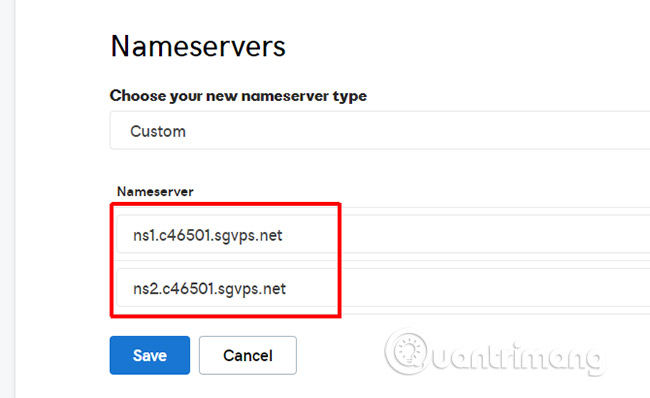
You will need to enter two nameservers.
Details for the first nameserver Bluehost are:
- ns1.bluehost.com
- 162,88,60,37
Details for the second Bluehost nameserver are:
- ns2.bluehost.com
- 162,88,61,37
It may take 24 to 48 hours for the conversion process to complete. Once done, the next time you enter your domain into the URL field on your browser, you will see your new Bluehost website appear.
Transfer website to Bluehost
If you are transferring a site to Bluehost, this process will require a bit more effort. However, it is not too complicated.
This process includes the following steps:
- Backup your old WordPress files.
- Back up your old SQL database.
- Create a new suitable SQL database on Bluehost.
- Download your old WordPress files to Bluehost.
Step 1: Back up the previous WordPress page
To backup WordPress files, simply connect to the old server with your favorite FTP client.
Upload all website files to a local computer and place them in a memorable location.
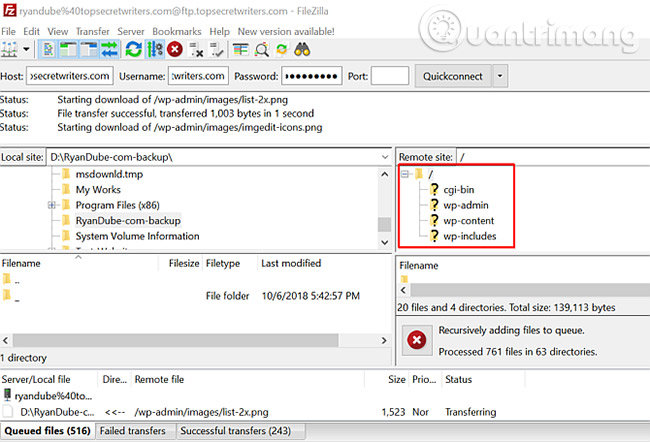
Next, go to Cpanel on your old server and download the SQL database for that site.
Step 2: Back up the previous WordPress database
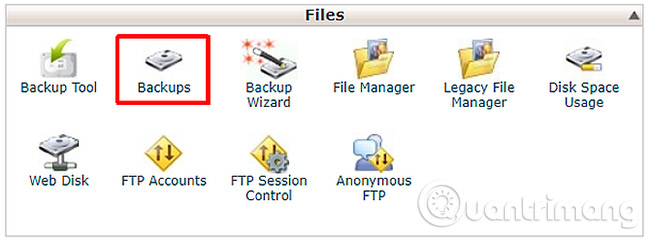
You will usually be able to do this by clicking on the Backups icon .
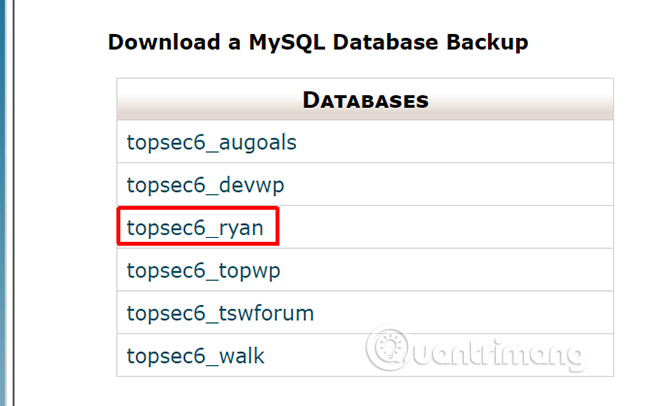
Scroll down to your SQL database list and click the relevant database link to download.
Normally, it will be downloaded as a compressed file. When you upload the file to Bluehost, Bluehost will know how to handle the file.
Now you are ready to upload your old website to your new Bluehost account.
Step 3: Enter the database
Log in to Bluehost and click Advanced in the left navigation panel.
In the Databases, click MySQL Databases.
- Create a database using any website name you like.
- Scroll down and create a new MySQL username and password.
- Scroll down and in the Add User To Database section , assign the user name created to the new database.
- Select ALL PRIVILEGES on the last Manage User Privileges page.
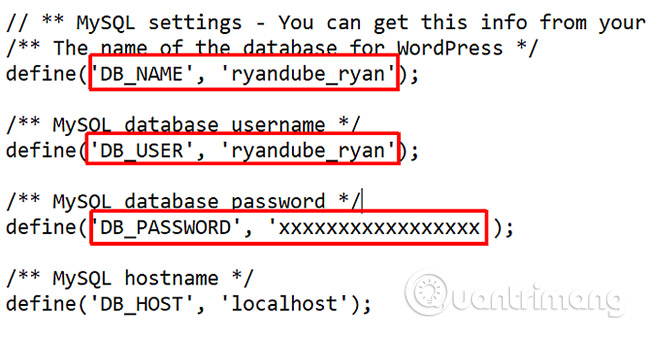
Now, go to the folder on the computer, where the old site files you have backed up are located and look for the wp-config.php file in the root directory.
Edit the three lines in that configuration file, where the database, user name and password are defined.
Now enter the database you have backed up by clicking Advanced in Bluehost Portal Page and clicking on phpMyAdmin.
Select the new database you created, click Choose File and select the database you previously backed up.
Make sure Partial Import is not selected, and the database format is SQL.
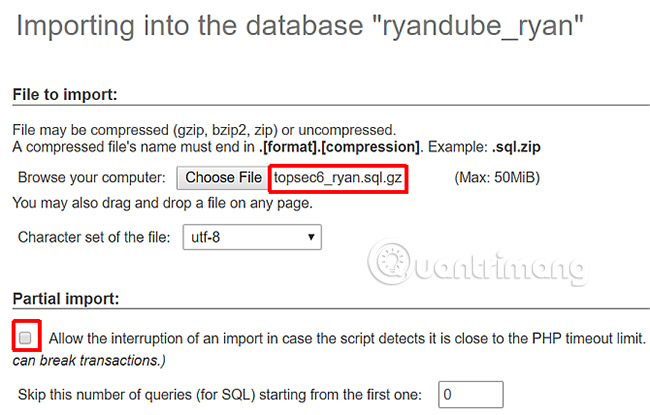
Click Go and after a few seconds, you will see the message that the import process was successful.
Step 4: Import WordPress files
In the Files menu , click FTP Accounts and scroll down to the list of FTP accounts.
For an account mapped to the main directory for the site you are migrating to, click Configure FTP Client and record the login details. The password here will match the password you registered when opening your Bluehost account.
Open your favorite FTP application and connect to it.
Delete all files in the public-html directory on your Bluehost account. Replace those files with all the files you have backed up from the previous WordPress site.
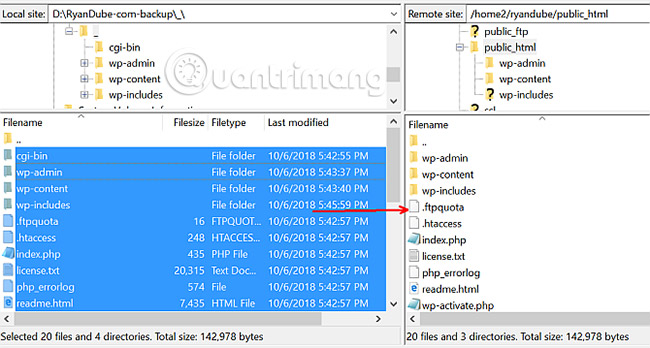
After all the files are uploaded, your website is fully transferred and ready to operate on Bluehost!
Just go back to the Home section of the website portal to see how your website is displayed in the preview window.
Install a new WordPress theme
Switching to a new host is also a great opportunity to refresh the theme for your website.
- 15 Versatile WordPress Theme for web designers
When you click on the Home tab in the Bluehost portal, you will see there is a Themes link in the preview window for your website.
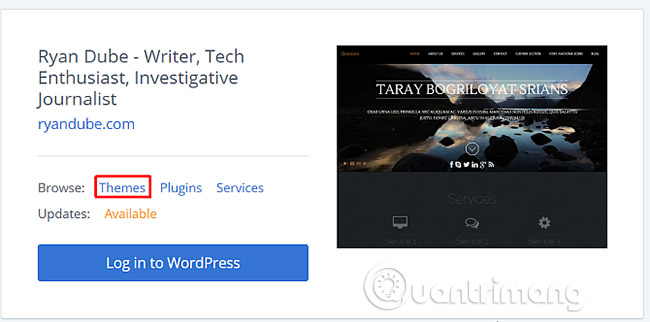
This will take you to marketplace Bluehost Themes & Templates . You will find thousands of templates available for purchase here.
No matter where you buy the theme, the upload process to your Bluehost WordPress website is the same.
Use your favorite FTP application to upload the theme folder containing all theme files, / wp-content / themes / directory.
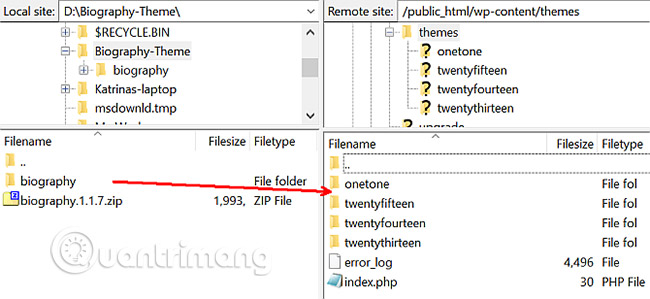
After all the files are uploaded, open the WordPress admin panel, click Themes, find the theme you uploaded and click Activate.

You can see a message in WordPress indicating that you are missing some theme plugins. Just click Begin installing plugins to install all missing plugins.
As you can see, there are many similarities between Bluehost WordPress installation and migration.
The main distinction is the interface of Bluehost Portal, as well as the difference between BlueHost Cpanel and a standard control panel. Fortunately, Bluehost provides all the tools you need to start a new website or move from an old site.
If in the end, you are not entirely sure you want to stick with Bluehost. Don't worry, Quantrimang has provided a list of the best WordPress hosting providers available. Take some time to consider one of these options to see if they fit your needs.
Good luck!
See more:
- How to set up Bluehost Webmail account
- Compare web hosting Bluehost and HostGator
- Instructions for installing WordPress on the Vitual Server with Cloud9