Instructions for installing WordPress on the Vitual Server with Cloud9
Downloading and running internal WordPress servers is quite complicated. If you are a seasoned developer, you should set up a local server using XAMPP or WAMP. But if you are a "new ghost" just want to "playfully" install WordPress self-host (different from wordpress.com) to see what a custom WordPress site will look like, but not successful.
So, I recommend you to skip this tedious process, try installing free WordPress on Cloud9 virtual server without code, without downloading specialized software. With just a few simple steps - theme options and additional plugins - and in a few minutes WordPress has been installed.
What is Cloud9?
Cloud9 is a cloud-based development environment. It allows encryption on more than 40 languages on web hosting servers and creates a free basic workspace. What you need is a CPU, a 512 MB RAM, and a 2 GB hard drive. In addition, install WordPress on the workspace with just one click.
Instructions for installing WordPress on Cloud9
Step 1 : Visit Cloud9 page and click ' Sign in ' on the top toolbar.

Step 2 . On the next page, register for an account

Step 3 . After logging in, you will see Workspace, click 'Create a new workspace'

Step 4. Name the Workspace and select the group (if needed). You can leave the workspace in ' Private ' mode (for free, you can only do this once). Now, select the template, click on WordPress and select ' Create Workspace '.
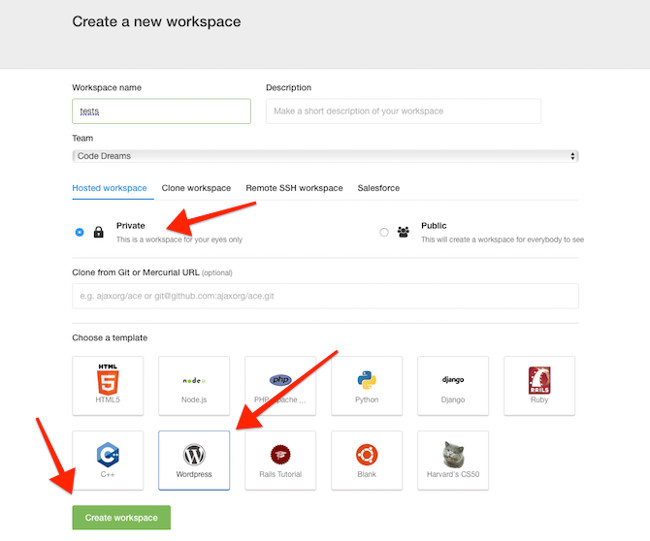
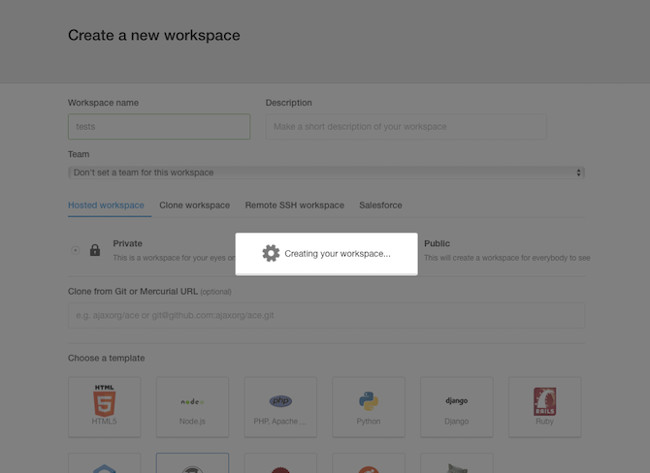
Step 5. Wait while Cloud9 set up the virtual server for you.
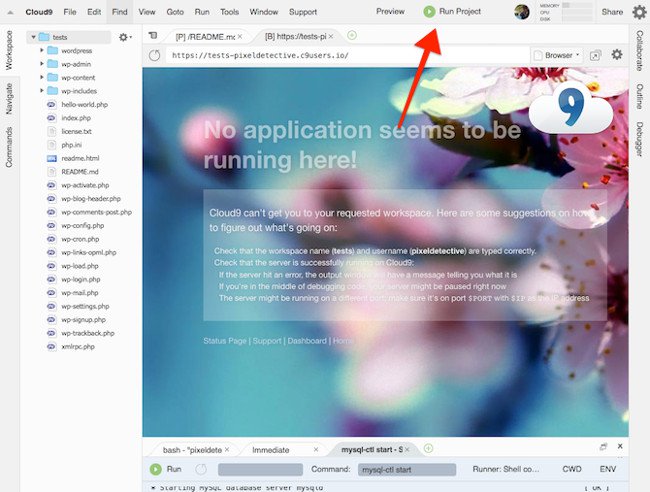
Step 6. Now that you are placed in the IDE and you can skip all the code, just click ' Run Project' on the top toolbar.
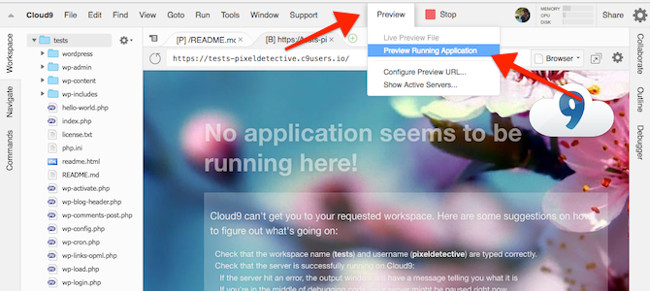
Step 7. The server is running, select ' Preview ' and then select ' Preview Running Application'.
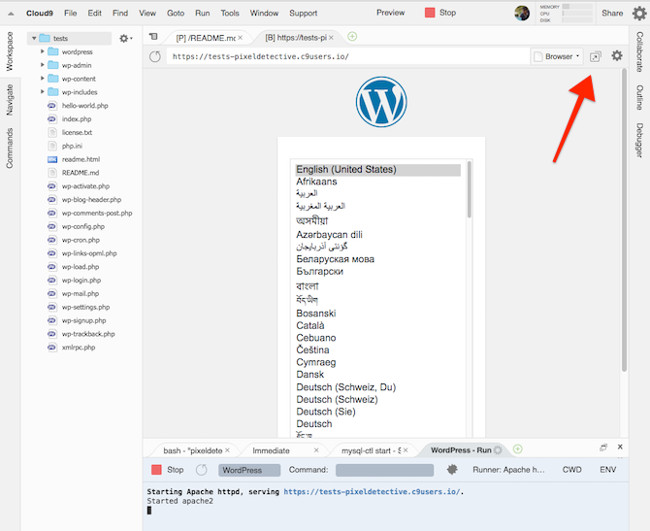
Step 8. The WordPress installer is running in the IDE. You can see the installation screen here. For easy tracking, open the setup screen in a completely new tab by clicking 'Pop Out into New Window' marked as the screenshot below.
- How to change the font in WordPress
- Instructions for installing WordPress on localhost - Part 1
Set up WordPress installation
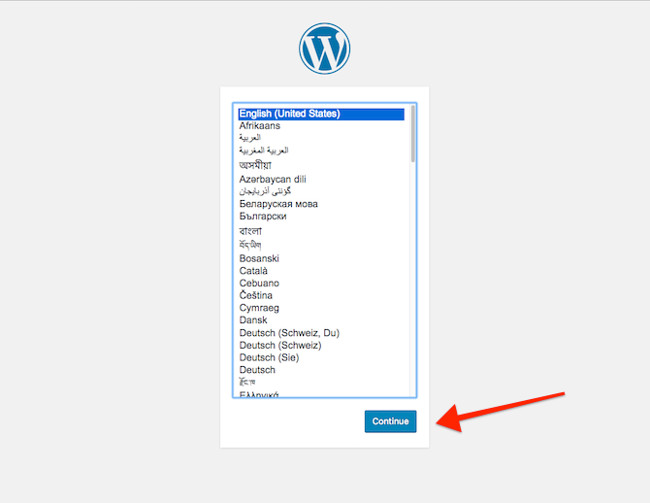
Step 1. You are in full screen view, and after selecting the installation language click ' Continue '.
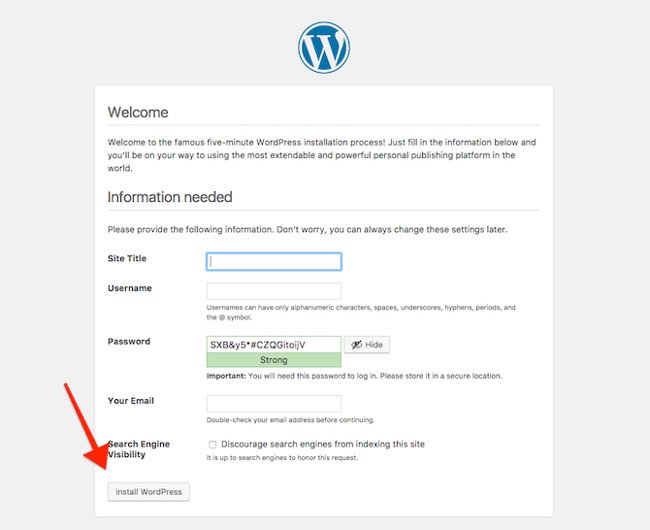
Step 2. On the Welcome screen, give your site a name, enter your username, password and email address and then select ' Install WordPress '
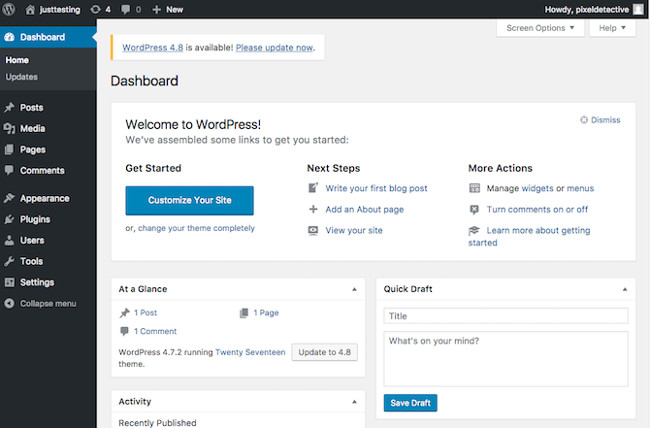
Step 3. After the installation process is finished, you will be taken to WordPress's Dashboard, set the theme and customize your preferences, blog and more.
As long as Cloud9 is active, your WordPress is still 'alive'. Yes, this is not a live site, but it is fully equipped to satisfy your 'experiments'.