How to schedule Facebook and Instagram posts automatically
Posting automatically on Instagram helps users save post time, freely choose the time that they want to post..
Scheduling Facebook Fanpage posts will save more time, instead of having to wait for the right time to post directly. And users can completely schedule to post on Facebook or Instagram through the Preppr website. Preppr supports linking to multiple Facebook or Instagram accounts so we can schedule posts with different accounts as needed.
The site provides complete tools for you to enter the content for the article, from icons, hashtags, locations, article links, . such as when posting directly from Instagram or from Facebook. The posting time zone that Preppr provides is not fixed, but according to the list of each region for us to choose. The following article will guide you how to schedule Instagram post on Preppr.
- How to link Facebook Fanpage with Instagram
- How to create time limits using Instagram
- 5 Instagram photo editors to create better photos
- How to post on many social networks
Instructions for timer Instagram post automatically
Posts made on Instagram, with Facebook users do the same.
Step 1:
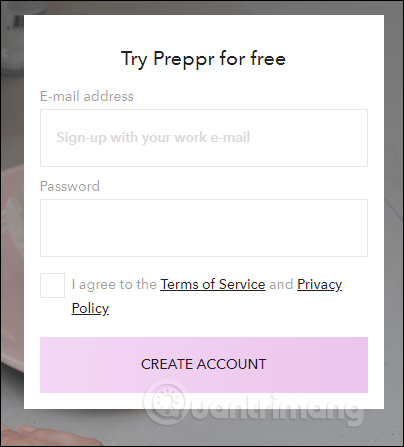
We access the homepage of Preppr by following the link below and enter the email address, click Create Account to register an account without activation.
https://preppr.com/
Step 2:
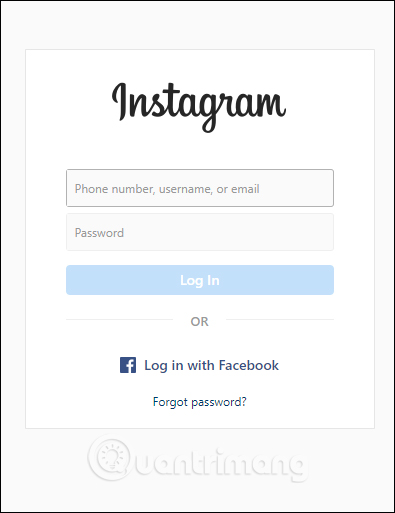
At the Welcome interface we are choosing to connect with the Facebook account (Add Facebook Account) or Instagram account (Add Instagram Account) to use. Here Network Administrator select Instagram account.

Next, log into the Instagram account you want to link with Preppr.
Step 3:
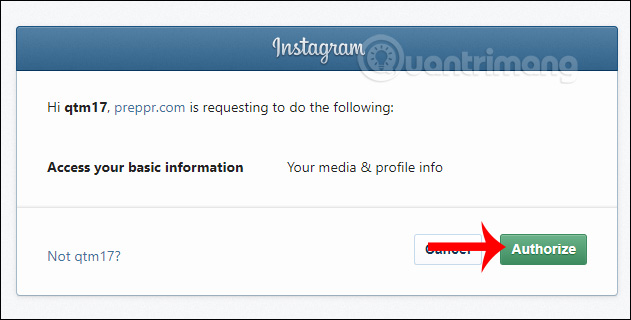
Display to a new page, click Authorize to authorize Preppr to access some basic information of personal account.
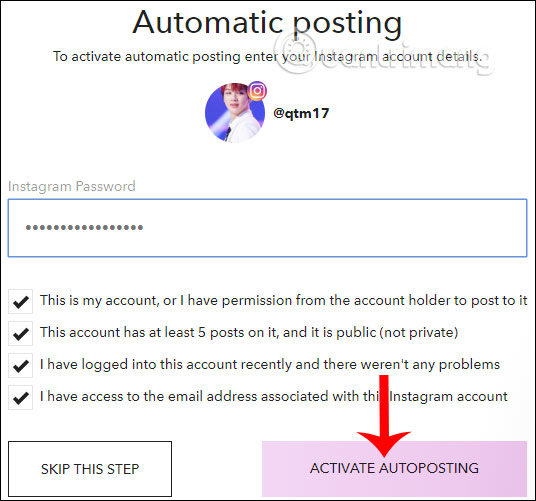
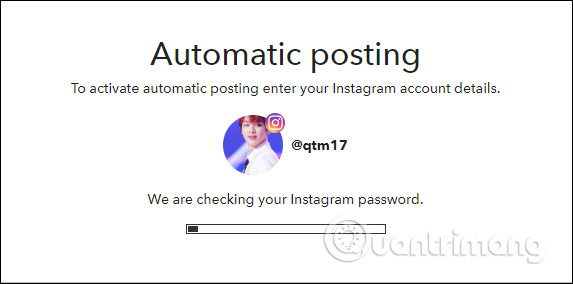
Next, the user needs to re-enter the Instagram account password and select the 4 required contents below. Click Activate AutoPosting.
Preppr will check the account as well as the password we entered.
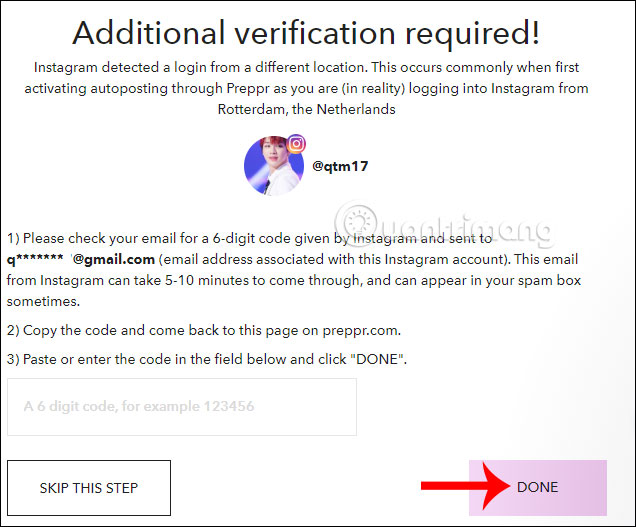
At this time, you will be notified by Preppr that you will need to enter the verification code that Instagram sent to the email address registered for your Instagram account. We enter 6 digits and press Done to complete.
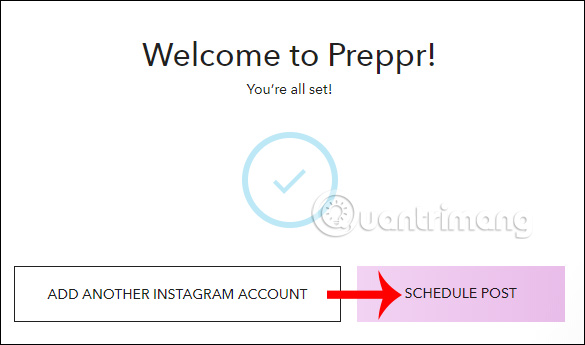
When all settings are complete, click Schedule Post to enter the interface to set up Instagram posts by the hour.
Step 4:
Switch to the interface of Preppr, in the Queue section, click New Post to make a post.

Step 5:
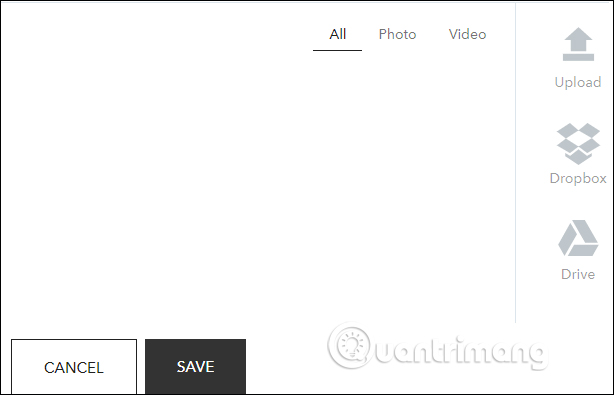
Post interface appears, first click on the g icon to upload media files.
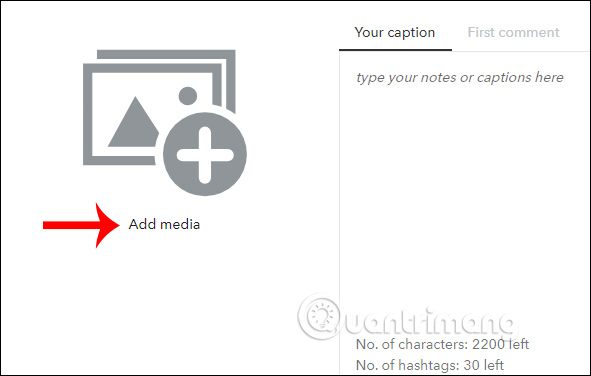
Photos or videos are allowed to take from your computer, Dropbox or Drive and up to 10 files for 1 post.Click Save to save the selected file.
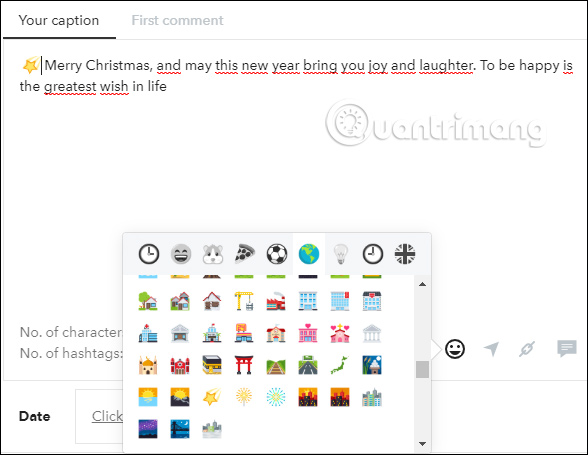
Step 6:
Return to the post interface, enter the caption , add the icons or other content you want.
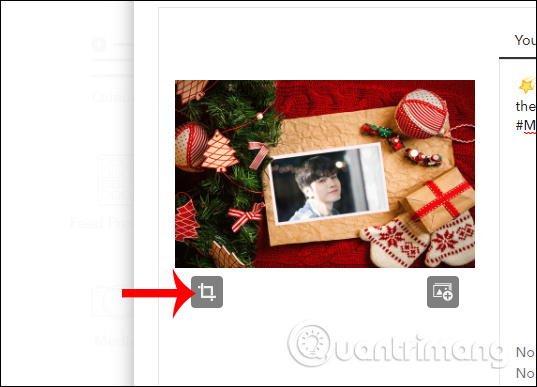
Images when posting on Postppr's posting interface also have a cropping section, click the crop icon as below.
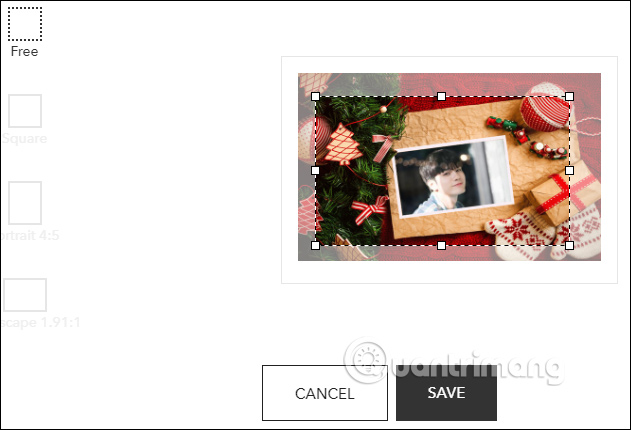
Choose the size for the cropping frame you want and click Save to save.
Step 7:
If finished posting content then click Click here to schedule to set the posting time.
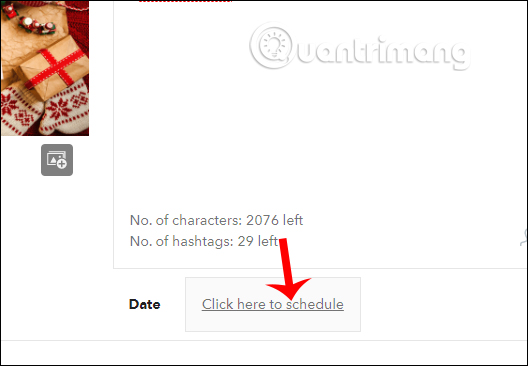
Display the date and time interface for us to choose. If you want to choose the time you want, then press Custom then enter the time. Click Apply to save.
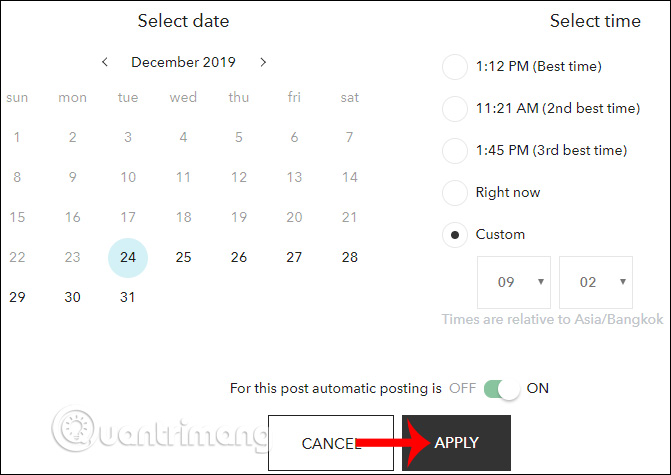
Finally, users click Add to Queue to put the article on the waiting list.

Step 8:
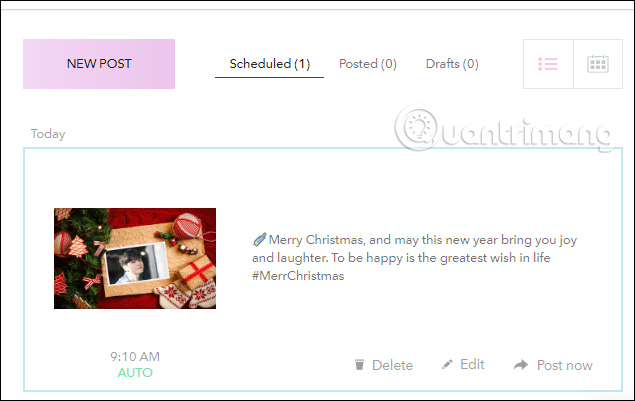
When you return to the Queue interface, you will see the Scheduled Post with a scheduled post. Each post has the option to edit or delete below.
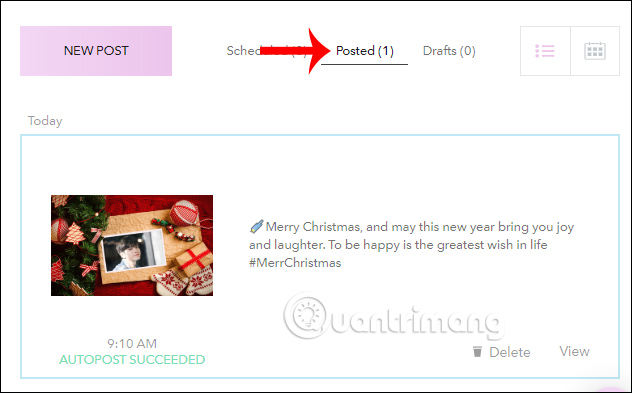
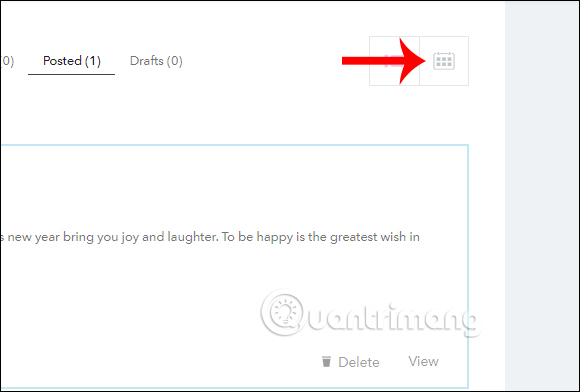
And when the Instagram post has been posted on the schedule, the Posted section displays the posted post.
Step 9:
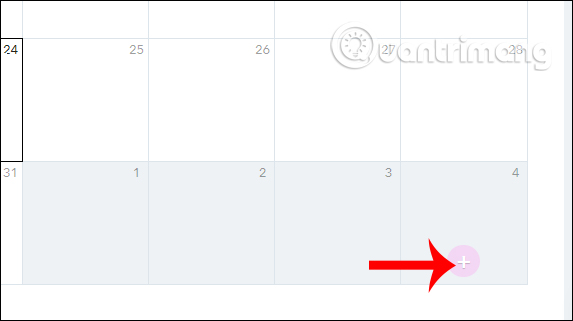
In addition, users can add posts in the right day from the monthly calendar , click the calendar icon on the right.
Now we just need to select the date we want to post and click the plus icon to proceed to enter the article.
Step 10:
If you want to preview how the post displays on Instagram, then click on the Feed Preview section .
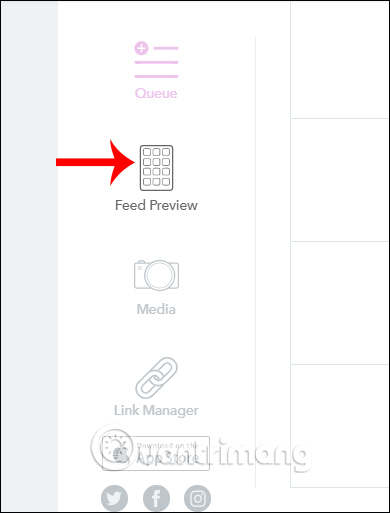
Website displays photos simulating Instagram application interface for us to preview. We also post images to the interface , then drag and drop photos into the Instagram simulation interface on the right to select the location. Hover over the image and select Click to schedule to schedule posting. The following steps you perform are similar to the steps above.

Step 11:
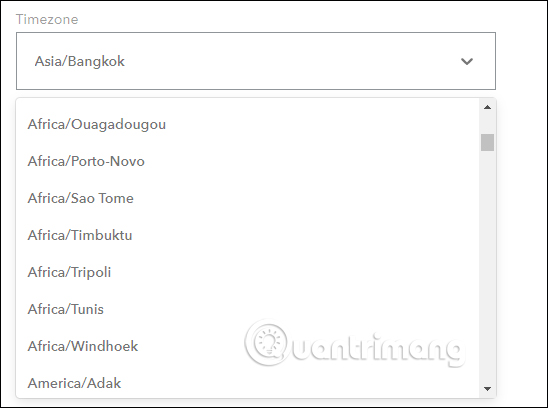
In case the user wants to have a different time zone posted on Preppr without following the computer's time zone, click on the Instagram account name and select Account settings .
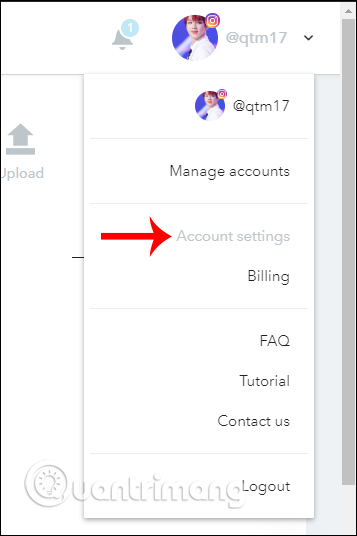
Then navigate to the Time zone section and select the other time zone you want to use and click Save to save.
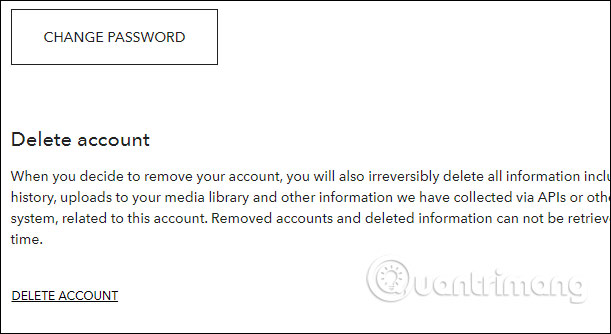
Also in this interface the Delete account section to delete the Preppr account.
Step 12:
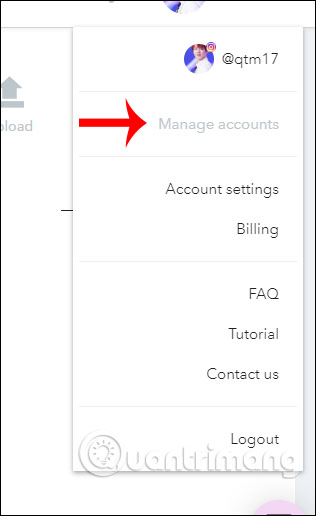
If you want to add an Instagram account associated with Preppr , click on Manage accounts .
Then we choose to add Instagram account or link to Facebook according to user needs.
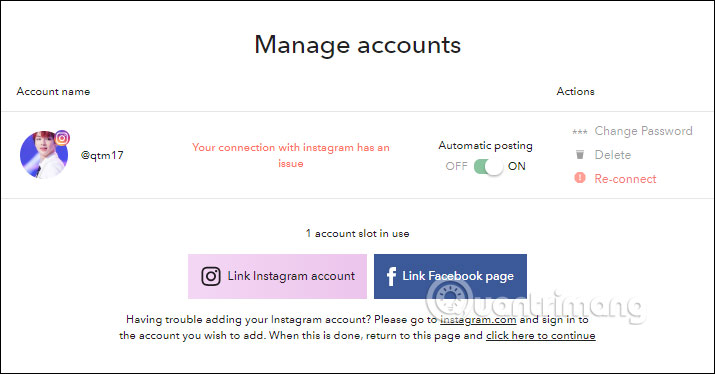
So with Preppr, we can schedule Instagram or Facebook posts with many different accounts. Accounts linked to Preppr are managed into lists, with options for you to delete or disable automatic posting by the hour.
I wish you successful implementation!