How to schedule automatic maintenance of Windows 10 system
Windows 8 and Windows 10 systems are provided with automatic maintenance of Automatic Maintenance system, error correction, defragmentation, system diagnostics, software updates, etc. This mode will also work even if The computer has been put into the Sleep state. And the auto maintenance schedule will take place at 2 am every day.
However, due to some problems that Windows cannot automatically perform system maintenance, or if we want to change the maintenance period, we can adjust the Automatic Maintenance feature on the computer. . Automatic scheduling of Windows 10 system maintenance will be available in the article below.
1. Schedule Windows 10 maintenance automatically:
Step 1:
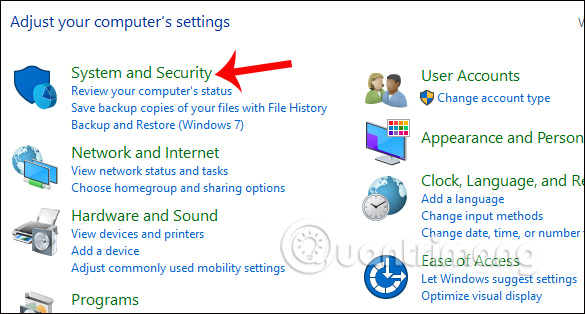
At the Control Panel interface on the computer, we click on System and Security .
Step 2:
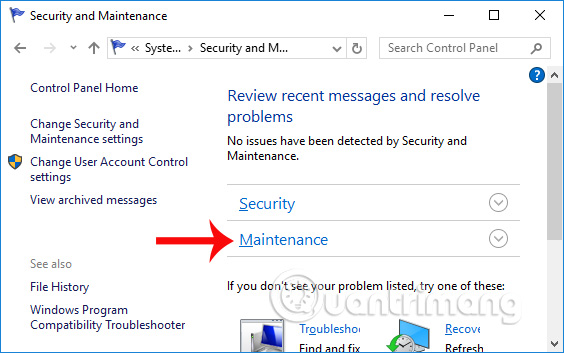
Click on the Security and Maintenance option .

Step 3:
In the new interface, click Maintenance to expand the list of options.
Step 4:
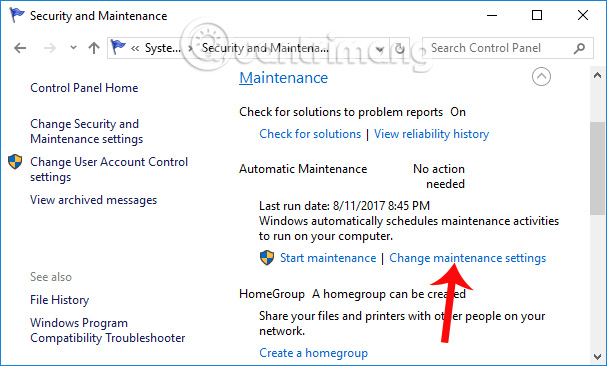
Here you will see the Automatic Maintenance section to perform automated system maintenance. Below are 2 options including Start maintenance to carry out maintenance of the computer system immediately. If the user wants to reset the maintenance, click Change maintenance settings .
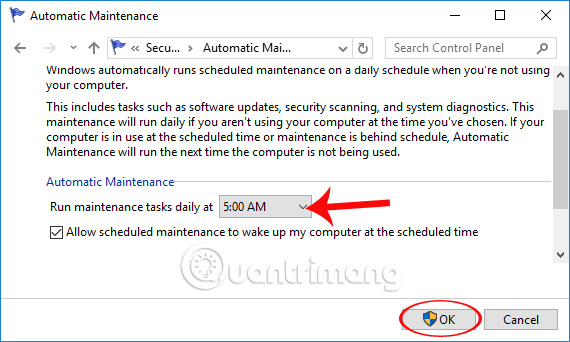
By default, this feature will schedule Windows 10 system maintenance automatically at 2 am every day. Users can change the schedule to start the system maintenance mode automatically. In the Run maintenance tasks daily at section , select the time period to set up. Then click OK to save and change the system.
Remember to tick Allow scheduled maintenance to wake up my computer at the scheduled time below.
2. Add the option to check and install updates when maintaining:
During system maintenance, the default will not include any other customizations. However, if you want, we can add the action of checking and installing updates, without affecting the uptime on the user's computer.
Step 1:
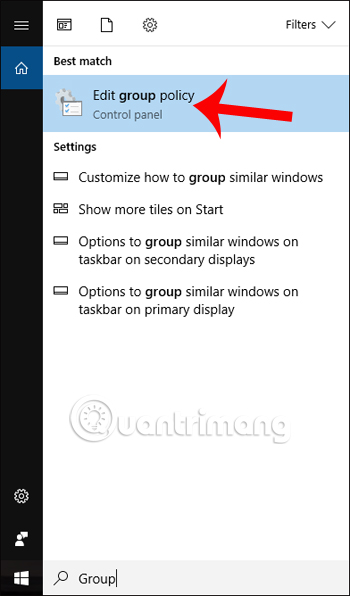
Enter the Group keyword in the search bar on Windows, then click the Edit group policy result as shown below.
Step 2:
In the Local Group Policy Editor interface, we access the following path.
Computer Configuration Administrative TemplatesWindows ComponentsWindows Update
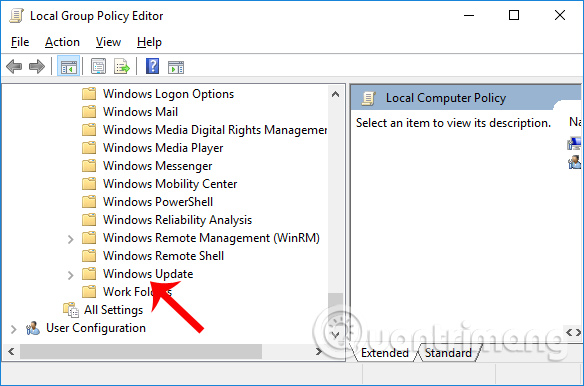
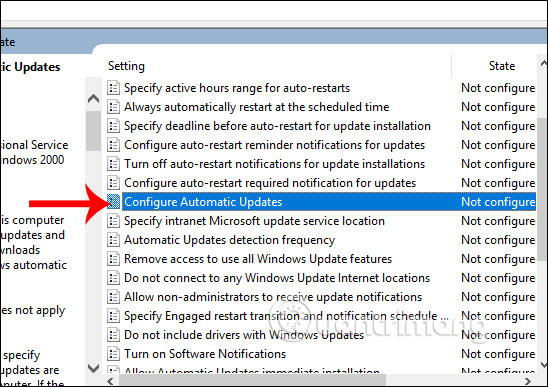
Looking at the content on the right, click on the Configure Automatic Updates option .
Step 3:
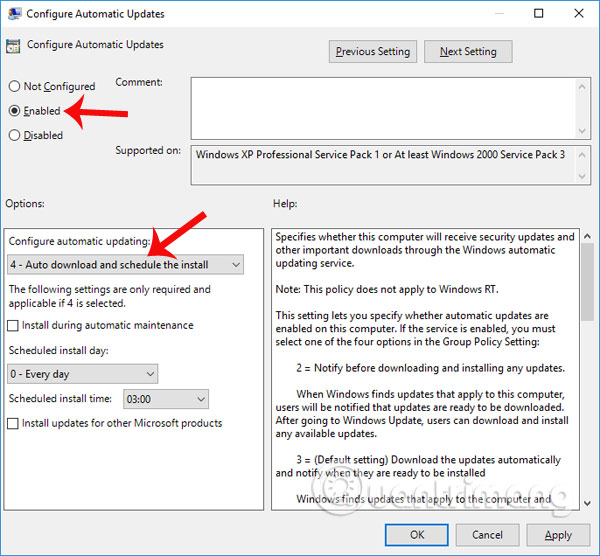
The Configure Automatic Updates dialog box appears. Here, you select Enabled to activate. Continue clicking 4 - Auto download and schedule the install in the list at content Configure Automatic Updating.
Finally click Apply> OK to save this change.
Thus, you can change the scheduling time to automatically maintain the system through the Automatic Maintenance feature. In addition, we can add the check and install updates to the system maintenance task, but the update will not affect the working time on the computer.
I wish you all success!