How to safely erase an SSD without destroying it
An SSD drive is one of the best upgrades you can make to your PC. Large capacity SSDs are now cheaper than ever.
Like other types of flash memory, you can only write a certain number of times to the SSD, which causes problems if you want to wipe your SSD. Using a common tool can damage an SSD and reduce its life.
So how do you securely erase an SSD without damaging it?
How to safely erase an SSD?
Right now, you're probably thinking: How do I securely erase an SSD? Thankfully, it's still possible to securely erase your SSD with software without damaging the drive. The difference is that instead of safely wiping all data off the drive, the SSD will "reset" to a clean memory state (not the factory state, meaning the drive isn't worn out!).
The "ATA Secure Erase" command instructs the drive to erase all stored electrons, a process that forces the drive to "forget" all stored data. The command resets all available blocks to the "deleted" state (which is also the state the TRIM command uses for file deletion and block recycling purposes).
Importantly, the ATA Secure Erase command does not write anything to the SSD, unlike the traditional secure erase tool. Instead, this command causes the SSD to simultaneously apply a voltage spike to all available blocks of flash memory. The process resets every available volume in a single operation and the SSD will be "clean".
Using the ATA Secure Erase command will use the entire program erase cycle for your SSD. So it causes a small, but negligible amount of wear compared to a traditional secure eraser.
Erase SSDs securely with manufacturer's tools
Most manufacturers provide software for use with their SSDs. The software usually includes a firmware update tool, a secure erase tool, and possibly a drive cloning option. While it's not possible to test every manufacturer's software, you can find a list of tools for the major SSD manufacturers below.
The SSD manufacturer's management app is the first place to check out the secure erase tool. However, some manufacturers do not include the ATA Secure Erase command as an option. Furthermore, in some cases, your SSD model may not support the command. If that's the case with your SSD, move on to the next section.
Erase SSDs securely with motherboard utilities
In addition to the manufacturer's tools, you can safely erase your SSD using the built-in motherboard tool. Some modern motherboards come with additional tools to help you manage your machine, and clearing memory is one of those functions.
This process will vary between motherboard manufacturers but will roughly follow these steps:
- Enter your motherboard's UEFI BIOS. Each manufacturer will have different requirements, so check with the motherboard manufacturer if you are unsure.
- Look for a secure erase option in the settings. It will be named "Secure Erase" or something similar.
- Select the SSD you want to securely erase. Make sure you back up your data before continuing.
After you press Erase, your SSD will be securely erased.
Erase SSDs securely with Parted Magic
While the SSD manufacturer's tool may come with a secure erase tool, many experts recommend using Parted Magic instead. Indeed, Parted Magic features as an essential tool in your PC repair toolkit.
Parted Magic is a complete Linux distribution that has all kinds of partition management and drive erasing tools. This tool costs $11, but you get access to it forever, whenever you need it, and it's one of the best ways to securely erase an SSD.
Parted Magic is a bootable Linux environment, which means you install it onto a USB and boot from there. Here's a quick list of exactly what you need to do:
- Download Parted Magic and create a mountable USB drive using Unetbootin.
- Boot the drive and select option 1, Default Settings .
- After booting, go to Start (bottom-left) > System Tools > Erase Disk .
- Select the option Internal:Secure Erase command writes zeroes to entire data area , then confirm the drive you want to erase on the next screen.
- If you are told that the drive is "frozen", you will need to click the Sleep button and repeat this process until you can continue. If your drive requires a password, set the password as "NULL".
- Confirm that you have read and understand the risks, then click Yes to erase your drive.
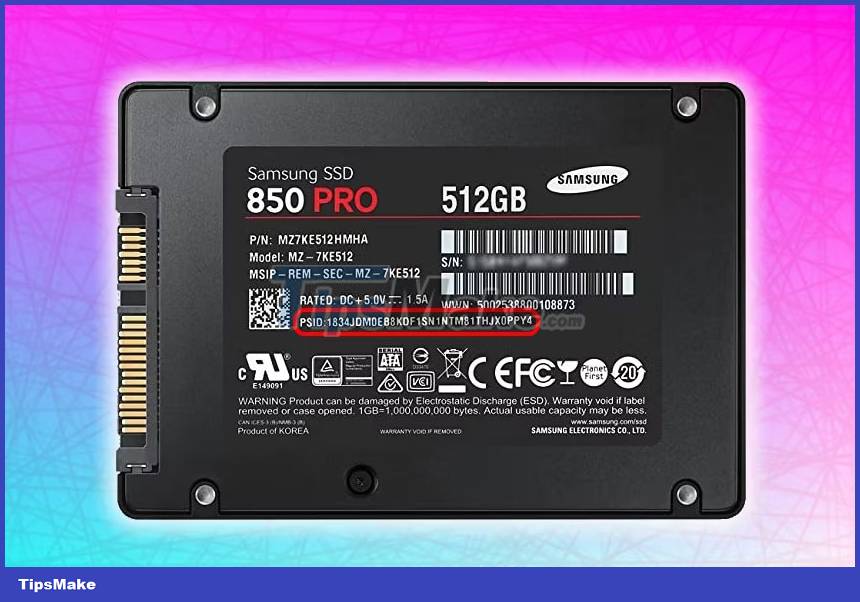
Securely erase an SSD using PSID Revert
There is a third method to securely erase an SSD. Physical Security ID (PSID) Revert will effectively erase the contents of the SSD cryptographically, then reset it to the erased state. However, this method only works if you cannot securely erase the drive due to full disk encryption.

PSID Revert will wipe the entire drive. This process also works if the drive is hardware encrypted but not encrypted with third-party software. Find out if your drive supports PSID Revert by searching the Internet for "[your drive name] PSID Revert".
Secure SSD Erase for Mac Users
Attempting to start Parted Magic on a Mac can cause some problems.
Problems related to the method you use to create the Parted Magic USB boot. Some burning programs work fine, while other options never seem to work.
A post on the Apple Stack Exchange forum provides details on how to start Parted Magic on a Mac, along with some helpful images. You should also check out the tutorial on how to create a bootable USB for your Mac - but remember, it might be a little different in your case!
Other forum posts advise that if you're having problems with an SSD on your Mac and it's still under warranty, you should let Apple take a look.