How to run Chrome OS from USB
If you want to buy a Chromebook just because you're eager to experience the features of Google's Chrome OS, there's really no need. In fact, you only need one desktop and one USB so you can experience this operating system already.
Until now, Google has not officially provided a trial version of the operating system, but developers have found a way to help you experience an unofficial open source version called Chromium. This method works well whether you use Windows, macOS or Linux. Besides, you will not be overwritten with your current operating system.
- 10 tips and tools for new Chromebook users
- Do you know how to run Windows applications on Chromebooks?
- Experience Chromium OS on virtual machines
The tools you need to prepare before you start
- An active computer has a USB port.
- A USB with a minimum capacity of 4 GB.
- 7-Zip decompression software for Windows, Keka for Mac and p7zip for Linux.
- Etcher image burner for Windows, macOS or Linux.
Note: Data in USB will be completely erased during installation. If you have any important data in the USB, save it somewhere else.
Step 1: Download the latest version of Chromium OS
Google does not yet have the official Chromium OS, so the best alternative is Arnold The Bat.
Link to download the latest Chromium OS.

Step 2: Extract Zip file
It's time to use the 7-Zip file on your hard drive. Unzip this file with the 7-Zip applications mentioned above.

Step 3: Format the USB drive
Plug the USB into the computer and format it as FAT32. This is the simplest process on Windows, for macOS and Linux it is not difficult to implement.
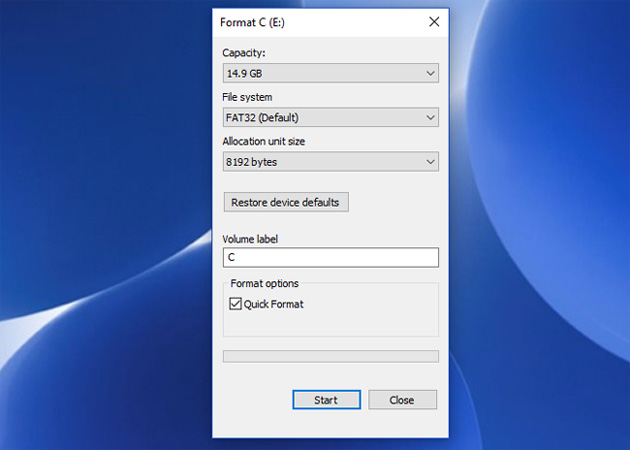
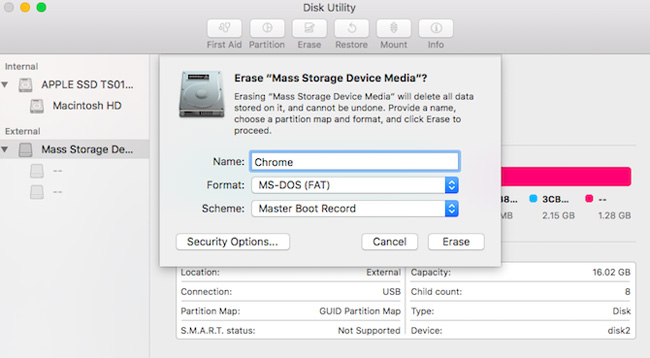
MacOS's built-in Disk Utility can format USB in FAT32 format. If you see it as MS-DOS FAT, don't worry, these two formats are similar.
If the methods for Windows or Mac make you confused, you can use the official Card Formater app of the Distributors Association (SD Association).
Download the SD Card Formater application for Windows or for Mac (for free).
For Linux users, we recommend using the GParted application.
Download GParted application for Linux.
For added convenience, when asked to name a new drive, name it "Chrome".
Step 4: Download and install Etcher
There are many software tools to install files to external drives, but we find that Etcher is the best of them. This is a cross-platform application, meaning that it works the same way on Windows, macOS or any Linux distro. Most importantly, it confirms the burning process, ie when creating the file on the USB, it will verify everything is correct.
Download Etcher for Windows, Mac and Linux.
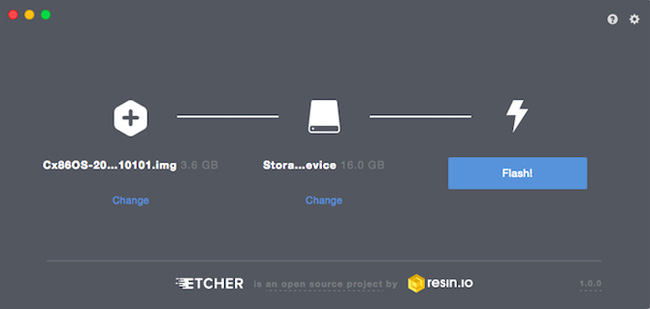
Step 5: Run Etcher and install the file
You should now have a fully formatted USB drive, named "Chrome", plugged into a computer port (as in step 3). You will also have the unzipped image file of the latest Chromium OS (like step 1 and step 2). Besides, you also have Etcher installed on your computer (as shown in step 4). Start using Etcher.
- Click Select Image and browse to where the Chromium OS image file is located. Add it in Etcher.
- Click Select Drive and select the Chrome USB Drive you created.
- Click Flash to start the image installation process and confirm the installation.
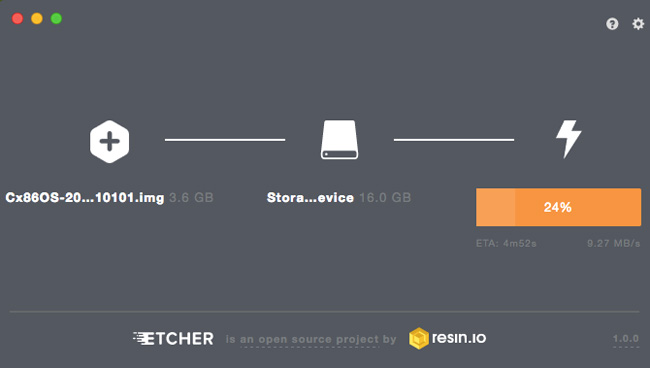
When Etcher is complete, this will be the USB drive that starts with Chomium OS.
Step 6: Restart your computer and click the boot options
"Boot" is the process of selecting an operating system. Each computer allows you to select the drive to boot the operating system, whether it's a hard drive, a USB drive or even a DVD drive.
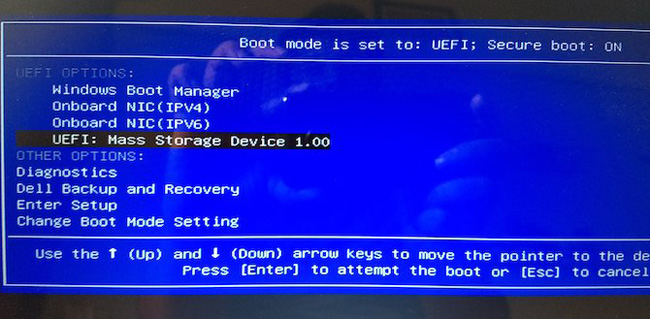
For Windows or Linux computers: Different computers have different BIOS settings. Boot menu option has shortcuts F5, F8 or F12. If you are not sure, you can enter the PC BIOS settings.
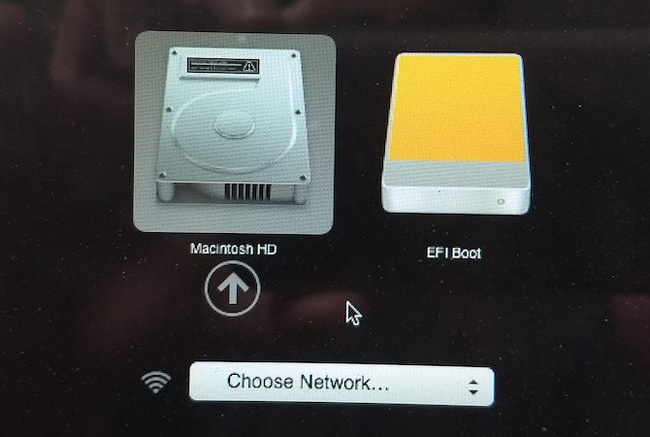
For Mac : As soon as the Mac turns off and restarts, hold down the Option key. Continue holding that key until you see the boot menu, allowing you to choose between the Macintosh and USB hard drive you plugged in (usually marked as EFI).
Step 7: Boot into Chrome OS
Select the USB drive in the boot menu, press Enter. Your computer will boot from the drive. You are the quintessential experience of the Chrome operating system without affecting the hard drive and the main operating system.

This setting will only happen during the first boot. Whenever you want to run this operating system, it will direct you to the login screen.
Conclude
The idea of running an operating system from USB has many advantages. After all, you can turn any operating system into your own, just one computer and USB without affecting the main operating system.
If you want to use Chrome OS on your computer, immediately follow the steps above!