Table of Contents
In Google Sheets, an individual cell cannot have a width or height that differs from the rest of its column or row. To resize “cells,” change the column width, the row height, or both. You can drag a boundary, enter an exact pixel size, or use Fit to data.
Automatically fit a column to its contents
Move the pointer to the right boundary of a column letter until it becomes a horizontal double arrow.
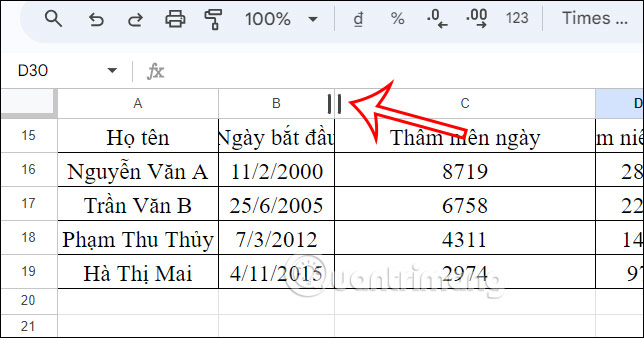
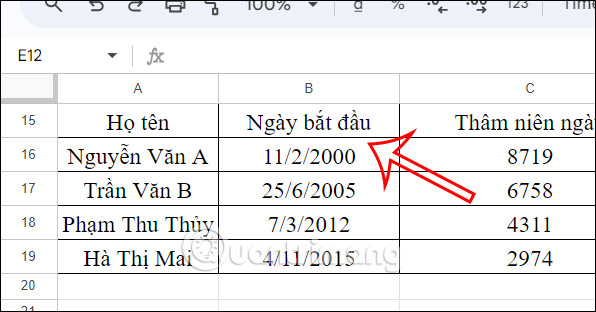
Double-click the boundary. Sheets adjusts the column to fit the widest displayed value in that column.
To fit several columns, select their column letters first. Drag across adjacent headers, or hold Ctrl on Windows/ChromeOS or Command on a Mac to select nonadjacent columns.
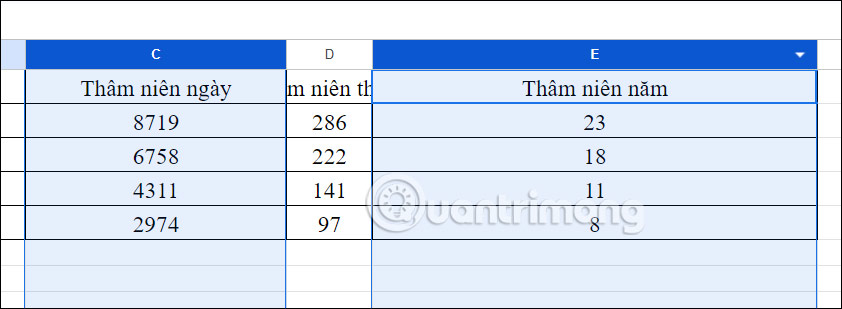
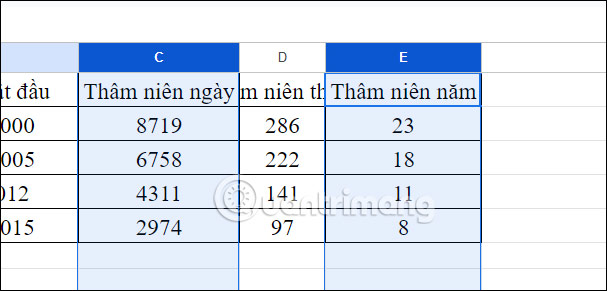
Double-click a boundary within the selected headers. Each selected column is fitted to its own content; they do not necessarily become the same width.
Use the Resize columns dialog
Step 1: Select one or more column letters, right-click a selected header, and choose Resize column or Resize columns.

Step 2: Choose Fit to data for automatic sizing, or enter a width in pixels when the layout needs a consistent measurement. Confirm with OK.

For a quick manual adjustment, drag the header boundary instead of opening the dialog. Dragging with multiple columns selected usually gives the selected columns the same width.
Fit row height to its data
Select one or more row numbers, right-click a selected row, and choose Resize row or Resize rows.
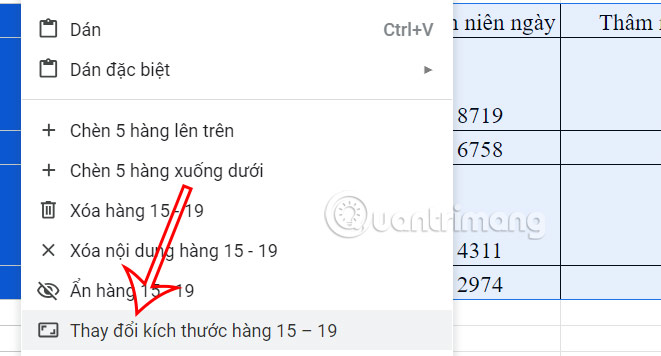
Choose Fit to data and confirm. You can also enter an exact height in pixels.
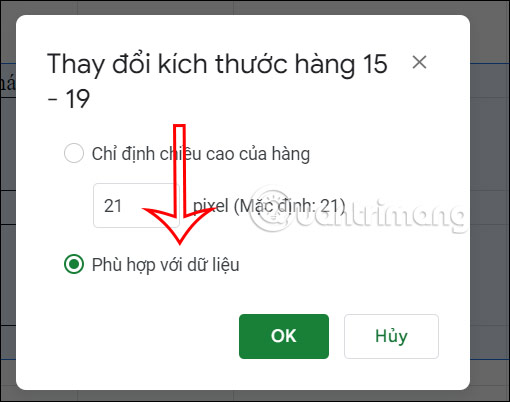
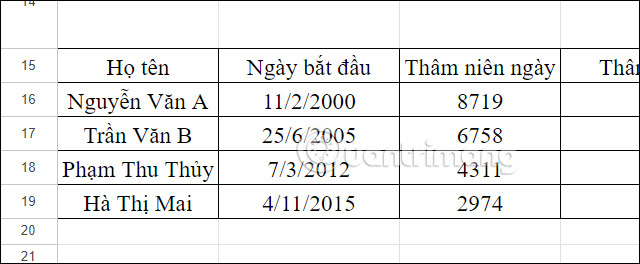
The selected rows expand or contract according to their displayed contents.
Fix text that is clipped or spills into another cell
- Wrap: select the cells and choose Format > Wrapping > Wrap. Then fit the row height so all lines are visible.
- Clip: choose Clip when text should remain hidden beyond the cell boundary without widening the column.
- Overflow: text can flow into an empty neighboring cell, but it is hidden when that cell contains data.
- Merged cells: automatic fitting can be inconsistent around merged ranges. Set the affected width or height manually when possible.
Resize the whole sheet
Click the blank rectangle above row 1 and to the left of column A to select the entire sheet. You can then set a common row height or column width. Use this carefully: a very long value in one cell can make Fit to data produce an impractically wide column.
On the Google Sheets mobile app, precise resizing options can be more limited. Select a row or column header and open its menu, or use the desktop web interface when you need exact pixel dimensions or many nonadjacent selections.
Related Articles
 Instructions for Coloring Cells and Text in Google Sheets4 minutes read
 How to Fix Text Overflow in Google Sheets3 minutes read
 How to Resize Columns and Rows in Google Sheets6 minutes read
 Merge Google Sheets: How to Merge Cells in Google Sheets4 minutes read
 How to Cross Out Cells in Google Sheets3 minutes read
 Familiarize Yourself with Spreadsheets, Rows, Columns, and Cells11 minutes read
Reader Comments 0
Sign in with email or Google to join the discussion.