How to record Windows 11 screen with sound (AutoRecovered)
Windows 11 screen recording with sound is an effective way to record tutorials, lectures or videos to share on social networks. The following article from Software Tips will guide you on how to record screen with sound on Windows 11 simply and easily..
Windows 11 screen recording with sound is an effective way to record tutorials, lectures or videos to share on social networks. The following article from Software Tips will guide you on how to record screen with sound on Windows 11 simply and easily.
1. How to record Windows 11 screen with sound without installing additional software
On Windows 11 operating system, the system is integrated with the Xbox Game Bar tool with a series of unique features for users. The biggest plus point of Xbox Game Bar is the feature of taking screenshots, recording the computer screen quickly and simply. In particular, Xbox Game Bar allows users to record the screen connected to a Webcam Microphone, Headphone Microphone. quickly to be able to record sound. To view the Windows 11 screen with sound through Xbox Game Bar, do the following:
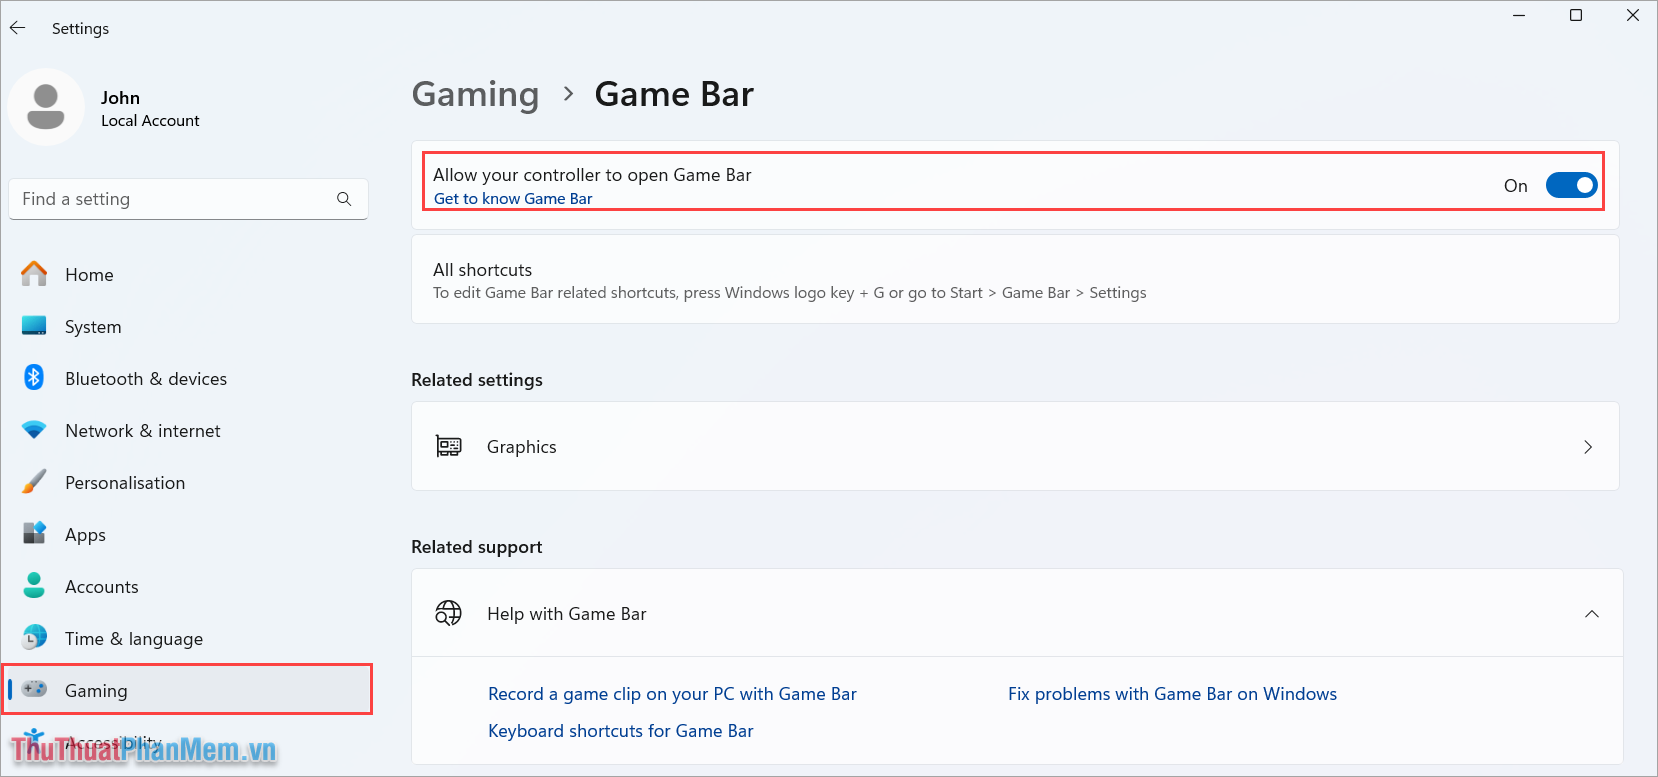
Step 1 : Go to Settings, select Gaming → Gaming Bar → Allow your controller to open Game Bar .
When you enable this feature, Game Bar will always be active on your Windows computer allowing you to quickly record your screen.
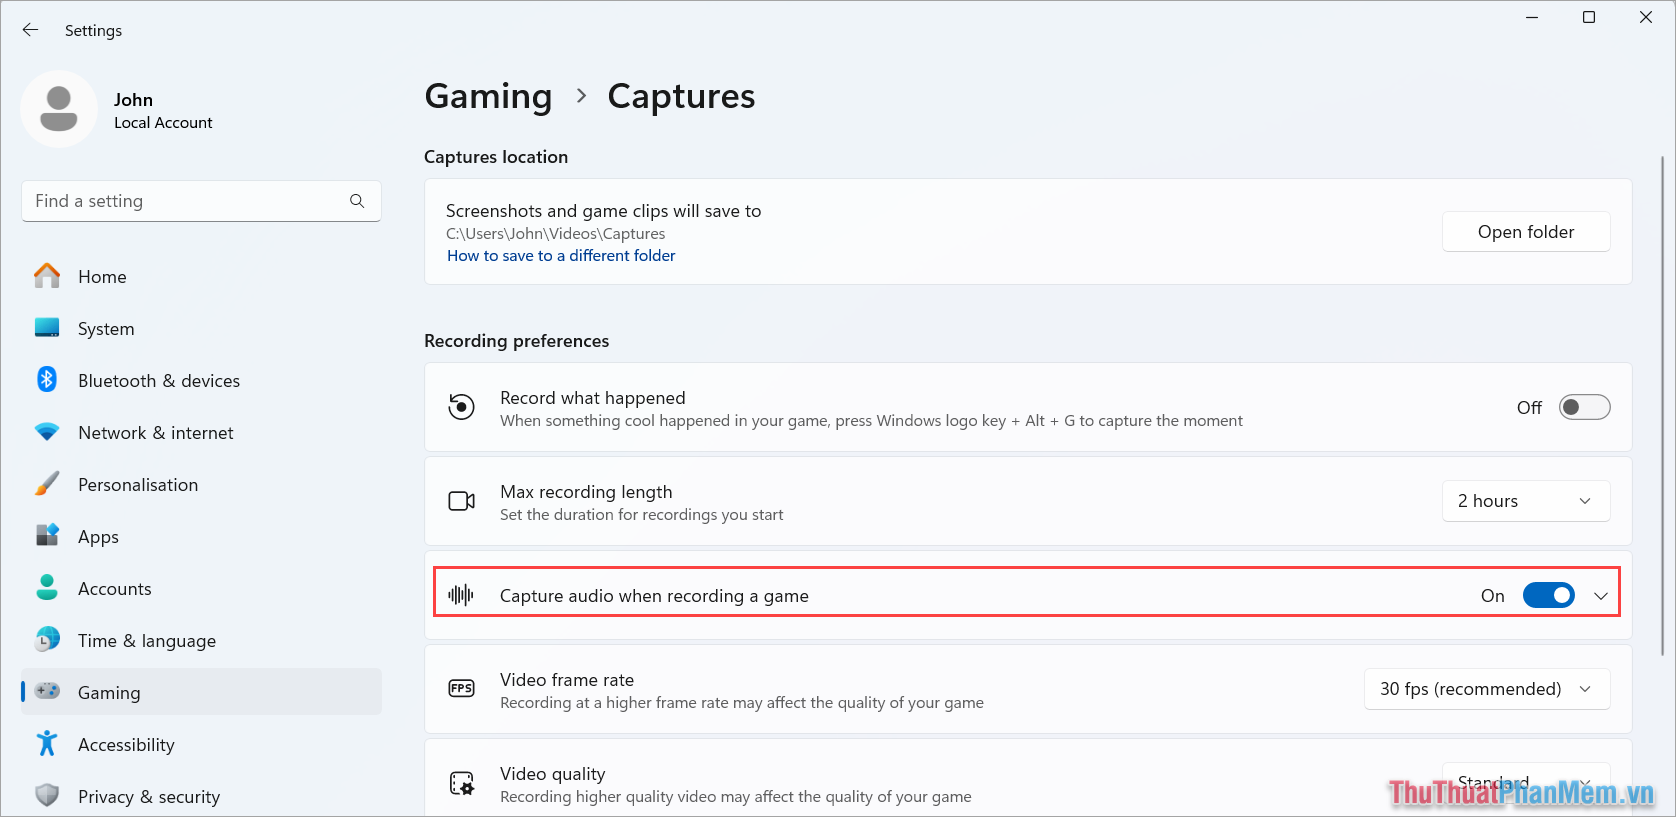
Step 2 : Next, select Gaming → Captures and enable Capture audio when recording a game .
This feature allows you to record screen with audio on Windows 11.
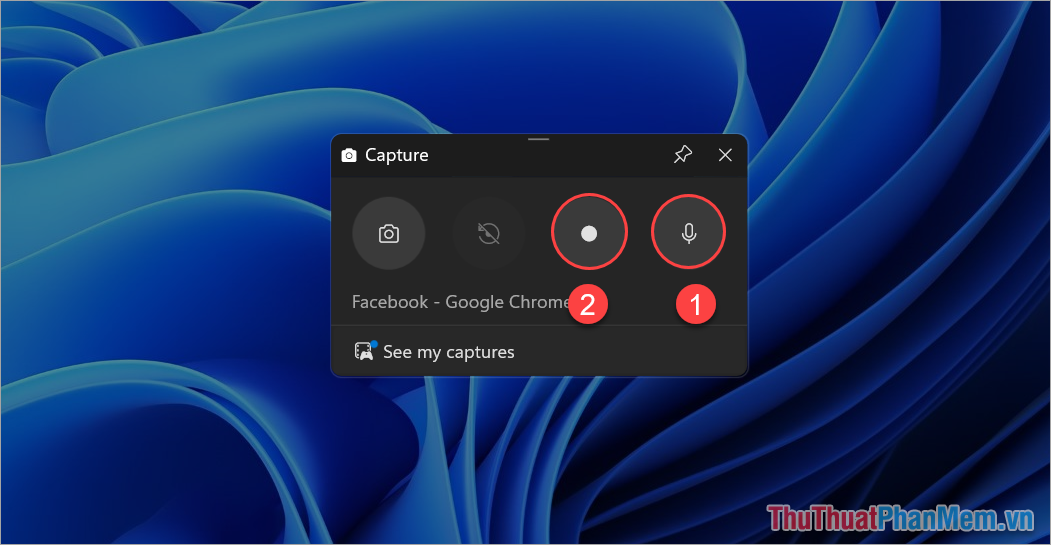
Step 3 : To open Xbox Gaming on Windows 11, press the Windows + G key combination . The screen will display new settings for the Gaming Box.
Here you will have the following options:
- Microphone : Turn on/off microphone to record sound, record screen with sound
- Recording : Start recording Windows 11 screen
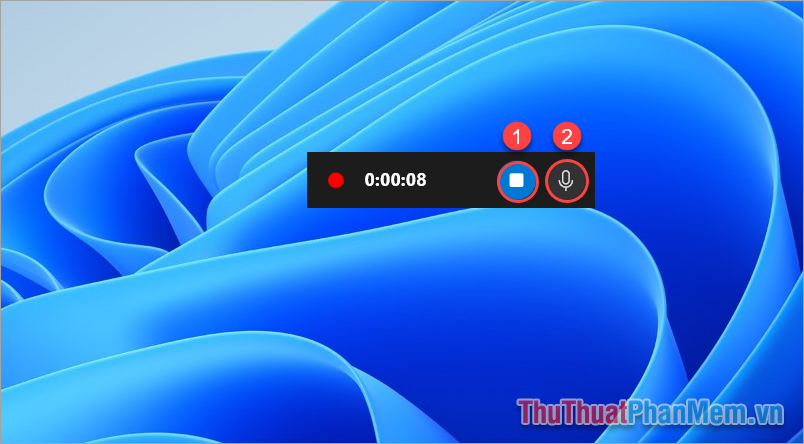
Step 4 : During the recording process on Win 11 computer, users have additional options as follows.
- Stop : Stop recording Win 11 screen
- Microphone : Turn on/off Microphone to record sound during Windows 11 screen recording
When you want to end the screen recording process, select Stop to end.
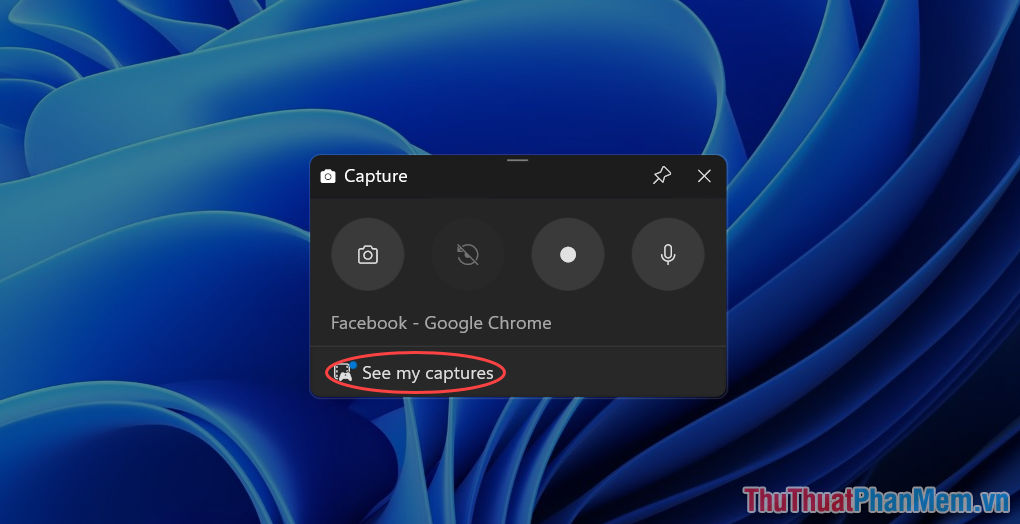
Step 5 : To review the screen recording content on Xbox Gaming Bar. Press Windows + G to open Xbox Gaming Bar and select See my captures to view the screen recordings.
2. How to record Windows 11 screen with sound using Bandicam
Bandicam is a famous screen recording software on Windows computers and is currently used by many people. Bandicam software is highly appreciated for high-quality screen recording, with sound, recording with microphone on headphones, webcam. In general, Bandicam software is the top choice for those who need to record screen with sound on Windows 11.
Step 1 : Visit the Bandicam homepage to download and install the software on your computer.

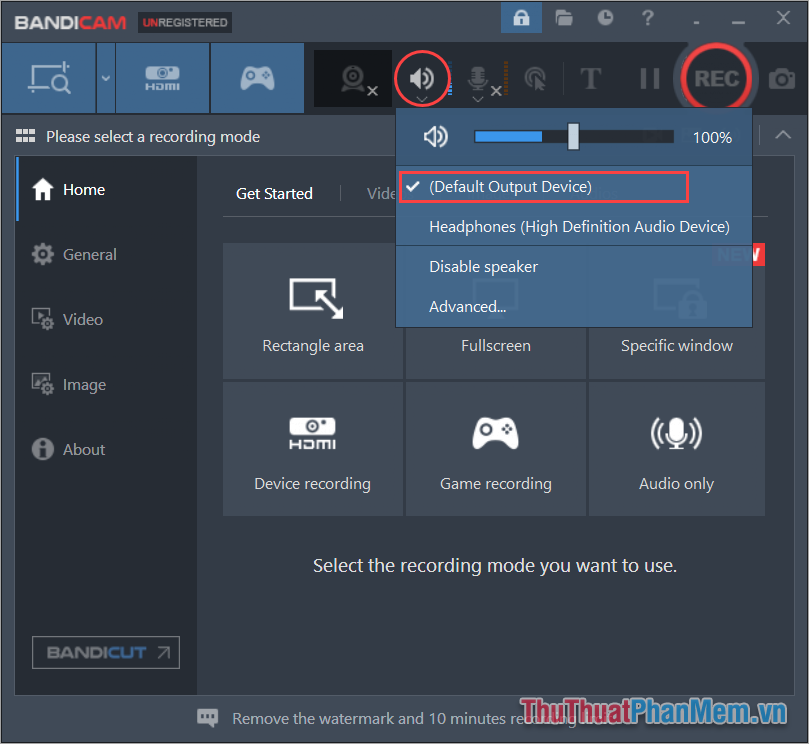
Step 2 : In the main interface of Bandicam, select the Sound icon and select Default Output Device to record all sounds on the computer.
Besides, if you need to combine both Microphone and Webcam recording, select the Microphone icon next to it to activate.
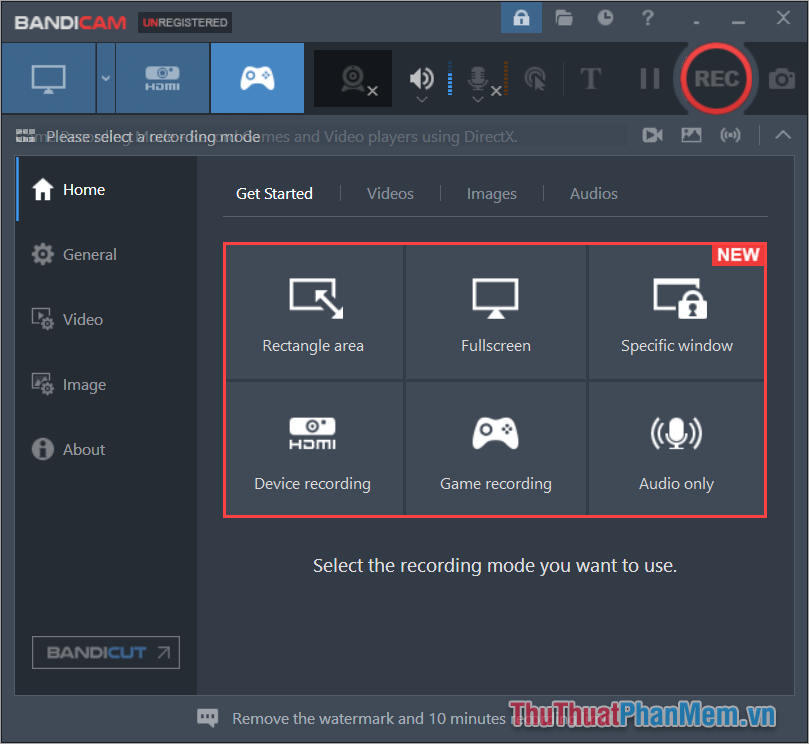
Step 3 : Next, you choose the screen recording mode on Windows 11 computer, the popular modes are as follows.
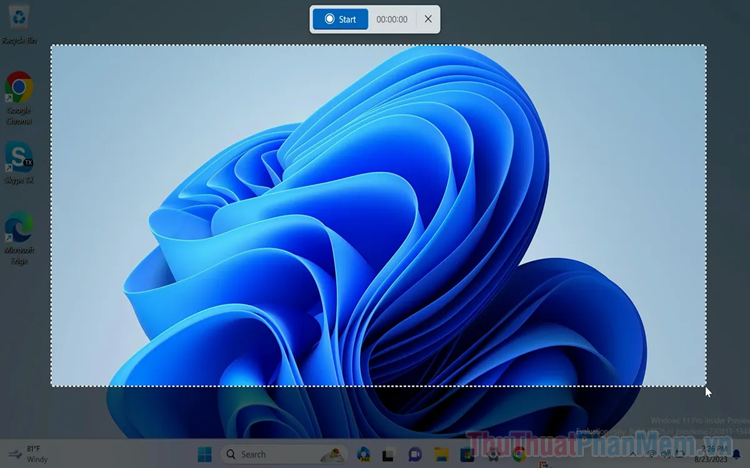
- Rectangle Area : Create custom screen recording area
- FullScreen : Create a recording area of the entire computer screen
- Specific Windows : Screen recording according to software window
- Gaming Recording : Record Game Screen
- Audio Only : Record screen with only audio
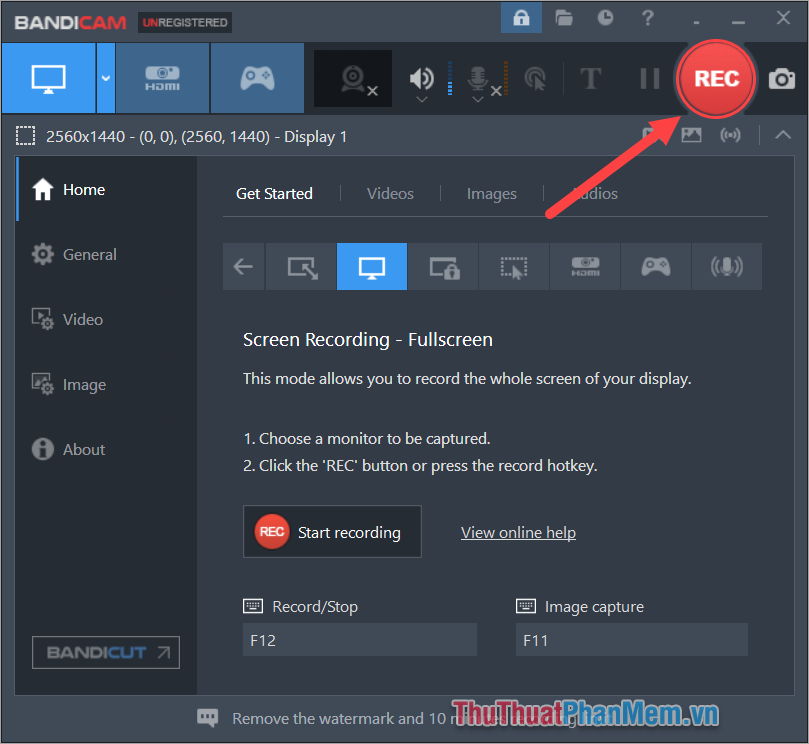
Step 4 : To record Windows 11 screen, press REC to start recording the screen with sound on the computer.
In this article, Software Tips has shared with you how to record Windows 11 screen with sound quickly and simply. Have a nice day!