Table of Contents
You can record an iPhone screen without installing an app. Add Screen Recording to Control Center, tap the record button, and wait for the three-second countdown. The recording is saved in Photos. To include your voice or nearby sound, turn on the microphone before you start.
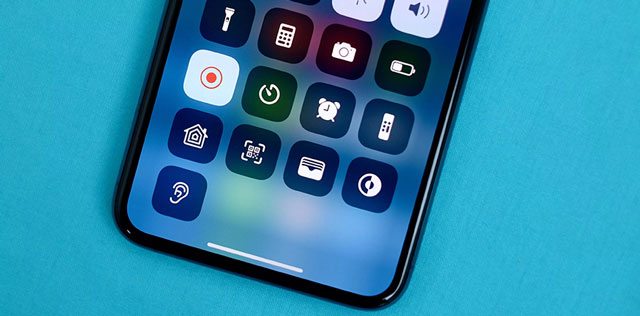
Add Screen Recording to Control Center
Open Control Center by swiping down from the top-right corner on an iPhone with Face ID, or up from the bottom edge on an older model with a Home button.
- Touch and hold an empty area in Control Center, then tap Add a Control.
- Select Screen Recording from the controls gallery.
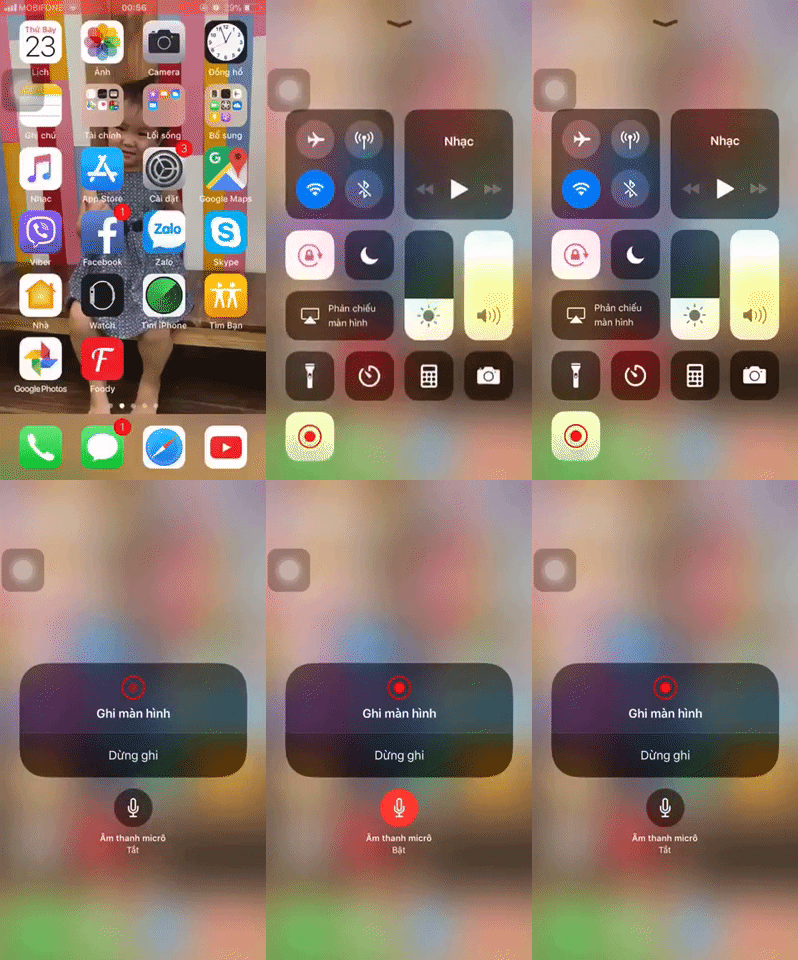
On an older iOS release, use Settings > Control Center and tap the plus sign beside Screen Recording. The screens below show that earlier layout; the control itself is still the circle-within-a-circle icon.
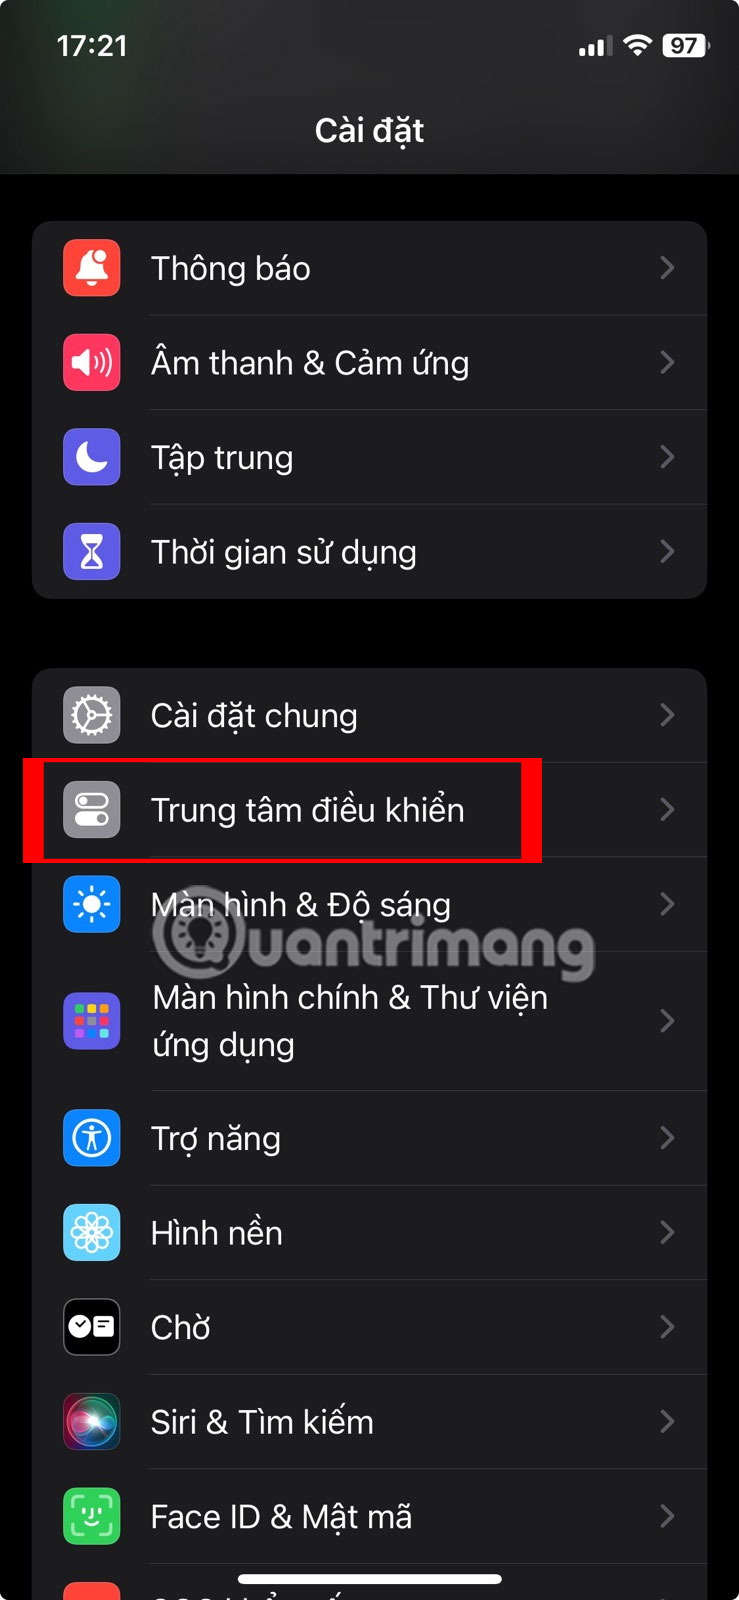
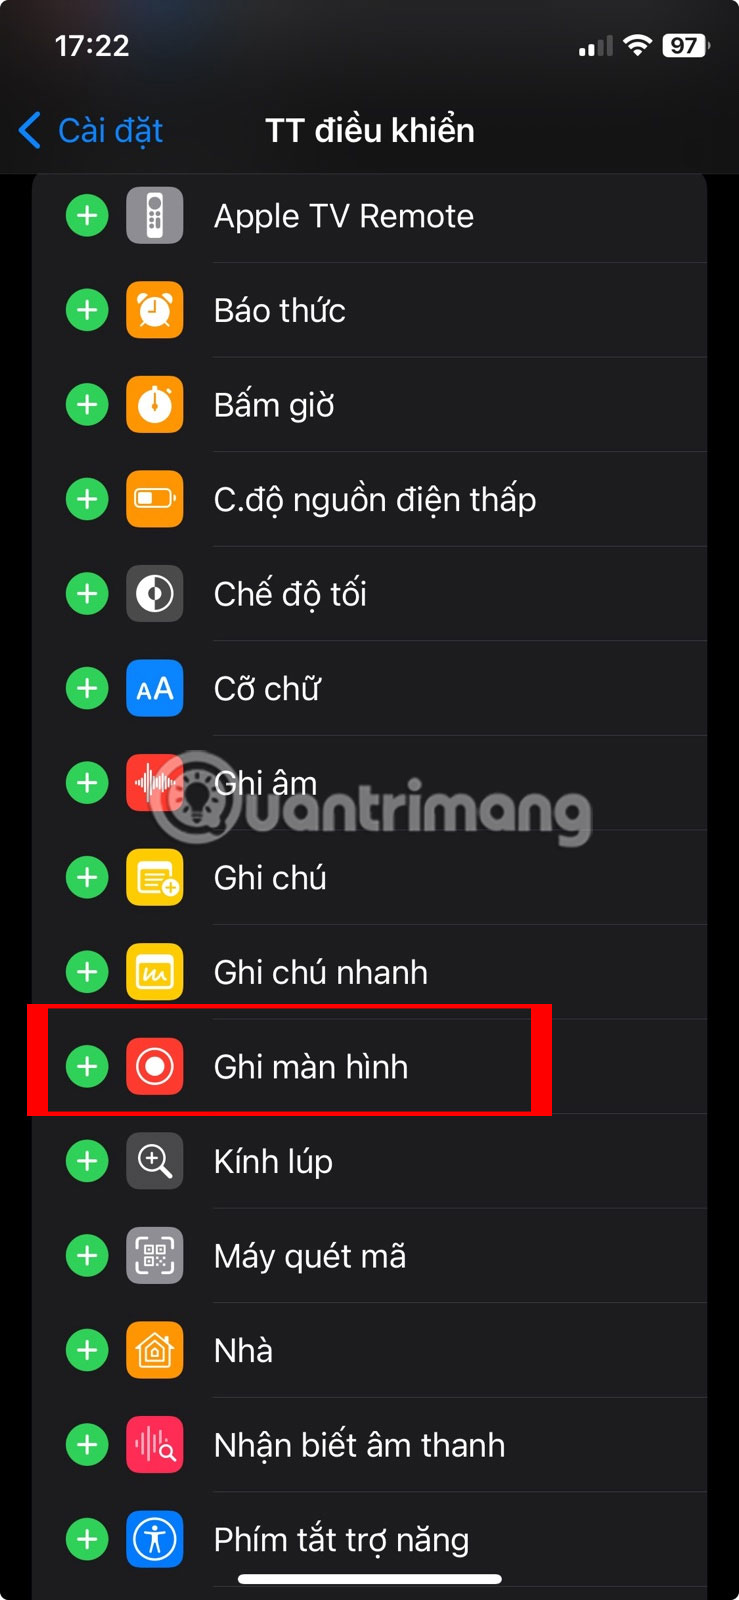
Record the screen with app audio
- Open Control Center and tap the Screen Recording button.
- After the three-second countdown, leave Control Center and perform the actions you want to capture.
- To stop, tap the red recording indicator at the top of the screen and confirm, or open Control Center and tap the Screen Recording button again.
- Open Photos to view, trim, or share the recording.
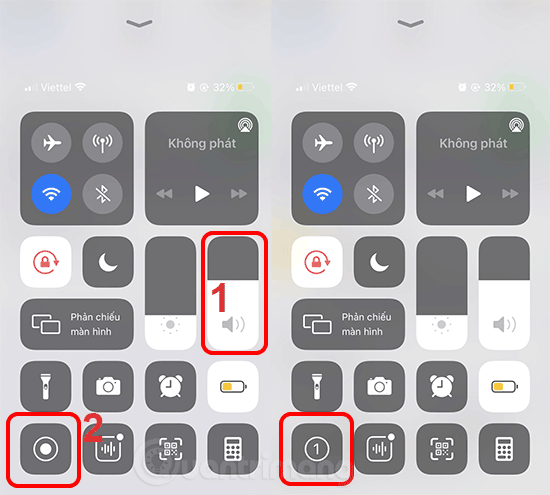
Supported app audio is captured automatically. An app may block audio or video recording for privacy, copyright, or security reasons, so a silent or black result does not always indicate an iPhone fault.
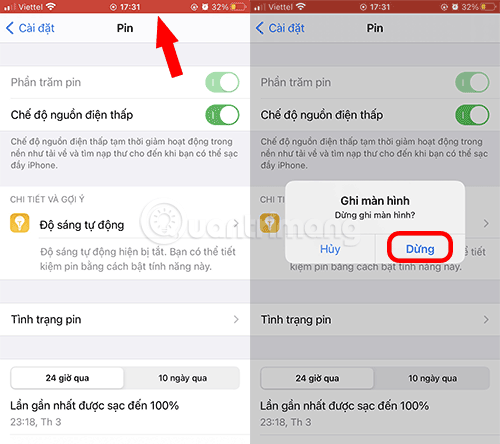
Record your voice with the microphone
- Open Control Center.
- Touch and hold the Screen Recording button.
- Tap Microphone so it shows as on, then tap Start Recording.
The microphone captures your voice and surrounding sound. For a cleaner narration, move to a quiet room and keep the phone a consistent distance from you. Use headphones if sound from the iPhone speakers is feeding back into the microphone.
Why a screen recording has no sound
- The microphone was off: Touch and hold the recording control and enable Microphone when you need narration.
- The app restricts capture: Some streaming, calling, and protected-content apps limit recording. Their behavior can change, and a third-party recorder generally cannot bypass an iOS restriction.
- Silent mode or app volume: Check the app's own sound controls and play a short test before recording something important.
- Another feature is using the microphone: Close calling or recording apps, then try again.
Recording calls and private content
Do not assume that a FaceTime or other video call will be captured with both sides of the conversation. Apps and regions handle call recording differently, and iOS may omit call audio. Get every participant's permission before recording; consent requirements vary by location.
Where recordings are saved and how to edit them
Recordings appear in the Photos app. Open a recording and tap Edit to trim unwanted time from the beginning or end. For captions, multiple clips, or more detailed edits, see these video-editing apps for iPhone or the practical guide to editing videos with CapCut.
If the control is missing or the menu looks different, follow Apple's current iPhone screen-recording instructions for your installed iOS version.
Related Articles
 How to Record the Screen with External Audio on iOS3 minutes read
 How to Record iPhone Screen Video, How to Record iPhone5 minutes read
 iPhone Screen X: Size and Special Features11 minutes read
 The Easiest Way to Record Audio on a Computer3 minutes read
 There Is a Super Easy Way to Record Calls on IPhone in 20245 minutes read
 How to Record Audio on Windows 11: Clear Instructions6 minutes read
Reader Comments 0
Sign in with email or Google to join the discussion.