How to Print in Office 2007
Part 1 of 5:
Printing in Any Office Program
-
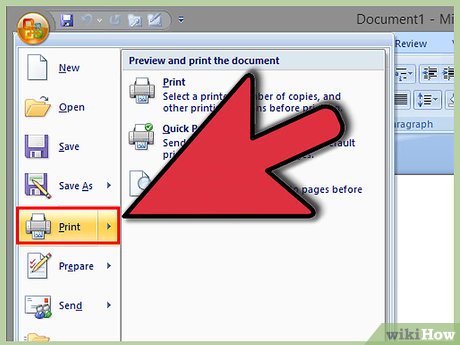
 Open the Print window by clicking the Office button and selecting "Print". You can also press Ctrl+P to quickly open this window.
 -
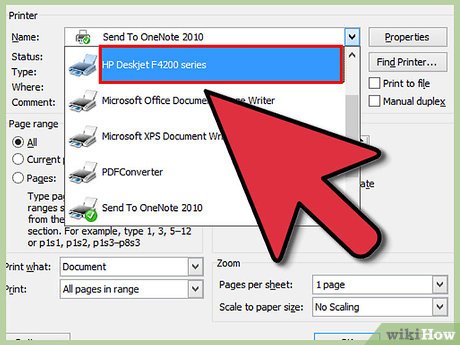
 Select the printer that you want to print to from the drop-down menu. If you don't see the printer that you want, click here.
 -
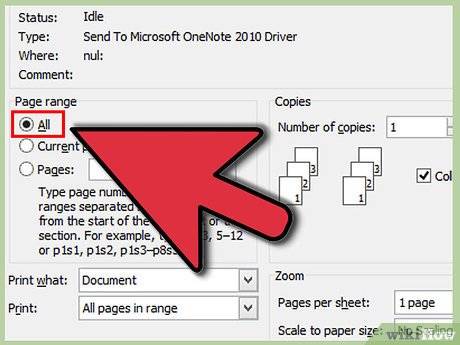
 Select the range of pages you want to print. You can select specific pages, the current page, or print your entire document.
- You can also print multiple copies of your document, as well as collate while printing. This ensures that the pages print in correct order for stapling.
-
 Click the .Properties button to open your printer's Properties window. You can adjust a variety of settings here, but every printer will be different.
- The Printer Properties window is unique to your printer model. You can adjust settings like the print quality and speed, paper source (if your printer has multiple trays), color settings, duplex (double-sided) and simplex, maintenance and more. The options available depend on your printer.
- This is the same window that appears if you open the Properties window from the printer's Control Panel entry.
-
 Click OK after selecting your print options. Your document will be sent to the printer that you selected.
Part 2 of 5:
Word Printing Tips
-
 Use the Print Preview tool to preview your document. The Print preview tool allows you to see how the document will look on the page, and it can help ensure that your document comes out looking perfect.
- Click the Office button and then click the ▶ button next to "Print". This will show additional printing options.
-
 Use the controls in the Page Setup group to change how the content looks on the page. You can adjust the orientation, change the paper size, and adjust your margins.
 -
 Use the Zoom tools to change your view. You can click the "Zoom" button to change how zoomed in you are on the print preview. This can be helpful for finding small inconsistencies, or for looking at the document as a whole. If you're using Word, you can choose between a single page displayed at a time, or two pages side-by-side.
 -
 Uncheck the "Magnifier" box to edit the document. Normally in Print Preview, clicking the mouse will zoom in and out of the preview. Unchecking the "Magnifier" box in the Preview group will allow you to click in the document and make changes.
 -
 Use the "Mailings" tab to print envelopes and labels. If your printer supports envelopes and label paper, you can use Word to create and print them. The "Mailing" tab contains the tools for both.
- Click the "Envelopes" or "Labels" button to start creating.
- Enter the information into the fields for your envelope or label. You can click the Address Book button to load in contacts from Outlook or other supported programs.
- Click the preview of your envelope or label to open the options. This will allow you to choose your envelope size or label type, how the envelope is fed through the printer, and more.
- Click the Print button to begin printing the envelope or label
- See this guide for detailed instructions on printing envelopes and labels in Word.
Part 3 of 5:
Excel Printing Tips
-
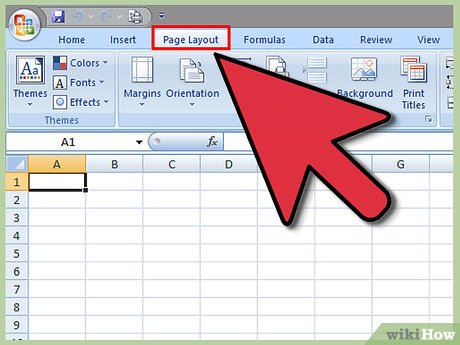
 Format your data so that it is easy to read and professional looking. You can use the "Page Layout" tab to help set up your spreadsheet for printing. There are several aspects you'll want to look at before sending your spreadsheet to the printer.[1]
- Make sure that all of the data in your cells is readable. You can drag the bars between the column and row labels to adjust the column or row size.
- Add headers to your page by opening the "View" tab and clicking the "Page Layout" button. You can select the Header and Footer boxes that appear and add the text you want.
- Avoid overuse of colors in your spreadsheet. Colors that look good on the screen don't always translate well to printed pages, especially if you print in black-and-white. For the best results, keep additional colors and formatting to a minimum.
-
 Adjust your page breaks. If you're printing a large spreadsheet, it likely won't all fit on one page. You can manually set where the page breaks occur so that the pages show exactly the data you want.[2]
- Click the "View" tab and then click the "Page Break Preview" button. You'll see dashed and solid lines appear on the spreadsheet, as well as page numbers in the background. Dashed lines are automatically-generated page breaks, while solid lines are page breaks that you have manually inserted.
- Click and drag the lines to adjust the page breaks.
- You can insert new page breaks from the "Page Layout" tab by clicking the "Breaks" button.
-
 Select multiple worksheets to print at once. If your spreadsheet has multiple tabs, you can select them so that you can print more than one at a time.[3]
- Hold Ctrl and click each of the tabs that you want to select.
- Proceed to print as you usually would. All of the selected tabs will be included in the print job.
- You can use this function to apply changes to multiple sheets at once, such as headers and footers.
-
 Add gridlines to your printed spreadsheet. By default, Excel won't print the cell borders for your spreadsheet. You can change this in the "Page Setup" window.
- Click the Office button and select "Print" → "Print Preview". Click the "Page Setup" button.
- Click the Sheet tab and check the "Gridlines" box. Click OK to save the changes.
-
 Set a print area. If you just need to print a small section of your spreadsheet, you can convert it to a printable area. This allow you to make formatting changes that will just affect the print area without affecting the rest of the document.
- Select the cells that you want to print by clicking and dragging your mouse.
- Open the "Page Layout" tab and then click the "Print Area" button.
- Click "Set Print Area". Your selecting will now become the active part of your spreadsheet, allowing you to add headers and footers and adjust formatting.
-
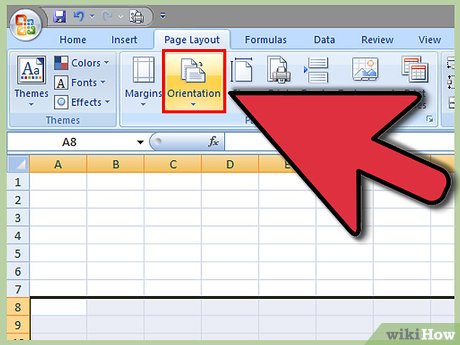
 Change the orientation. Oftentimes, spreadsheets will look better if they are printed in landscape orientation instead of portrait. Choosing the right orientation for your spreadsheet will make a big difference in the readability of your data.
- Click the "Page Layout" tab.
- Click the "Orientation" button and select either "Portrait" or "Landscape".
- Click the "Page Layout" button in the "View" tab to see how the spreadsheet will look.
Part 4 of 5:
Creating a PDF
-
 Download the "Save as PDF or XPS" add-in for Office 2007. You can save your documents as PDF files, which preserve the formatting of your file and can be viewed on any operating system. In order to do this, you'll need the official add-in for Office 2007.
- You can download the add-in here. Run the SaveAsPDFandXPS.exe file after it finishes downloading to install the add-in. Close any Office windows before installing the add-in.
-
 Open the document you want to save as a PDF and click the Office button.
 -
 Select "Publish/Save as" → "PDF or XPS". In the "Save as type" menu, select "PDF".
 -
 Adjust the PDF settings by clicking the Options... button. You can choose to just save certain pages or your current selection, or you can save the entire document. By default, it will save everything as PDF.[4]
Part 5 of 5:
Troubleshooting
-
 My printer is not appearing in the list of available printers. There are several reasons why your printer may not be appearing.
- Make sure that the printer is powered on and connected to the network if it is a network printer.
- Try restarting the printer. If it still doesn't appear, try restarting the computer.
- Reinstall your printer if it is still not appearing. If you're still not able to see your printer, you may need to reinstall it. Click here for detailed instructions.
-
 Word is not printing any background colors or images. You may need to manually enable this setting in Word if your backgrounds or images aren't getting sent with the document.[5]
- Open the "Print" window (Ctrl+P) and click the Options... button.
- Find the "Printing options" section of the window that appears.
- Check the "Print background colors and images" box. Check "Print drawings created in Word" as well.
-
 Word cannot print my document, or any new documents that I create. If your document won't print, there's likely something wrong with your template file.[6]
- Click the Start menu and type "normal.dotm". If you're using Windows Xp, select "Search" first.
- Rename all "normal.dotm" files to "normal.old". When you create a new blank document, a new Normal template will be created.
- Copy and paste the contents from your old document into a new blank document. You should be able to print from this new document.
Share by
Samuel Daniel
Update 05 March 2020
