Table of Contents
This updated guide examines Display: How to Make a Self‐writing Mosaic Program in Python and organizes the essential facts, background, and practical takeaways in clear American English.
Part 1
Downloading the Photo
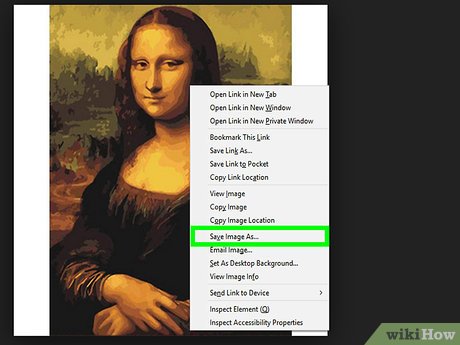 Download the Mona Lisa Photo.This is the base picture you will be using to create your mosaic. Note the picture's dimensions in pixels as this will be important for your code later.
- Save it as "mona.jpg"
- The image is743px by 1155px.Ensure sure the it saves as this size or else the mosaic will not be drawn properly.
Part 2
Creating the Main Program
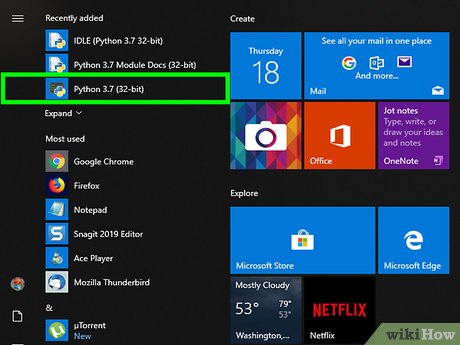 Open a new Python shell.Name the file "makeMona.py"; this file name is for your own reference.
 Import your modules.For this program, you'll need the Pygame module to display your image and the Math module to perform your adding functionality.
frompygameimport*#Import Pygamefrommathimport*#Import Math
 Set up display and image.Before you can start mapping the image, you must create the display screen that the image will appear on and load in Mona Lisa.
- display.set_mode((743,1155))is how you set your display. (743,1155) represents the screen size; note that it is the exact same size as your Mona Lisa image in pixels.
screen=display.set_mode((743,1155))#Set your display sizem=image.load("mona.jpg")#Assign a variable name to your base image and load itscreen.blit(m,(0,0))#Blit your image m into the top right corner
 Create a file for the self-writing program.Within your makeMona program, you will set up thenew file you will be writing to.
- Variablemonis your reference to the mosaic file. Within the quotations, you declare the file name "mona.py". The "w" declares that you will be writing to the new file.
mon=open("mona.py","w")#Create your mosaic file
 Initialize the program.You can now start writing to mona.py. Here you will import your modules and set your display size.
- mon.writesignifies that you are now writing the following code to your new file. Your display size will be the same as the Mona Lisa image.
mon.write("""from pygame import *from math import *screen = display.set_mode((743,1155))""")#To write to mon, you use triple quotes to isolate the desired code
 Display the image in makeMona.py.To confirm that your image was properly loaded into your program, you will display the image onto the screen.
running=True#Tell the program to rundisplay.flip()#Displays the image
 Map the mosaic pattern.You can now start parsing the image into small rectangles to create the mosaic. To get the best mosaic effect without distorting the image, you will map every 5 pixels into a rectangle.
- mon.write("draw.rect(screen,"+c+",("+str(x)+","+str(y)+",4,4))n")is the most important line to note. The breakdown is as follows:
- draw.rect(screen,"+c+",signifies that you will draw your mosaic piece (individual rectangles to your screen, then appending "c" relates tostr(screen.get_at((x,y))), which is how you map the color at each pixel location.
- The "x" and "y" in("+str(x)+","+str(y)represent the location of your rectangle. You usestr()because you need the program to read these x and y values as strings (because you are inside your triple quotes, which is all string formatting).
- The 4,4 in+",4,4))n")represent the dimensions of each rectangle in your mosaic. "n" is your newline character, which tells the program to go to the next line and start writing the next line of code.
forxinrange(0,743,5):#For every 5 pixels in the x direction from 0-743foryinrange(0,1155,5):#For every 5 pixels in the y direction from 0-1155c=str(screen.get_at((x,y)))#Get the pixel color at every x,y pairmon.write("draw.rect(screen,"+c+",("+str(x)+","+str(y)+",4,4))n")#Write your pixel location to mona.py in the shape of a rectanglemon.write("display.flip()n")#Display the image
 Create the while-running loop.As with any Pygame program, you must include your "while running" loop in mona.py.
mon.write("""running = Truewhile running:for evnt in event.get(): # checks all events that happenif evnt.type == QUIT:running = Falsequit()""")#Finally, you write your pygame "while-running" loop, which will allow the graphics module to runmon.close()#Saves and closes mona.py
Part 3
Code Review and Testing
 Review your code.Your main program makeMona.py is now complete. Here is all the code together.
frompygameimport*#Import Pygamefrommathimport*#Import Mathscreen=display.set_mode((743,1155))#Set your display sizem=image.load("mona.jpg")#Assign a variable name to your base image and load itscreen.blit(m,(0,0))#Blit your image m onto the top right cornermon=open("mona.py","w")#Createy your Mosaic filemon.write("""from pygame import *from math import *screen = display.set_mode((743,1155))""")#To write to mon, use triple quotes to isolate the desired coderunning=True#Tell the program to rundisplay.flip()#Displays the imageforxinrange(0,743,5):#For every 5 pixels in the x direction from 0-743foryinrange(0,1155,5):#For every 5 pixels in the y direction from 0-1155c=str(screen.get_at((x,y)))#Get the pixel color at every x,y pairmon.write("draw.rect(screen,"+c+",("+str(x)+","+str(y)+",4,4))n")#Write your pixel location to mona.py in the shape of a rectanglemon.write("display.flip()n")#Display the imagemon.write("""running = Truewhile running:for evnt in event.get(): # checks all events that happenif evnt.type == QUIT:running = Falsequit()""")#Finally, you write your pygame "while-running" loop, which will allow the graphics module to runmon.close()#Saves and closes mona.py
 Open the new mona.py program.If you go to wherever your makeMona program is saved, directly below it you will find your new program file mona.py.
- If you open this file, you will see hundreds of lines of code. Magic! This code is each individual piece of the mosaic. Each line represents a new rectangular piece of Mona Lisa.
- It may take several seconds to open; this is normal because it is such a big file.
 Run mona.py.If everything up to this point is looking good, your last step is to run your program and behold your new Mona Lisa mosaic.
Part 4
Avoiding Common Errors
 Troubleshoot your program.It's easy to make small little mistakes once you're implementing the code for your own mosaic. Here are some common issues people run into and how to resolve them.
- Where is my new program?- After running the main program, the new one should appear in the same file location as the main program.
- My new program isn't running- All code you wrote for the self-writing program is contained in triple quotes. Review all of the code inside of these quotes throughout the program and ensure you didn't miss things like colons, closing brackets/quotes, or indentation formatting.
- Why is the image distorted?- This can be a result of your display size. Ensure that your display size indisplay.set_mode()all throughout your code is the same.
Frequently Asked Questions
What is Display: How to Make a Self‐writing Mosaic Program in Python about?
It provides a structured overview of display, explains the main context, and highlights practical takeaways for readers.
Why does this topic matter?
Understanding the main concepts helps readers evaluate the issue, avoid common mistakes, and make better-informed decisions.
How should readers use this information?
Use the guidance as a practical starting point, confirm details that may have changed, and follow current product, safety, or security recommendations.
Was this article helpful?
Your feedback helps us improve.
Related Articles
 The Rare Ancient Roman Mosaic of the 4th Century Was Discovered in England3 minutes read
 A 1000-year-old Ancient Roman Mosaic Stone in Cyprus4 minutes read
 How to Set Up Python to Program on WSL6 minutes read
 Learn the First Python Program5 minutes read
 How to Install Python Plugin to Be Able to Execute Python5 minutes read
 How to Make a Plagiarism Detector in Python10 minutes read
Reader Comments 0
Sign in with email or Google to join the discussion.