Table of Contents
This updated guide examines How to Set up a Python Environment for Deep Learning and organizes the essential facts, background, and practical takeaways in clear American English.
Part 1
Setting up Anaconda
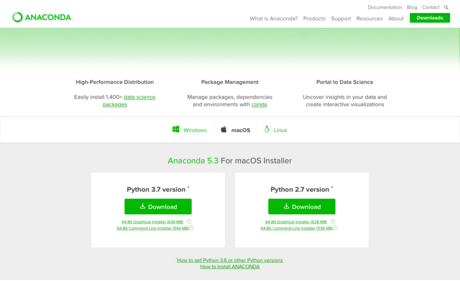 Download Anaconda. Anaconda is a scientific environment designed for Python. It is free and easy to use.
- Visit the Anaconda homepage. On the menu, click 'Anaconda' and then select 'Download' from the drop-down list. This will take you to the download page. Select Python 3.5 and choose the 'Graphic Installer'
- The Anaconda Python package should now be downloaded to your workstation
- Make sure you have administrative rights. Before we start this step, you would need to have sufficient administrative rights to install software on your system. Once confirmed, you can proceed.
- Install Anaconda. Double-click the downloaded file. This should launch the installation wizard. Simply follow the step by step instructions per the wizard. It should be a fairly simple and straightforward process. The installation process should take all of 10 minutes a little over 1 GB space on your hard drive.
- Finish the setup. Here will confirm if your Anaconda Python environment is the up to date version. The Anaconda software comes with a complete suite of graphical tools known as Anaconda Navigator. You can launch Anaconda Navigator via the application launcher. To know more about Anaconda Navigator, you can visit the detailed documentation here. For now, we suggest beginning with the command line for the Anaconda environment known as the conda.
Part 2
Set up Conda
- Make sure Conda is already installed. Conda is a simple, fast and efficient. Error messages can be easily spotted and you can easily confirm if your working environment is installed and working as intended.
- Open a terminal or a command line window. To confirm if conda is installed correctly, type
conda -V // You should see something similar to this conda4.2.9 - To confirm if Python is installed correctly, you can type
python -V
- You should the below line or something similar
Python3.5.2:: Anaconda4.2.0(x86_64)
- Open a terminal or a command line window. To confirm if conda is installed correctly, type
- Update it to the latest version. You may have to install some additional packages to confirm the updates. To confirm that your conda environment is the latest version available, type-
conda update conda conda update anaconda
Part 3
Verify SciPy Environment is working
- Setup SciPy. It is now time to confirm your SciPy environment. The following script prints the version number of the key SciPy libraries required for optimum Machine Learning development. Some basic libraries include – SciPy, Matplotlib, NumPy, Pandas, Scikit-learn and StatsModels.
- Write a Python Script. You can either choose to type 'python' followed by the commands directly. Or you can use a text editor and paste the script below into your editor. We recommend the second option.
# scipyimportscipyprint('scipy:%s'%scipy.__version__)# numpyimportnumpyprint('numpy:%s'%numpy.__version__)# matplotlibimportmatplotlibprint('matplotlib:%s'%matplotlib.__version__)# pandasimportpandasprint('pandas:%s'%pandas.__version__)# statsmodelsimportstatsmodelsprint('statsmodels:%s'%statsmodels.__version__)# scikit-learnimportsklearnprint('sklearn:%s'%sklearn.__version__)
- Run the Python script. Save the script with the file name 'versions.py'. Back on the command line, you can change your directory to the path where you saved the script file. You can then type –
python versions.py# The output should look like thisscipy:0.18.1 numpy:1.11.1 matplotlib:1.5.3 pandas:0.18.1 statsmodels:0.6.1 sklearn:0.17.1
Part 4
Update scikit-learn Library
- Understand what scikit-learn is for. Scikit-learn is the most popular machine library in Python that you can't avoid. Here, we will go the steps to be followed to update the library.
- Update scikit-learn to incorporate the latest available version. A specific library can be updated by way of the conda command line. Below is an example on how to update scikit-learn to the latest version available. Once in the terminal, type -
conda update scikit-learn
- You also have the option of updating a specific library only using –
conda install -c anaconda scikit-learn=0.18.1
- You also have the option of updating a specific library only using –
- Confirm that the installation was successful. To confirm if the installation was successfully completed and scikit-learn was updated, you can re-run the versions.py script –
python versions.py# You should see the following output –scipy:0.18.1 numpy:1.11.3 matplotlib:1.5.3 pandas:0.18.1 statsmodels:0.6.1 sklearn:0.18.1
Part 5
Install Deep Learning Libraries
- Understand your stack requirements. Here, we attempt to install Python libraries that are used for deep learning. Particularly, TensorFlow, Theano and Keras. In this article, we recommend using Keras for deep learning initiatives.[1]XResearch sourceIt is important to note that Keras requires only either Theano or TensorFlow installed in the system.[2]XResearch sourceBoth are no longer needed. Also, some window machines may face problems installing TensorFlow.
- Install Theano. You can install the Theano deep learning library using –
conda install theano
- If you choose to use the TensorFlow deep learning library, you can use the following command (all except Windows) –
conda install -c conda-forge tensorflow
- You can have the choice of completing the installation using pip and a particular version of tensorflow for your platform. To know more, visit installation instructions for tensorflow.
- If you choose to use the TensorFlow deep learning library, you can use the following command (all except Windows) –
- Install Keras. You can install Keras via the command –
pip install keras
- Add additional tools to your stack. You can add additional tools to your deep learning stack for code tracking, automation, and auto-documentation. You can integrate deep learning SDKs and monitoring tools to make it easier for your team.
- Make sure you've installed the right version. Once completed, it is a good idea to confirm that your environment for deep learning is properly installed and working as intended.
- For this you need to create a script which prints the version numbers for each of the libraries, similar to the exercise for the SciPy environment we completed earlier.
# theanoimport theano print('theano: %s'% theano.__version__)# tensorflowimport tensorflow print('tensorflow: %s'% tensorflow.__version__)# kerasimport keras print('keras: %s'% keras.__version__)
- You can save the script as a file named 'deep_versions.py' and then run the script using
-pythondeep_versions.py# You should see the following output -theano:0.8.2.dev-901275534cbfe3fbbe290ce85d1abf8bb9a5b203tensorflow:0.12.1UsingTensorFlowbackend.keras:1.2.1
- For this you need to create a script which prints the version numbers for each of the libraries, similar to the exercise for the SciPy environment we completed earlier.
- Startlearning Python. That's it. You can now start building models or get started with developing models using your favorite deep-learning stack. Python & deep learning can be intimidating when you're just getting started, but start with simpler models and then start building more complex ones. You can find tons of useful resources on GitHub.[3]XResearch source
Frequently Asked Questions
What is How to Set up a Python Environment for Deep Learning about?
It provides a structured overview of python, explains the main context, and highlights practical takeaways for readers.
Why does this topic matter?
Understanding the main concepts helps readers evaluate the issue, avoid common mistakes, and make better-informed decisions.
How should readers use this information?
Use the guidance as a practical starting point, confirm details that may have changed, and follow current product, safety, or security recommendations.
Was this article helpful?
Your feedback helps us improve.
Related Articles
 Bookmark 5 Best Python Programming Learning Websites8 minutes read
 AI Engineer Facebook Talks About Deep Learning7 minutes read
 Deep Learning (DL): What You Need to Know5 minutes read
 What Is Machine Learning? Complete Guide9 minutes read
 More Than 100 Python Exercises Have Solutions (Sample Code)20 minutes read
 The Difference Between AI, Machine Learning and Deep Learning10 minutes read
Reader Comments 0
Sign in with email or Google to join the discussion.