How to install Windows 11 without Internet, install Windows 11 without Microsoft account
With Windows 11, Microsoft not only raised the hardware bar but also made some adjustments to the installation process. Previously, on Windows 11 Home version, you would not be able to install without an Internet connection and a Microsoft account. However, now even the Windows 11 Pro version needs to have the above.
Is there any way to overcome Microsoft's somewhat unreasonable requirements? The answer is yes.
Why does Windows 11 setup require an Internet connection?
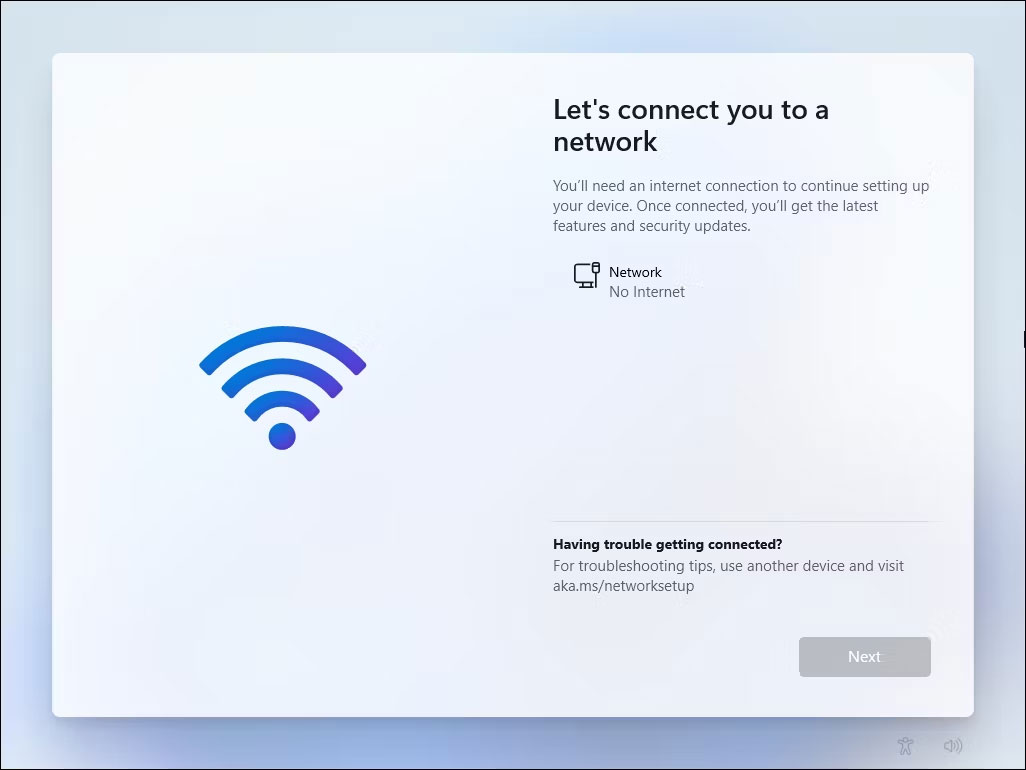
According to Microsoft, you need an active Internet connection to perform updates and download and use some features. Additionally, Windows 11 Home edition requires a Microsoft account to complete device setup for first use.
However, this may not be feasible for many reasons. First, you may want to use a local user account, but connecting to the Internet will force you to sign in with a Microsoft account. The second potential problem is the lack of WiFi drivers to connect to the network. Finally, not having an active Internet connection is another reason why you may want to bypass this restriction.
In Windows 10, getting around this restriction is easy. You can click on the "I don't have internet" option and proceed to create a local user account and complete the setup.
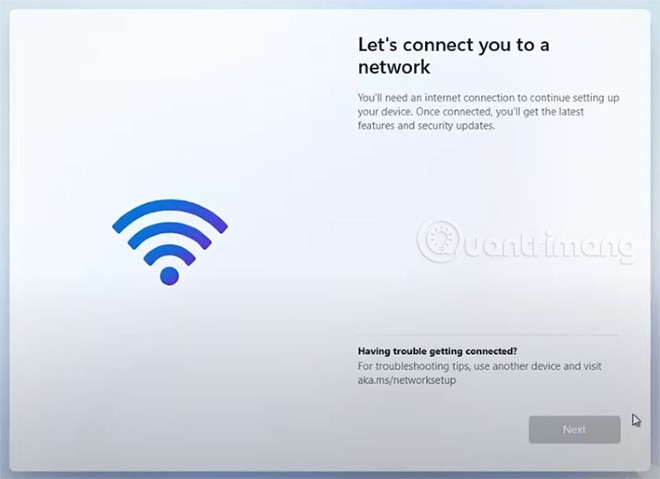
However, Windows 11 stops at the 'Let's connect you to a network' screen with the Next button grayed out. Windows 11 Pro, Enterprise, and Education users can click "I don't have internet" and proceed to complete setup using a local user account. However, Home edition users do not have this option.
Here are some workarounds to install Windows 11 Home without an active Internet connection.
Note : The fixes below will work or not depending on the version of Windows 11 you are installing. Make sure you have tried all the solutions to achieve your goal.
Method 1: Enter a fake Microsoft account
First, TipsMake.com will send you a pretty funny way to "overcome the wall". Perhaps Microsoft itself doesn't know that there is a way to bypass the Microsoft account requirement and messy Internet connection like this.
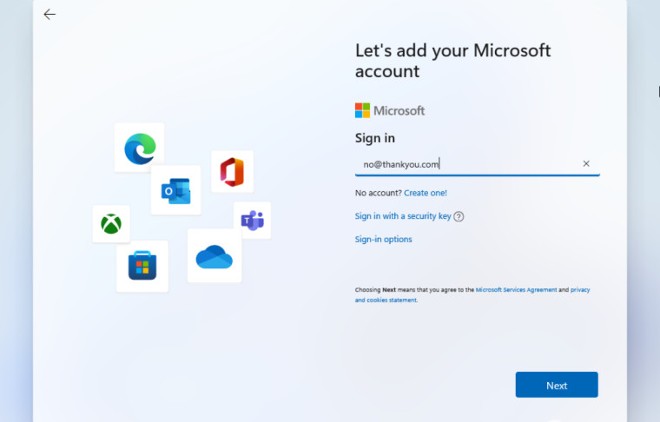
Step 1 : When you get to the screen asking you to enter your Microsoft account, add a fake email. Of course, the fake email must have the same structure as a real email address. You can use an email like no@thankyou.com but not just nothankyou. After entering the fake email, click Next.
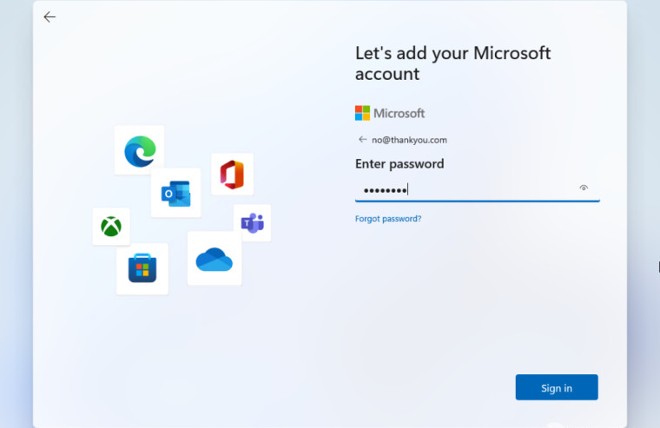
Step 2 : Now, you enter any password, of course the password is also fake. After entering, click Sign in.
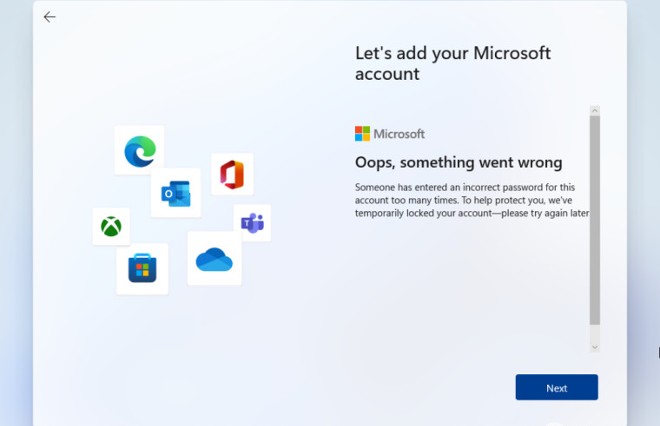
Step 3 : An error screen will appear. Click Next to continue.
Step 4 : Because the account is fake, the system will ask you to enter a local account to use on the computer. Enter the computer name then click Next and then press Enter to skip the password setting process or enter the password you want to use.
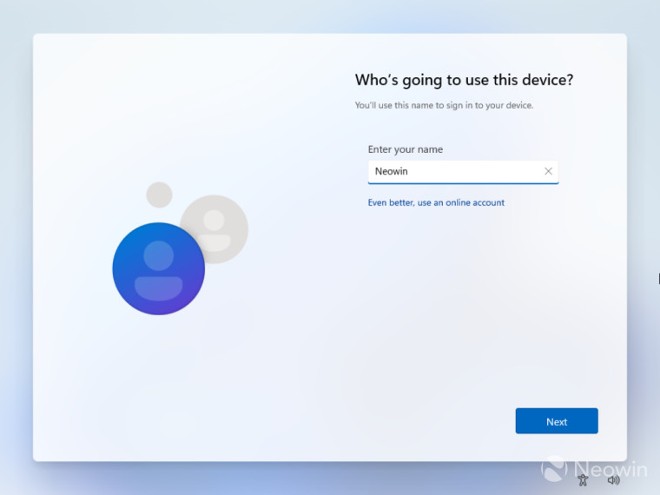
That's it!
Method 2: Use Command Prompt
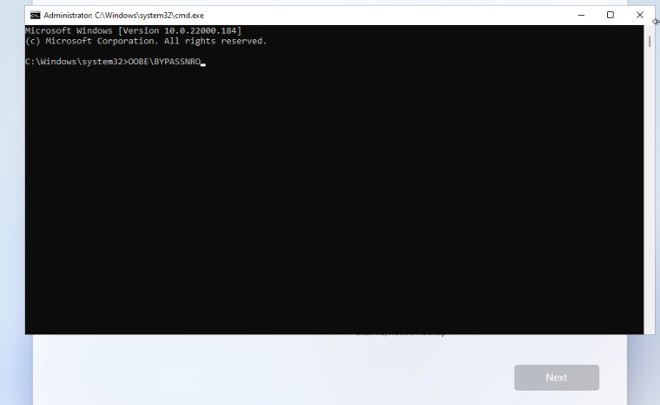
Another way to help you overcome the requirement to have an Internet connection and a Microsoft account is to use the OOBEBYPASSNRO command in Command Prompt.
Step 1 : At the "Connect to the Internet" screen in OOBE, press Shift + F10 to open the Command Prompt command window.
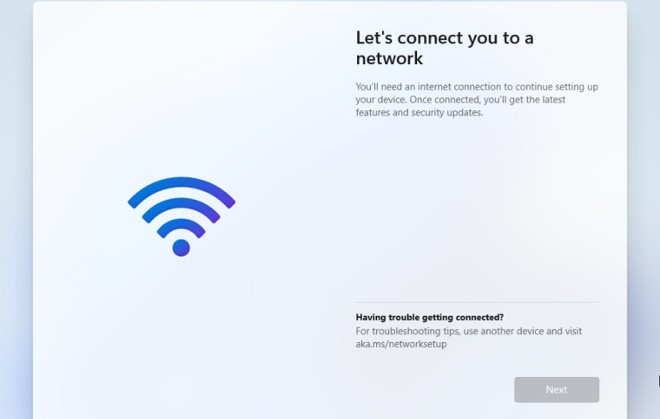
Step 2 : Enter the command OOBEBYPASSNRO then press Enter.
Step 3 : The system will reboot automatically and you will see the option "I don't have Internet" .
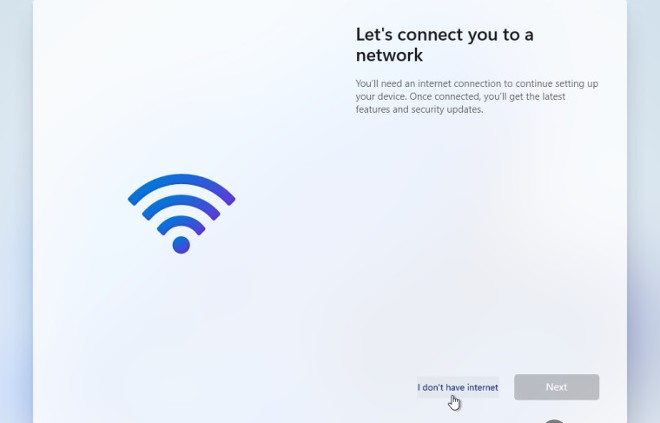
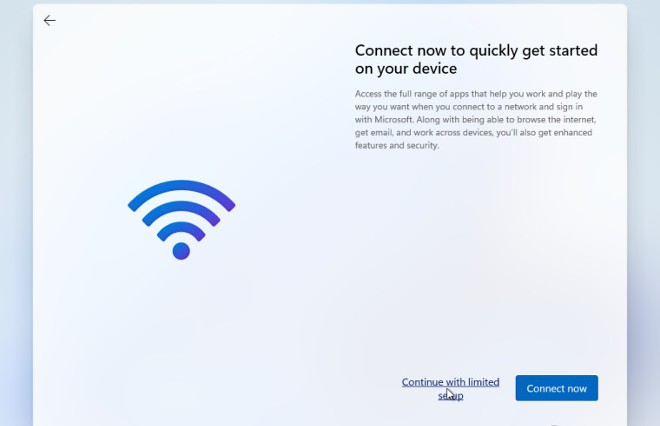
Step 4 : Click on the "I don't have Internet" option then continue to click "Continue with limited setup" to complete the installation. During the subsequent installation process, you will be using a local account instead of a Microsoft account.
Method 3: Press Alt + F4
According to Neowin, when you get to the OOBE screen requiring an Internet connection and a Microsoft account when installing Windows 11 Home, you just need to press the key combination Alt + F4 . Once you click, the installer will take you to the local account setup OOBE page.
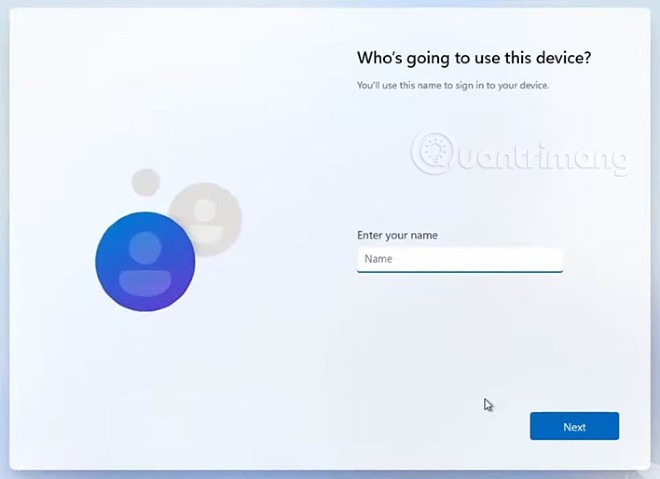
It's clear that Microsoft intentionally hid the local account settings option to force users to use Microsoft accounts. However, there are many people who do not want to use the software giant's account.
Note : Some laptops reverse the function key configuration. Therefore, you need to press the Fn key (Alt + Fn + F4) .
Method 4: Close the Network Connection Flow process using Task Manager
You can also bypass the networking step when installing Windows 11 by closing the oobenetworkconnectionflow.exe process using Task Maanger. Here's how:
Step 1 : At the network connection request screen when installing Windows 11, press Shift + F10 (possibly Shift + Fn + F10 on some laptops) to open Command Prompt.
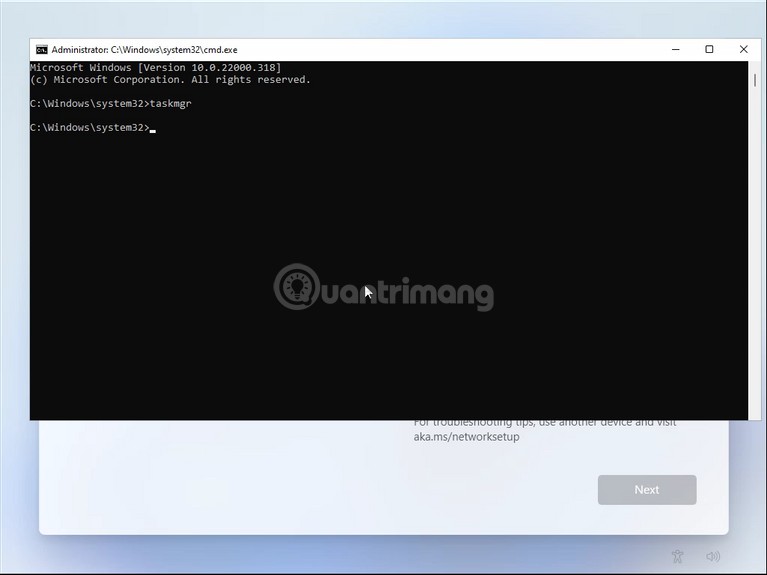
Step 2 : In Command Prompt, enter taskmgr and press Enter to open Task Manager.
Step 3 : Alternatively, you can open Ctrl + Shift + Esc to open Task Manager without opening Command Prompt.
Step 4 : Click More Details to open Task Manager in full mode.
Step 5 : In the Processes tab, find Network Connection Flow .
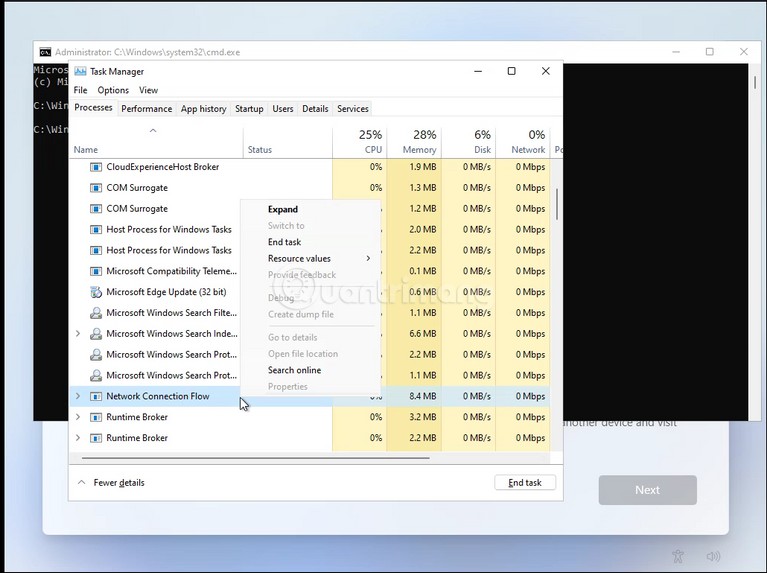
Step 6 : Select Netwrok Connection Flow and then press the End task button . Wait for the process to be disabled, then close Task Manager .
Step 7 : Close Command Prompt .
Now you are back to the installation process. It will show some loading animation and move to the next step. Here, you create a local account on your computer and then complete the installation process.
Method 5: Use the command to close the Network Connection Flow process right in Command Prompt
In addition to using Task Manager, you can also use the command to close the Network Connection Flow process right in the Command Prompt.
Step 1 : At the network connection request screen when installing Windows 11, press Shift + F10 (possibly Shift + Fn + F10 on some laptops) to open Command Prompt .
Step 2 : In Command Prompt, enter the following command:
taskkill /F /IM oobenetworkconnectionflow.exeStep 3 : Press Enter to execute the command.

After completing this command, the installation process will continue.
If you want to install to experience the new features of Windows 11, you can join the testing channel according to the following instructions:
Good luck!
You should read it
- Windows revolution and breakthrough changes through each version
- Summary of several logout methods on Windows 8 and Windows 10
- Looking back at 27 years of 'evolution' of Windows
- Instructions on how to upgrade from Windows XP to Windows 8
- 4 ways to 'revive' Windows XP on Windows 10
- What is Windows Hello? How does Windows Hello work? How to install Windows Hello
 Windows 11 is about to allow users to access files on smartphones through File Explorer
 How to turn off lock screen widgets on Windows 11
 Reasons to upgrade to Windows 11 now
 How to speed up Windows 10/11 startup
 Microsoft 'declared war' on Apple
 How to get rid of ads on Windows 11 devices