How to install VirtualBox Guest Additions on Kali Linux
If you run Kali Linux as a 'guest' in VirtualBox, this article will help you successfully install the 'VirtualBox Guest Additions' tool on Kali Linux..
If you run Kali Linux as a 'guest' in VirtualBox, this article will help you successfully install the 'VirtualBox Guest Additions' tool on Kali Linux.
You must use 4.2.xx or newer of VirtualBox to take advantage of enhancements, including compatible updates and enhance the stability of both platform and client applications.
- Download VirtualBox
Install VirtualBox Guest Additions in Kali Linux
VirtualBox Guest Additions integrates appropriate mouse and screen, as well as shared folders, with your operating system. To install them, proceed as follows.
Start the Kali Linux virtual machine, open the terminal window and enter the following commands:
  apt-get update
  apt-get install -y virtualbox-guest-x11
  reboot
Install VirtualBox Guest Additions in older Kali versions
Start Kali Linux virtual machine, open a terminal window and enter the following command to install Linux kernel headers:
apt-get update && apt-get install -y linux-headers - $ (uname -r)
Once completed, you can attach an image of the CD-ROM ' Guest Additions '. Select ' Devices ' from the VirtualBox menu and then select ' Install Guest Additions '. This will mount the ISO Guest Additions in the virtual CD drive of the virtual machine Kali Linux. When prompted to run the CD automatically, click the Cancel button.

From the terminal window, copy the VboxLinuxAdditions.run file from the Guest Additions CD-ROM to the path on the local system. Ensure the necessary conditions and run the file to start the installation.
  cp /media/cd-rom/VBoxLinuxAdditions.run / root /
  chmod 755 /root/VBoxLinuxAdditions.run
  cd / root
  ./VBoxLinuxAdditions.run
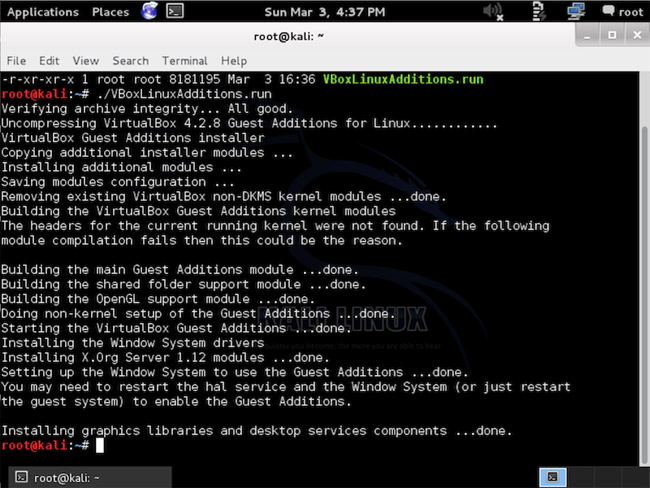
Restart Kali Linux virtual machine to complete the Guest Additions installation process. You will now have full mouse and screen integration, as well as the ability to share folders with the server system.
Create shared folders with the server system
This section explains how to share folders on the server system with Kali Linux VirtualBox 'guest'.
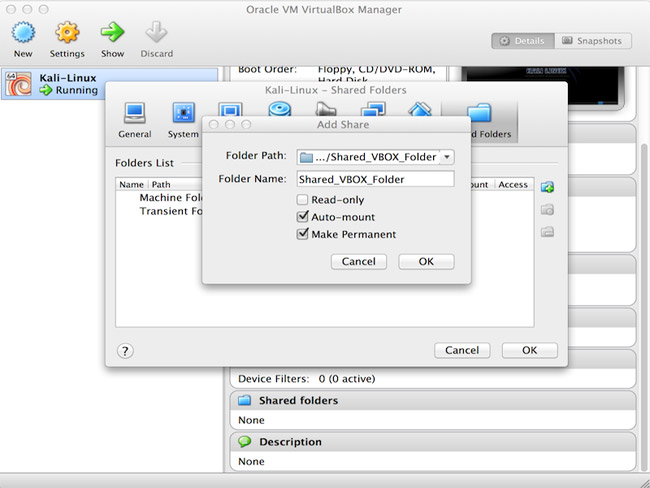
From VirtualBox Manager, select your Kali Linux VM and click on the ' Shared Folders ' link in the right pane. This will open a window to add the shared folder. In this window, click the " Add Folders " icon.
In the Folder Path text box, provide the path to the folder you want to share or click the drop-down arrow to browse the server system for the path to the directory. Select the checkboxes to enable ' Auto-mount ' and ' Make Permanent ' and click the ' OK ' button both times when prompted.
Your shared folders will now be available in the media folder. You can create bookmarks or links for easier access to folders.

See more:
- How to install Kali Linux on Android using Linux Deploy
- Instructions for installing Kali Linux on Windows 10 are easier than ever
- How to install and use Kali Linux on VmWare virtual machine