Table of Contents
Running Ubuntu in VMware Workstation lets you test Linux without repartitioning your physical drive. The guest system stays inside virtual-disk files, although it still uses your computer's CPU, memory, storage, and network connection while running.

What you need
- A current VMware Workstation installation.
- An Ubuntu Desktop ISO downloaded from Ubuntu's official website.
- Enough free storage and memory to run both the host and guest operating systems.
The screenshots show an older VMware interface. Current releases may use different labels, but the workflow is similar.
1. Create a new virtual machine
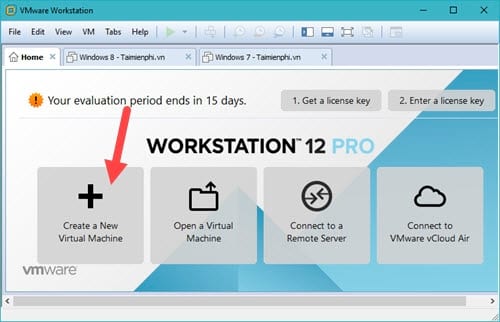
Open VMware Workstation and choose Create a New Virtual Machine.
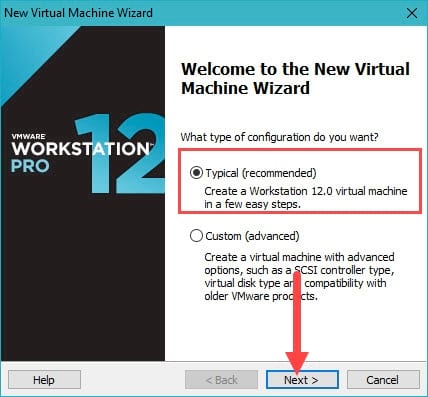
Select Typical for a standard setup, then choose Next. Use the custom option only if you need a specific virtual hardware version or controller.
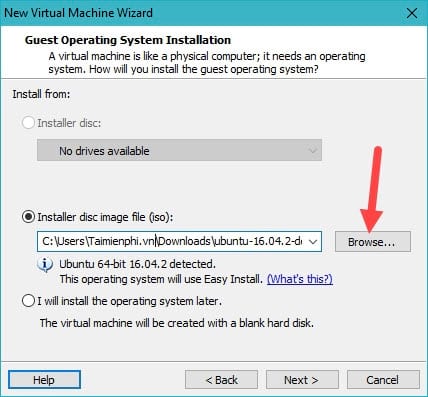
2. Attach the Ubuntu ISO
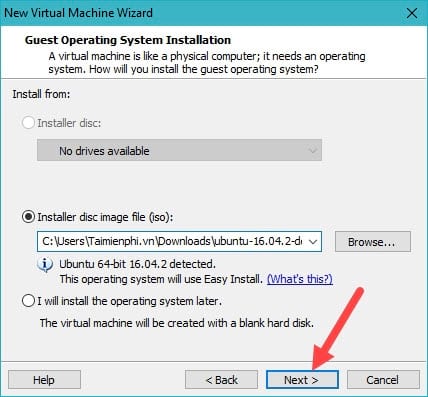
Select Installer disc image file (ISO), then choose Browse.
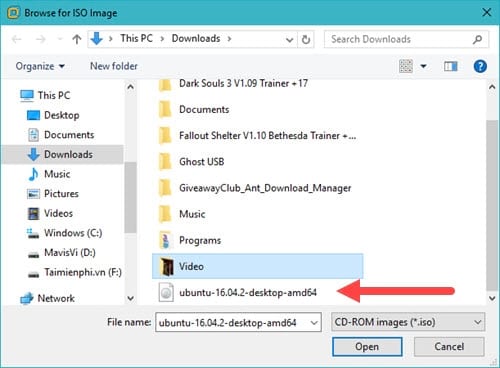
Select the Ubuntu ISO you downloaded and choose Open.
Confirm that VMware recognizes the image, then select Next.
3. Enter Easy Install details
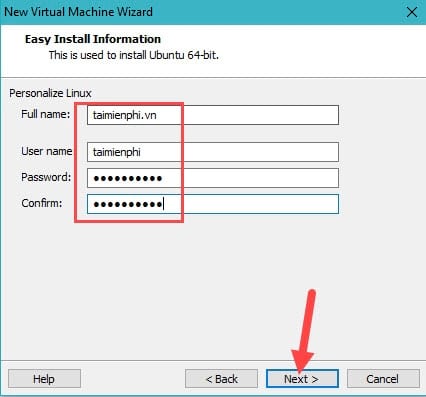
If VMware offers Easy Install, enter the full name, Ubuntu username, and password you want to use inside the guest. Store the password securely; it may also be required for administrative commands.
4. Name the VM and choose its location
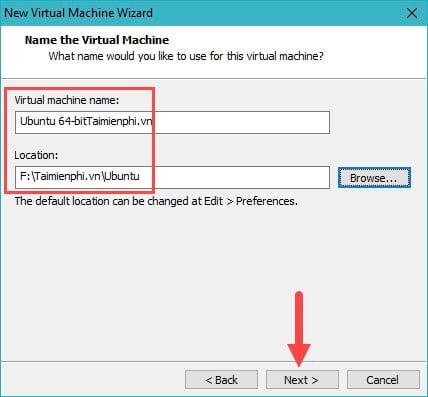
Give the VM a clear name and select a folder on a drive with enough free space. The folder will hold the configuration, virtual disk, and related files.
5. Configure the virtual disk
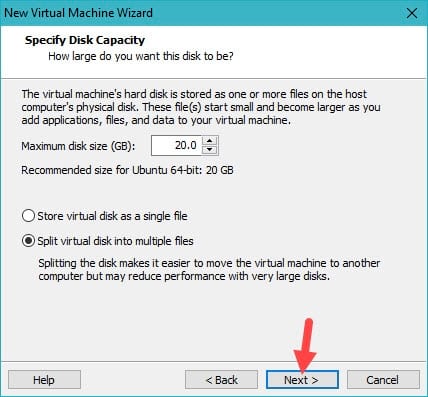
Set a maximum disk capacity suitable for the Ubuntu version and the applications you plan to install. A virtual disk does not necessarily consume its full maximum size immediately, but it can grow over time. Choose whether to store it as one file or split it into multiple files based on portability and filesystem limits.
6. Review memory, CPU, and networking
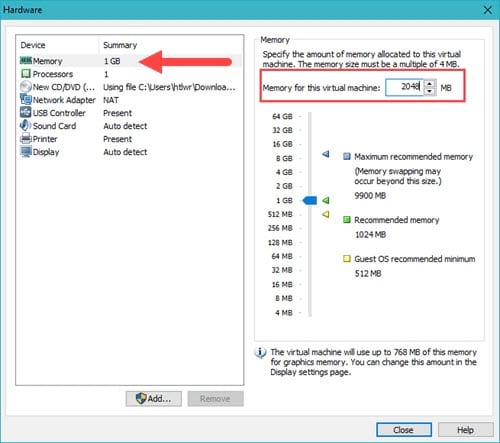
Select Customize Hardware to review the allocation. Do not assign so much RAM or so many processor cores that the host becomes unresponsive.
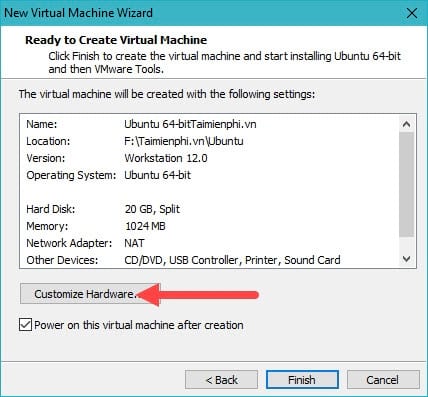
Also review the virtual optical drive, network mode, USB controller, and display settings. NAT is a practical default for internet access; bridged networking gives the VM a more direct presence on the local network and should be used only when that behavior is intended.
7. Install Ubuntu
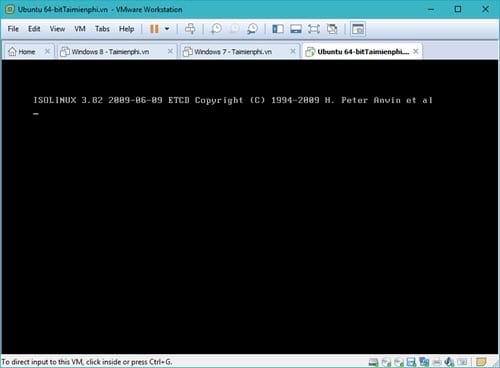
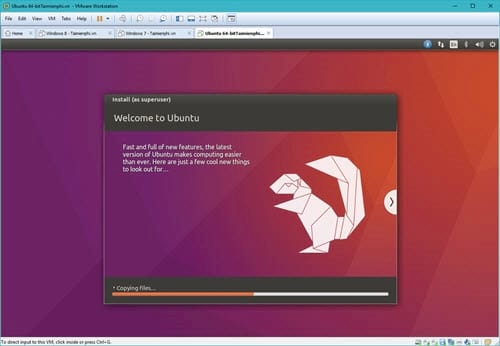
Finish the wizard and start the VM. VMware's Easy Install may automate much of Ubuntu's setup; otherwise, follow the Ubuntu installer prompts inside the VM. Installation time depends on the host and storage speed.
Let the VM restart when setup completes.
Sign in using the account created during installation.
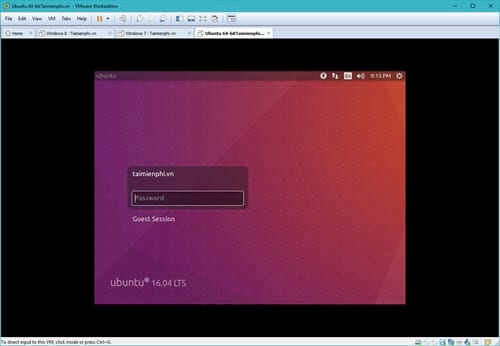
Ubuntu's desktop layout differs from Windows, but the application launcher, settings, file manager, and notification area provide the same basic functions.
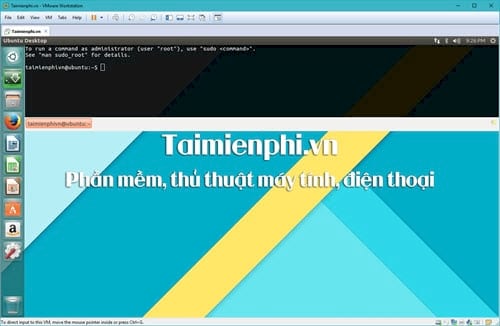
Ubuntu includes common desktop software and can install more applications through its software center or package manager.
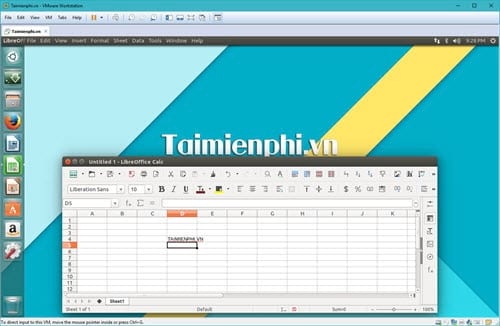
After installation
- Run Ubuntu's software updates.
- Install or update VMware guest integration tools if clipboard sharing, resizing, or shared folders do not work.
- Create a snapshot before experiments that may be difficult to undo, but keep separate backups of important files.
Ubuntu supports multiple interface and input languages; the original claim that it does not support Vietnamese is inaccurate. Language and keyboard options are available in Ubuntu's Settings.
If you are still choosing a hypervisor, compare VirtualBox and VMware. Once Ubuntu is running, see TipsMake's overview of Linux terminal emulators if you want alternatives to the default terminal.
Related Articles
 How to Install Ubuntu on a VMware Virtual Machine4 minutes read
 Instructions for Installing Ubuntu on Vmware Workstation - Part 23 minutes read
 Ways to Install Ubuntu on Windows, Run in Parallel or Run14 minutes read
 Instructions for Installing Ubuntu on Vmware Workstation - Part 15 minutes read
 Instructions for Fixing Errors Do Not Install Vmware Tools3 minutes read
 Install Windows 10 on Vmware Workstation6 minutes read
Reader Comments 0
Sign in with email or Google to join the discussion.