Table of Contents
Hyper-V Manager can export a virtual machine's configuration, virtual disks, and checkpoints to a folder, then import that package on the same or another compatible Hyper-V host. Export is useful for migration or for creating a portable copy, but it should not replace a tested, versioned backup plan.

Before exporting
- Confirm that the destination has enough free space for the VM and its virtual disks.
- Use a local or reliably connected destination; an interrupted copy can leave an incomplete export.
- Record networking or host-specific settings that may need adjustment after import.
How to export a Hyper-V virtual machine
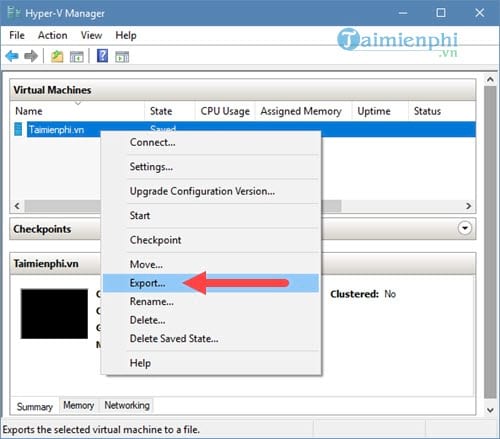
1. Open Hyper-V Manager. Select the VM, then choose Export in the Actions pane or the VM's context menu.
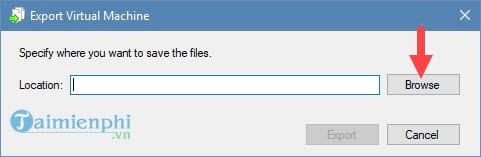
2. Select Browse and choose the parent folder that will receive the exported VM.
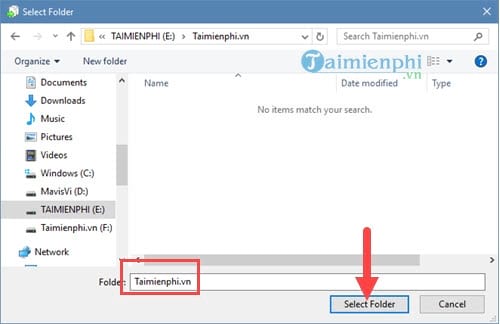
3. Confirm the destination with Select Folder.
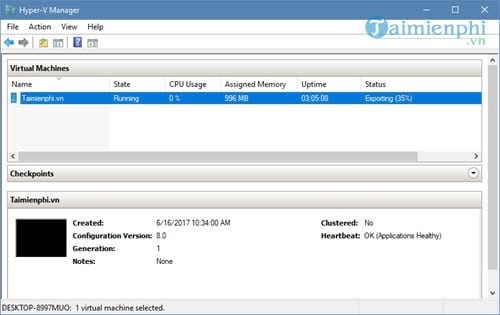
4. Monitor the export status in Hyper-V Manager. Do not move or delete the destination folder while the operation is running.
5. After completion, confirm that the export folder contains the VM configuration and virtual-disk files. A folder size alone cannot prove that every file is valid, so keep the source VM until you have tested the import.
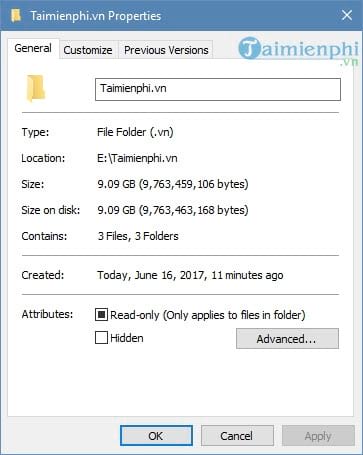
How to import a Hyper-V virtual machine
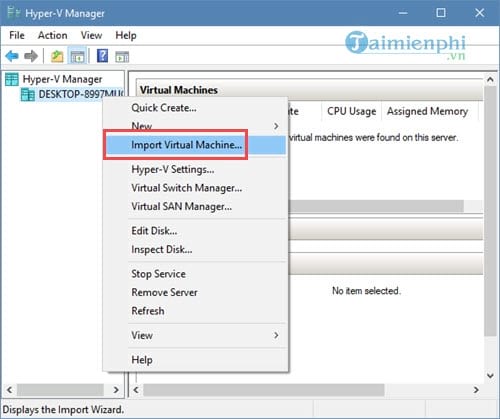
1. In Hyper-V Manager, select the destination host and choose Import Virtual Machine.
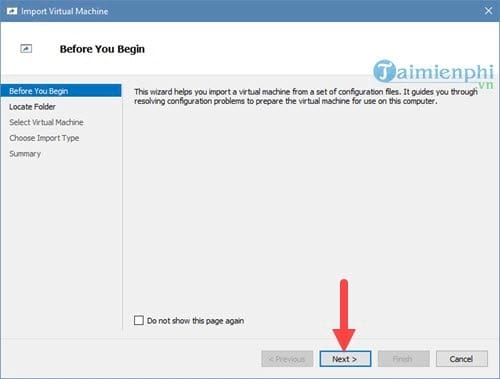
2. Select Next on the wizard's welcome screen.
3. Browse to the exported VM's folder.
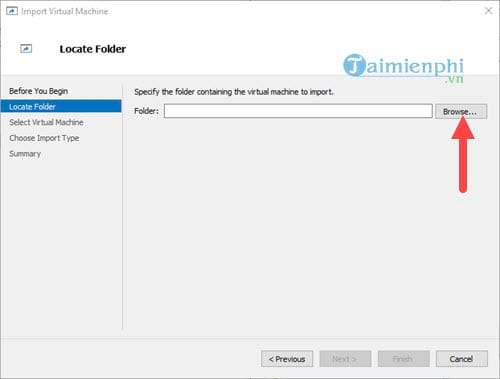
Select the folder and continue.
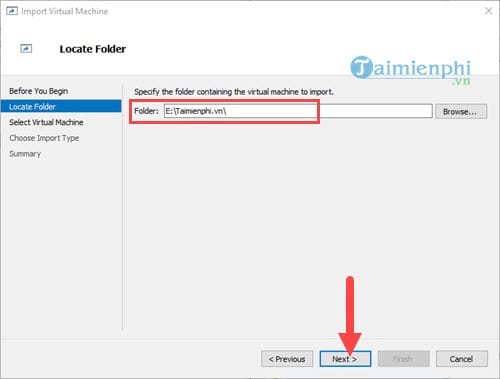
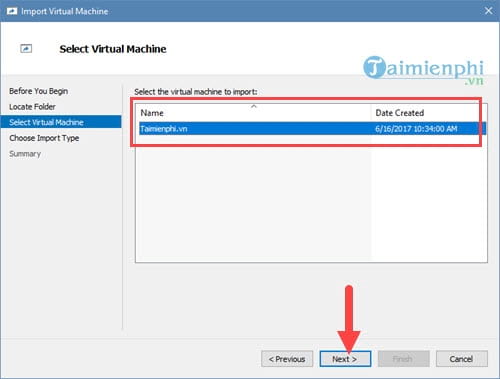
4. Select the VM detected by the wizard, then choose Next.
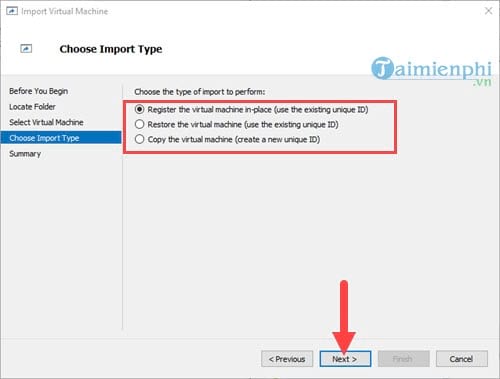
Choose the correct import type
- Register the virtual machine in-place: Use the files in their current location and retain the VM's existing unique ID. The files must remain at that location.
- Restore the virtual machine: Retain the existing unique ID while allowing Hyper-V to place files in selected locations.
- Copy the virtual machine: Copy the files and assign a new unique ID. Use this when the imported VM must coexist with the original.
5. Review the summary and choose Finish.
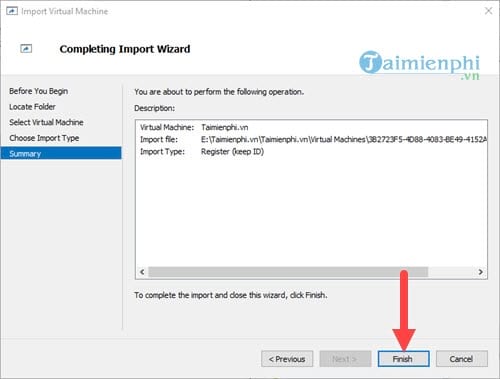
When import completes, the VM appears in Hyper-V Manager.
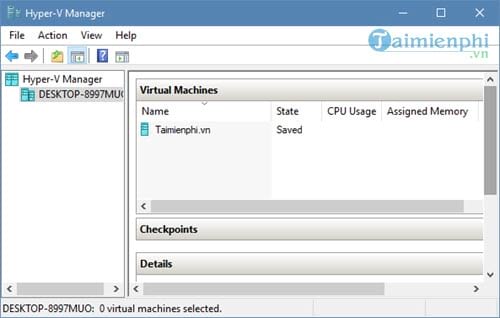
Checks after importing
- Verify the virtual switch and network adapter configuration.
- Start the VM and check storage, networking, integration services, and application behavior.
- If you copied the VM, make sure duplicate host names, IP addresses, or services will not conflict with the original.
Hyper-V must already be available on the destination system. If you are deciding between platforms, see TipsMake's comparison of Hyper-V, VirtualBox, and VMware. For a separate image-based recovery workflow, see the guide to using a Macrium Reflect image with Hyper-V.
Related Articles
 How to Import Hyper-v Virtual Machines in Windows 1014 minutes read
 How to Export Hyper-v Virtual Machines in Windows 106 minutes read
 Create Virtual Machines with Hyper-v on Windows 8 and Windows 1016 minutes read
 How to Rename Hyper-v Virtual Machines Using Powershell and6 minutes read
 Create Virtual Machines in Hyper-v on Windows Server 20082 minutes read
 Install Hyper-v: How to Installing Hyper-v2 minutes read
Reader Comments 0
Sign in with email or Google to join the discussion.