Table of Contents
VirtualBox Shared Folders let a guest virtual machine use a selected folder from the host without configuring an SMB network share. Install the matching Guest Additions inside the guest, add a host folder in Devices > Shared Folders, and enable read-only access unless the guest must write to it.

Before you share a folder
- Host means the physical computer running VirtualBox.
- Guest means the operating system inside the virtual machine.
- Update VirtualBox from its official source and use the Guest Additions image from the same VirtualBox release.
- Create a dedicated host folder for the VM instead of sharing an entire drive, home directory, or folder containing secrets.
- Take a backup or VM snapshot before installing system-level guest drivers.
A writable shared folder reduces isolation: software inside the guest can change or delete host files exposed through that share. Use Read-only for installers, samples, or documents that the guest only needs to read.
Install Guest Additions in a Windows guest
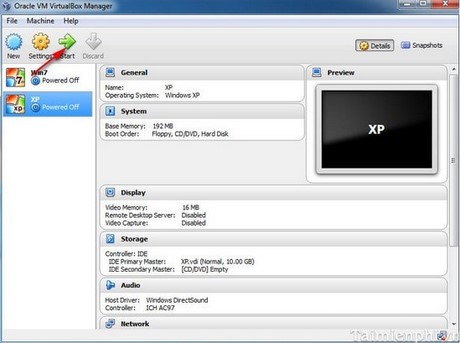
- Start the virtual machine and sign in to the guest operating system.
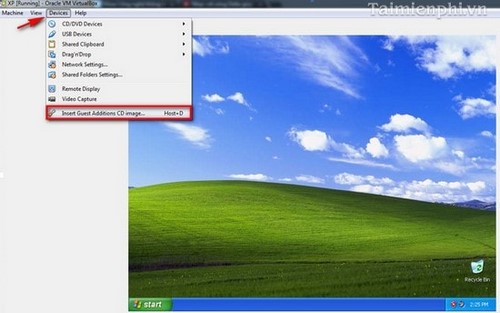
- In the VM window's menu, choose Devices > Insert Guest Additions CD Image.
- Inside the Windows guest, open File Explorer > This PC, open the mounted VirtualBox Guest Additions disc, and run
VBoxWindowsAdditions.exe. - Follow the installer, keeping the default destination and components unless you have a specific compatibility requirement.
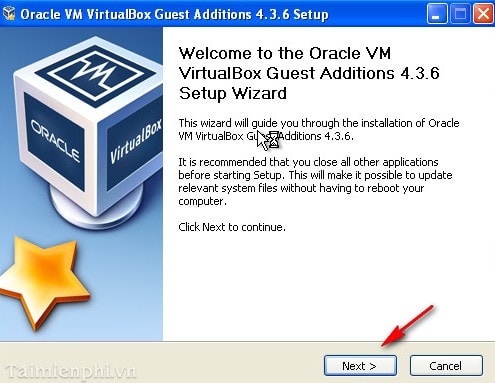
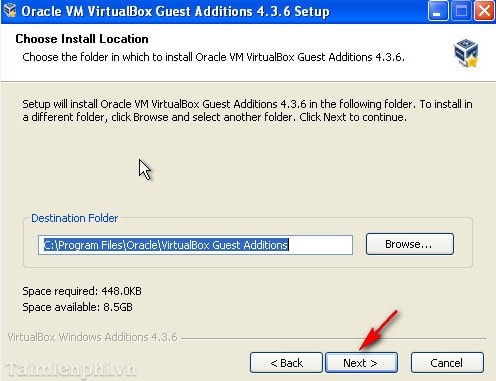
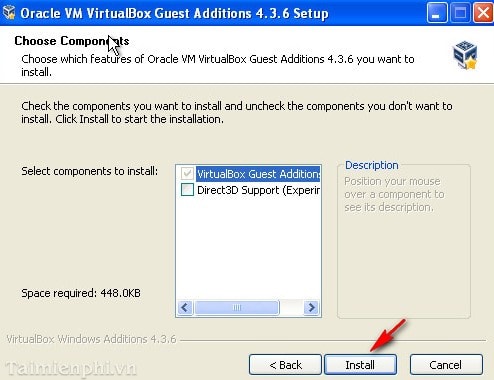
Approve only drivers that identify Oracle as the verified publisher. An unsigned-driver “Continue Anyway” screen in an old tutorial is not expected with a current, official matching release; do not bypass an unexpected signature warning.
- Restart the guest when installation finishes.
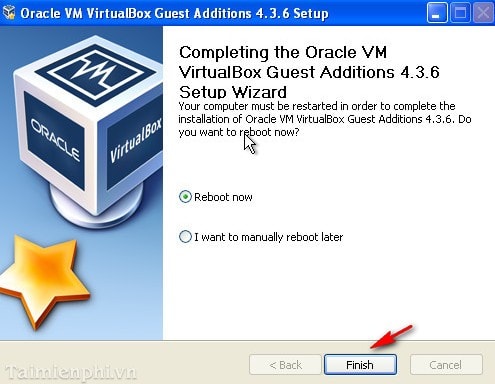
Oracle's VirtualBox Guest Additions manual documents shared folders and the guest-specific installation process.
Add a host folder to the VM
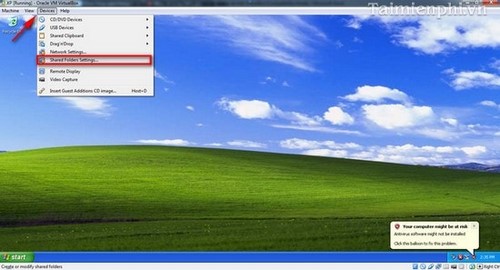
- With the guest running, choose Devices > Shared Folders > Shared Folder Settings. You can also configure a powered-off VM from VirtualBox Manager under Settings > Shared Folders.
- Select the folder-with-plus icon to add a share.
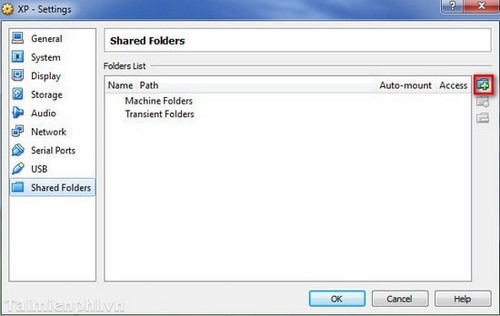
- Configure the share:
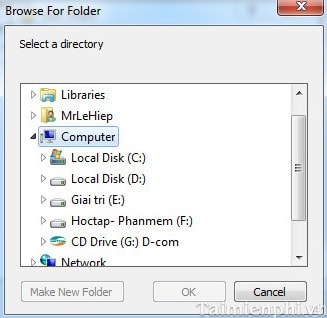
- Folder Path: choose the dedicated folder on the host.
- Folder Name: use a short, clear name without relying on the host's full path.
- Read-only: enable it if the guest does not need to modify host files.
- Auto-mount: let Guest Additions mount it automatically.
- Make Permanent: keep the share after the VM is powered off. Leave this cleared for a temporary share.
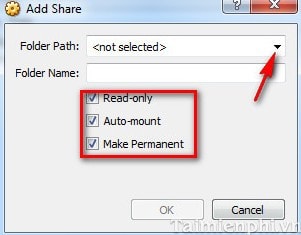
Select the exact host folder and confirm.
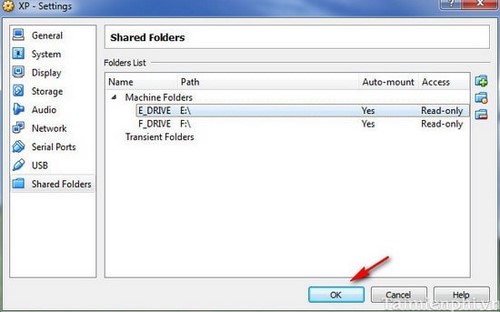
The new share appears in the Shared Folders list. Restart the guest if it does not appear immediately.
Open the shared folder in a Windows guest
In File Explorer, enter this path in the address bar, replacing ShareName with the configured folder name:
\\vboxsvr\ShareNameTo map it to drive Z:, open a normal Command Prompt inside the guest and run:
net use Z: \\vboxsvr\ShareNameThe mapped share may also appear under This PC or Network locations when auto-mount is enabled.
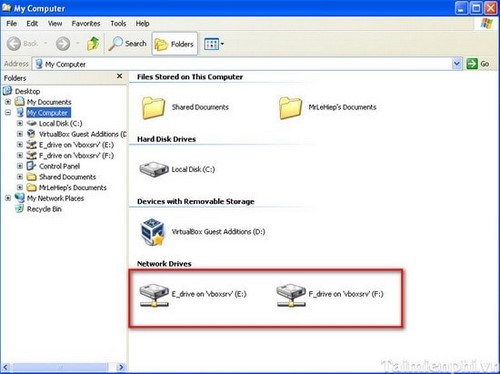
Shared folders are not extra virtual disks and do not reduce guest RAM use. They expose selected host files through the Guest Additions file-system driver, so free space and permissions still belong to the host folder.
Open the shared folder in a Linux guest
With Linux Guest Additions installed and Auto-mount enabled, the folder is commonly mounted under:
/media/sf_ShareNameIf the user lacks permission, add that guest user to the vboxsf group, then sign out and back in:
sudo usermod -aG vboxsf $USERUse the guest distribution's current Guest Additions prerequisites and kernel-module instructions. Do not loosen permissions on the host folder merely to work around an incomplete Guest Additions installation.
Clipboard and drag-and-drop alternatives
For a small piece of text or an occasional file, Devices > Shared Clipboard and Devices > Drag and Drop may be more convenient. Guest Additions is required, and VirtualBox disables these integrations by default for security. Enable only the direction you need—Host to Guest is safer than Bidirectional when testing untrusted software.
For background on VM setup, see creating a Windows virtual machine with VirtualBox. The comparison of VirtualBox and VMware explains how their integration features differ.
If the shared folder does not appear
- Confirm Guest Additions is installed inside the guest, not only VirtualBox on the host.
- Check that the Guest Additions version matches the host's VirtualBox version, then reinstall and restart the guest if necessary.
- Verify the configured Folder Name and try the direct
\\vboxsvr\ShareNamepath. - Check host file permissions and whether the folder still exists at the configured path.
- On Linux, verify the
vboxsfmodule and group membership. - If writes fail, check whether Read-only was intentionally enabled before changing it.
When handling untrusted files or malware samples, do not use a writable shared folder, bidirectional clipboard, or drag-and-drop. Transfer only the minimum data required and preserve the VM's isolation.
Related Articles
 VirtualBox and Vmware Player: Which Virtual Machine Should You Choose?9 minutes read
 How to Fix Mouse Error and Virtual Machine Keyboard in Virtualbox4 minutes read
 How to Share VirtualBox VM Across Different Operating Systems: Complete Guide8 minutes read
 How to Create a Windows 10 Virtual Machine with Vmware Player and12 minutes read
 Stealing Virtual Machines and Virtual Machine Data15 minutes read
 Virtualbox and Vmware: Which Virtual Machine Software Is Better?8 minutes read
Reader Comments 0
Sign in with email or Google to join the discussion.