Table of Contents
Upgrading laptop RAM can improve responsiveness when Task Manager shows memory pressure, but the first question is whether the laptop is upgradeable. Many thin laptops use soldered memory, while others have one or two removable SO-DIMM modules. Check the manufacturer's service manual and supported memory specifications before buying anything.
Before buying RAM
Confirm that memory is the bottleneck
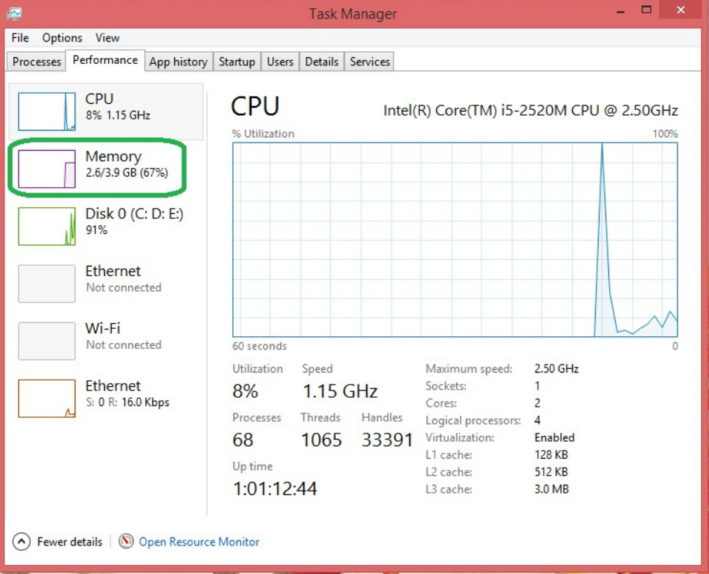
In Windows, press Ctrl+Shift+Esc, open Performance > Memory, and observe usage during your normal workload. The same page often shows the installed speed, form factor, and number of slots in use. Consistently high usage accompanied by slow app switching or heavy paging is stronger evidence than a single high reading.
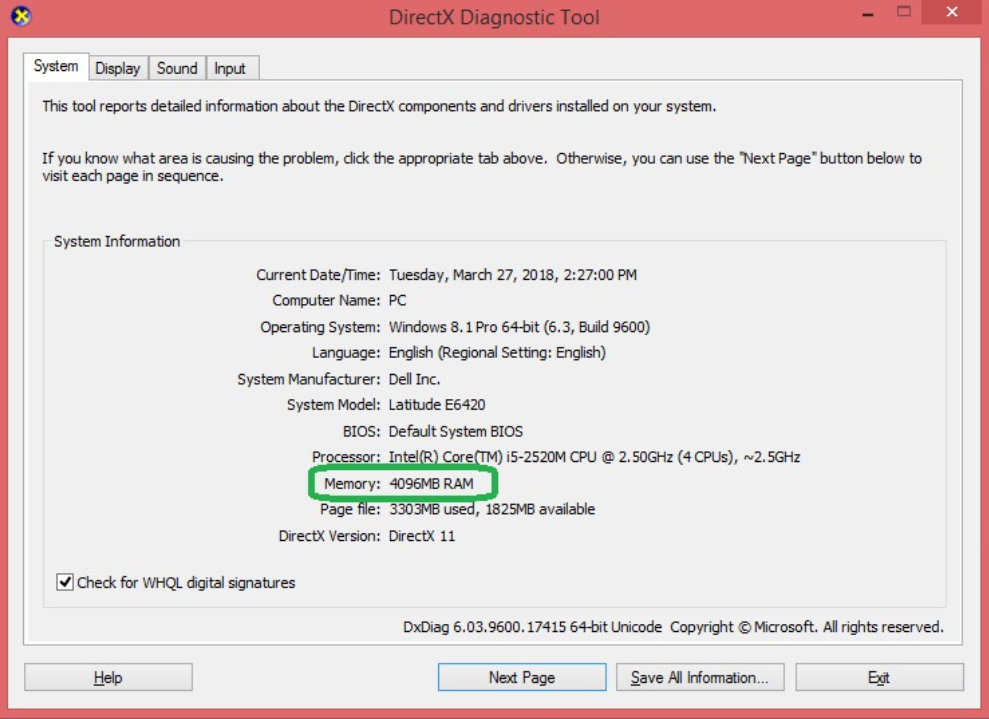
You can also open the DirectX Diagnostic Tool by pressing Win+R, typing dxdiag, and checking the Memory entry. For a broader hardware inventory, see four ways to check a laptop's specifications.
Check the exact compatibility requirements
Use the laptop maker's support page or service manual for the model number printed on the computer. Confirm all of the following:
- whether the memory is soldered, socketed, or a mixture of both;
- the number of SO-DIMM slots and how many are occupied;
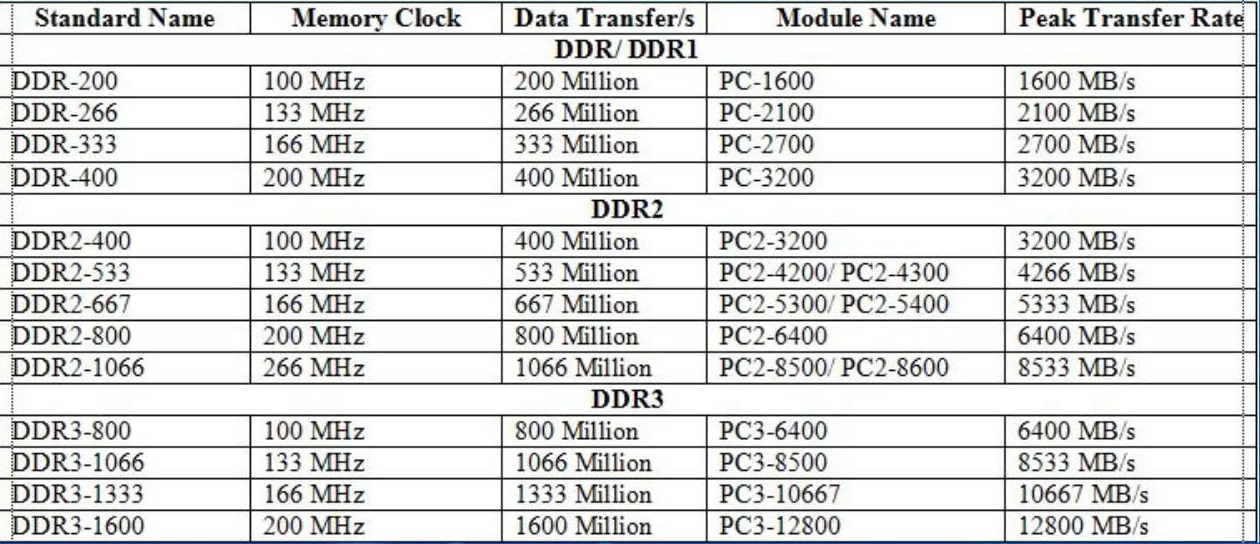
- the supported DDR generation, such as DDR4 or DDR5;
- the maximum supported capacity and recommended module arrangement;
- the supported speed, voltage, and any model-specific restrictions.
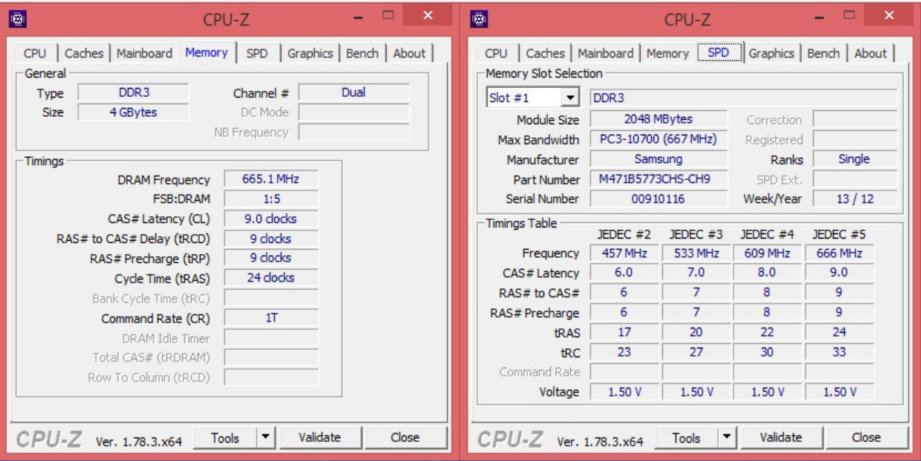
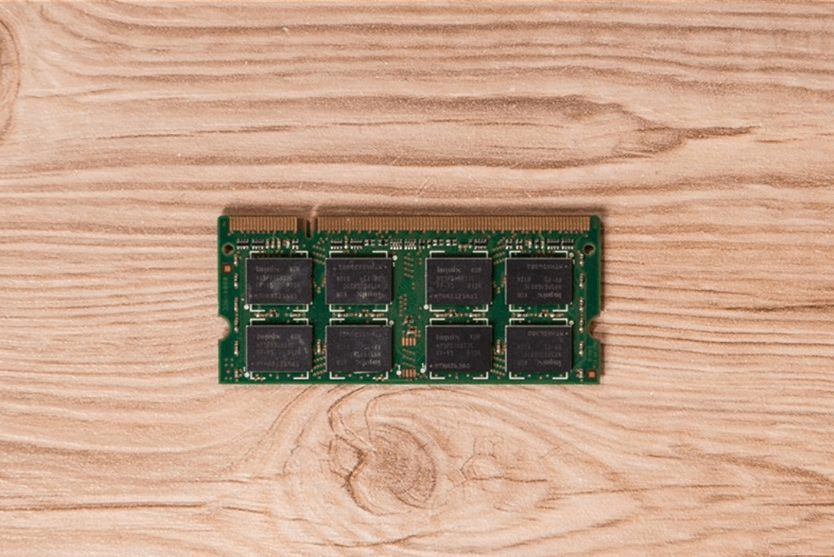
DDR generations have different electrical designs and key positions, so a DDR4 module cannot be substituted for DDR5. Faster compatible memory may operate at a lower supported speed. Matching modules are often the simplest way to obtain stable dual-channel operation; TipsMake's dual-channel RAM explanation covers why module layout matters.
Do not rely only on a generic capacity recommendation. Browser-heavy office work, large creative projects, virtual machines, and modern games have very different needs. Buy for the workload and the laptop's documented limit.
Tools and safety checklist
- Correct replacement SO-DIMM module or kit
- Screwdriver bit that matches the laptop's screws
- Plastic opening pick if the bottom panel uses clips
- Small container or diagram for screw positions
- Clean, dry, non-carpeted work surface
Shut Windows down completely, unplug the charger and peripherals, and remove an externally removable battery. If the battery is internal, follow the service manual to disconnect it after opening the chassis. Hold modules by their edges and avoid touching the gold contacts. Ground yourself before handling components.
How to install laptop RAM

1. Open the access panel or bottom cover
Turn the laptop over on a soft surface. Remove the specified screws and keep track of their locations because lengths may differ. Release plastic clips gently; if a panel resists, check for a hidden screw rather than forcing it.
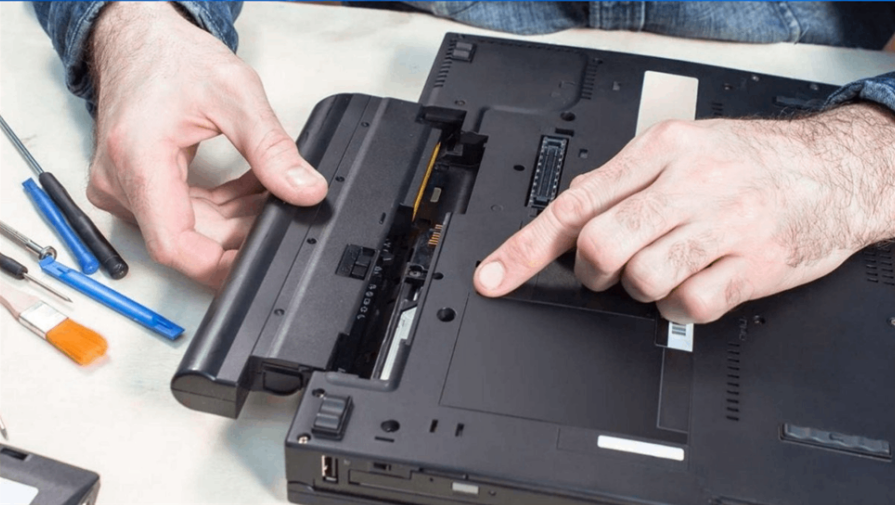
2. Disconnect power inside the laptop
Disconnect the internal battery if the service manual instructs you to do so. Pressing the power button briefly after power is disconnected can help discharge residual power. Never work on the memory while the laptop is powered or charging.
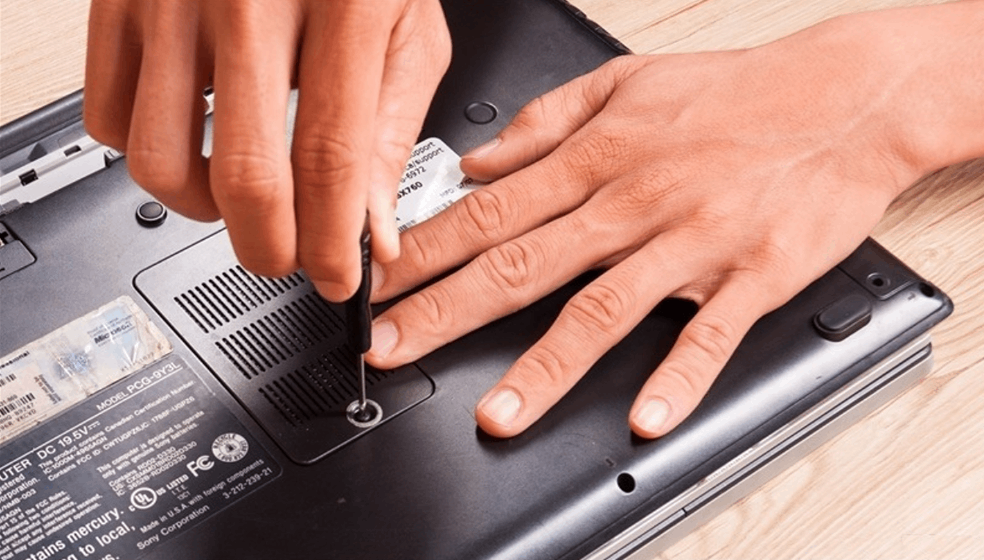
3. Locate the SO-DIMM slots
The memory may be under a small shield or protective film. Move only parts the service manual identifies as removable, and do not pull on nearby antenna or ribbon cables.
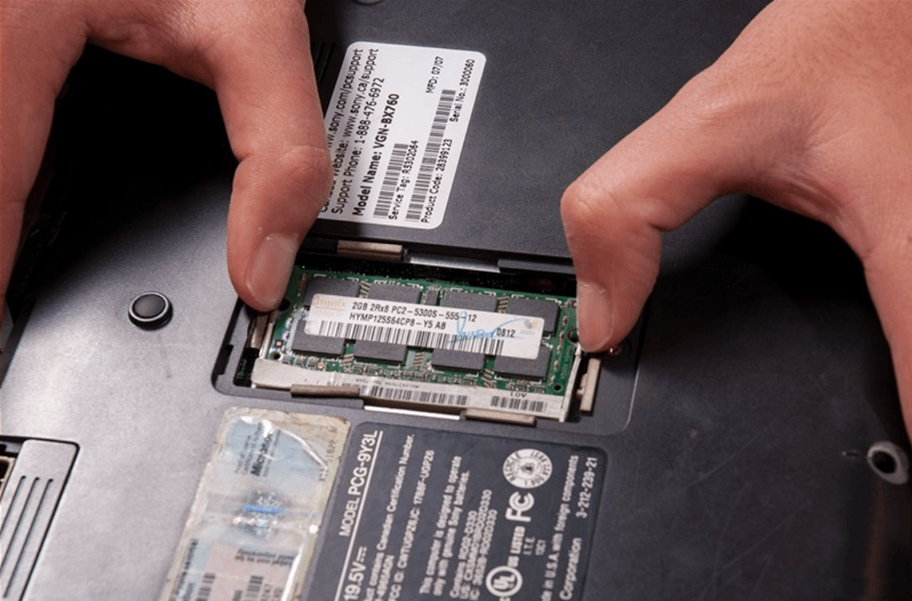
4. Remove an existing module if necessary
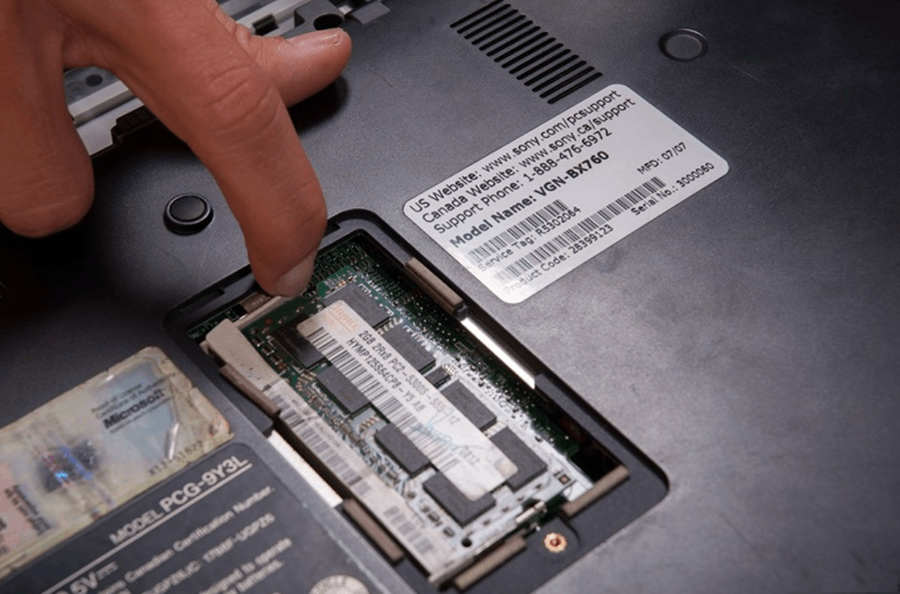
Push the two retaining clips outward. The module should rise at an angle. Slide it straight out while holding its edges.
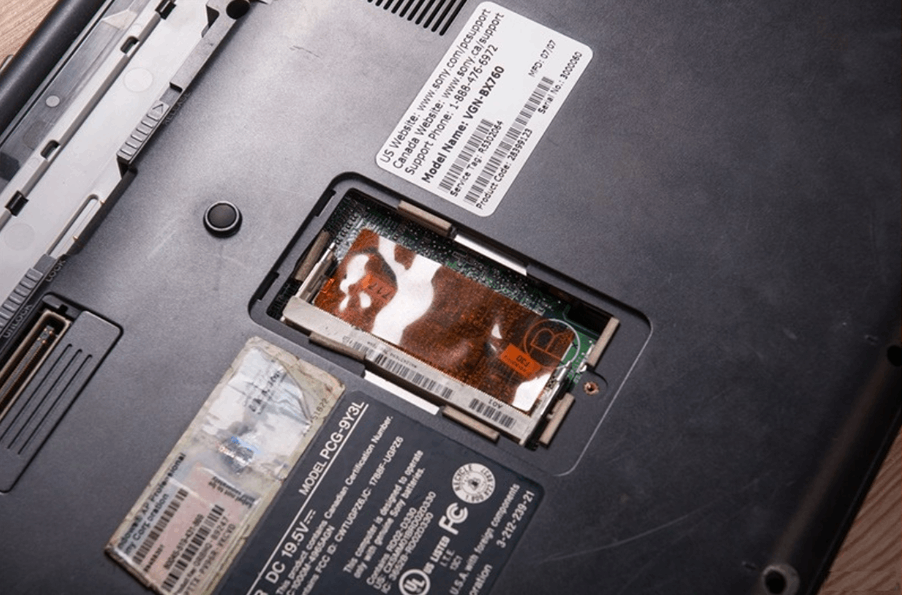
5. Insert the new module
Align the notch in the module with the key in the slot. Slide the contacts fully into the connector at roughly the same angle used for removal, then press the raised edge downward until both clips lock. Do not force a module that does not align.
6. Reassemble and verify
Reconnect the battery, replace shields and the bottom cover, and reinstall each screw in its original position. Start the laptop and check Task Manager > Performance > Memory or the firmware setup screen to confirm the expected capacity. The first boot after a memory change may take longer than usual.
If the laptop does not start
- Shut down, disconnect power, and reseat the module.
- Confirm that both retaining clips are locked and the contacts are fully inserted.
- Test one module at a time in a supported slot if the manual permits it.
- Reinstall the original memory to determine whether the new module is incompatible or faulty.
- Stop and seek service if you see damage, smell overheating, or cannot safely disconnect the battery.
A RAM upgrade is worthwhile only when the machine supports it and memory is limiting the workload. Careful compatibility checks are more important than the physical installation, which usually takes only a few controlled steps.
Related Articles
 How to Properly Install an SSD Hard Drive in Your Laptop at Home8 minutes read
 New Memory Optimization Feature on iOS 115 minutes read
 Broken Laptop Ideas: How to Repurpose It Without Repairs9 minutes read
 Instructions to Install Drivers for Computers Asus (Download6 minutes read
 How to Fix Laptop Not Recognizing SD Memory Card6 minutes read
 How to Install Android Apps on SD Card13 minutes read
Reader Comments 0
Sign in with email or Google to join the discussion.