How to Install Labview
Method 1 of 3:
Uninstalling LabVIEW (skip this step if you are installing for the first time)
-
 Know when to uninstall. Use this step in case you installed any previous version or you want to rollback to an older version. Since it involves deleting the license files, it is recommended you keep your old serial key safe or make a backup of the folder in C:Program Data as it follows from the steps below.
 -
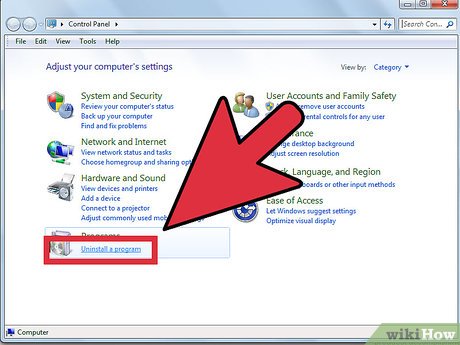
 If you are using Windows XP/Vista/7/8 go to Control Panel > Programs and Features > Right Click on National Instruments Software > Uninstall/Change
- In the prompt use Ctrl+A or drag using left mouse to select all the components and click on Remove. Once the Wizard finishes uninstalling you will be prompted to restart your system. Click Yes if you want to do so now, No if you want to later.
-
 Delete the program folder. Once your system has finished restarting, go to C:Program Data and delete the National Instruments folder there.
 -
 Delete the registry. Make sure you have a backup of it ready, because this is the point in which all files will be gone. Press Win+R and type regedit and press Enter or click Run. Go to ComputerHKEY_LOCAL_MACHINESOFTWARENational Instruments and delete all keys. Then restart your system. If all appears well, you've successfully deleted the program.
Method 2 of 3:
Installing LABVIEW 2011
-
 Upon inserting the DVD, it will prompt you to Install LabVIEW 2011. Click on it. Since the setup takes a lot of RAM, it is recommended to close all running programs and disabling Anti-Virus in slower systems. Then click on Next.
 -
 User information will be displayed automatically. You may choose to change it or ignore it. Click on Next again. Now, you will be asked to enter the serial number which came with the DVD or purchased online. Leave it blank if you want to install an evaluation copy. Then click on Next.
 -
 You will be asked to choose the directory for installation. If you are installing in 64-bit systems and are using a 32-bit version of the software, then it will be installed in Program Files (x86) instead of Program Files. You may choose to install the software in other drives if you want a quick install. Be sure to change both the directories in case you intend to change one. Then click Next.
 -
 The wizard will ask you to choose components for installation. It is recommended to leave it untouched and click on Next. You can change your installation directory here too. In the next step, in case you want to request the installer, you'll need to switch off your firewall or allow access when prompted. Uncheck this option in case you don't have internet access. The option will be checked by default. Click Next.
 -
 Accept the License Agreement when prompted. In case your computer doesn't have NET Framework 2.0 or Microsoft Silverlight 4, you will be prompted to install these programs as well. Then click Next. You may choose to review your installation before it begins now. If you are ready, then click Next.
 -
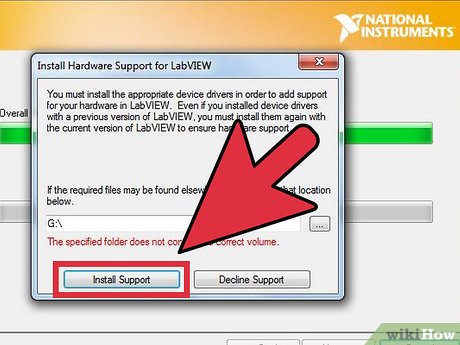
 Once the installation is complete, you will be prompted to install hardware support for LabVIEW. You need to insert the DVD with Device Drivers and click on Install Support. This is needed in case you intend to use external hardware from NI. Click Decline Support if you just want to use the software. Click Next. You will be prompted for restarting. You will have to restart if you want to use the software.
Method 3 of 3:
Installing Additional Software (LabVIEW Mathscript RT Module)
-
 Insert the DVD or run the installer that you downloaded from NI Website. Click on Next.
 -
 You will be asked if you want to install MathScript with a serial number (if you have it) or choose the Evaluation mode. Apply this as needed.
 -
 Accept the license agreement and click on Next. You may need to review the installation before beginning it. When you're ready, click on Next.
 -
 After installation, you will be asked if you want to launch the Activation Wizard. If you want to, then click on Next for activation. For using in Evaluation Mode, uncheck the option and click on Finish. Use the same procedure to install other addons.
Share by
Micah Soto
Update 05 March 2020


