How to install and use a vulnerability scanner in Linux
In this article, TipsMake.com will install OpenVas, an open source vulnerability scanning and management application, then run the first vulnerability scanning process..
One of the best things about Linux is the huge number of open source tools, although they may not have been installed. In this article, TipsMake.com will install OpenVas, an open source vulnerability scanning and management application, then run the first vulnerability scanning process.
You must first choose a basic Linux distribution. This tutorial will use Ubuntu. Some other distributions, such as Kali Linux, may already be installed.
In addition to installing Ubuntu, you'll need to choose which version of OpenVas will work with. Currently, there are 3 versions in circulation. This tutorial will use the latest version - Greenbone Vulnerability Management (GVM) version 10. To read more about OpenVas or GVM, you can refer to:
https://launchpad.net/~mrazavi/+archive/ubuntu/gvm
Begin
To start installing the GVM, you will also need to install the appropriate mandatory repository on which the GVM depends. To do this, you'll start with opening a terminal session by pressing Ctrl + Alt + T and running the following command:
sudo add-apt-repository ppa:mrazavi/gvm
The output of the above command will provide text-based instructions for the GVM, but also provide you with optional instructions.
Update Ubuntu installation
Starting with the new installation of Ubuntu 18.04, you'll want to make sure everything is up to date. To do this, run the following command:
sudo apt-get update
Install OpenVas
At this point, you are ready to install the GVM. The default database used for the GVM is SQLite. If you prefer another database to use with this solution, you can find additional instructions at the link provided above.
To install GVM, run the following command:
sudo apt install gvm
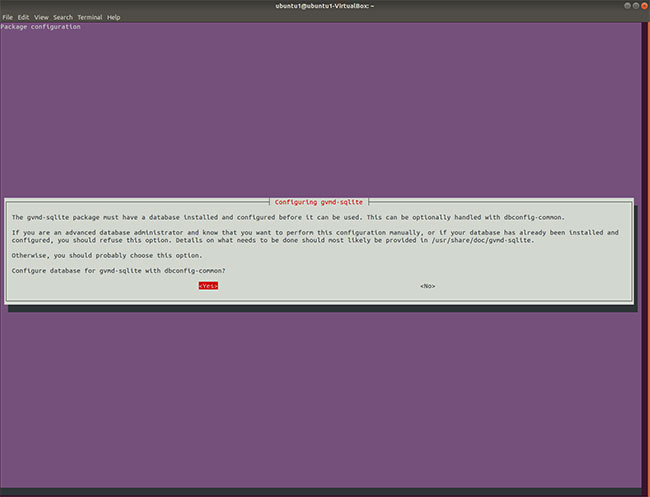
During the installation process, you will be prompted for additional configuration steps:
To configure Unix Socket, select 'Yes'.

To configure GVMD-sqlite, select 'Yes'.
To configure GVMD-sqlite-cert, select 'Yes'.

To configure GVMD-sqlite-scap, select 'Yes'.

When the installation is complete, the final step is to update the greenbone nvt / cert / scap data with the following command:
sudo greenbone-nvt-sync sudo greenbone-scapdata-sync sudo greenbone-certdata-sync
Run the first scan
Congratulations on completing the GVM installation - now the fun will begin. First, check the installation status. All applications that are running properly will display a green dot (or 'active' status) when running. You can do that by launching the following items:
systemctl status gvmd # manager systemctl status openvas-scanner # scanner systemctl status gsad # web ui
The GVM provides users the ability to use the Web interface. To access the Web interface, navigate the web browser to:
https://localhost:4000
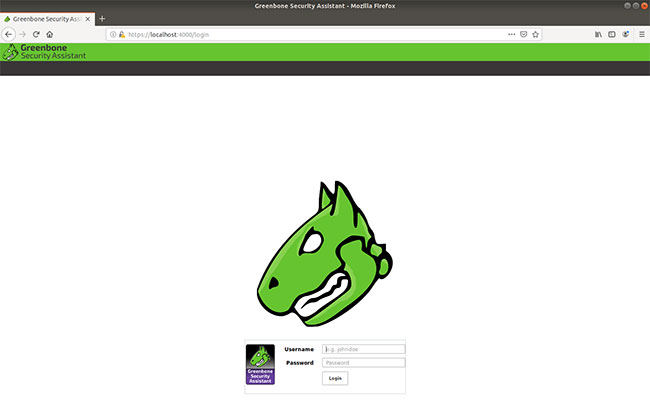
Log in with the following information:
Username: admin Password: admin
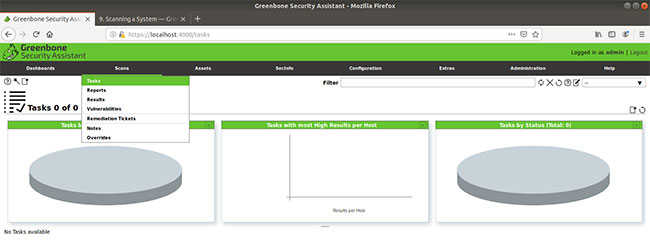
After logging in with admin credentials, you can now set up the first scan. To do this, select Scan> Tasks from the application menu.
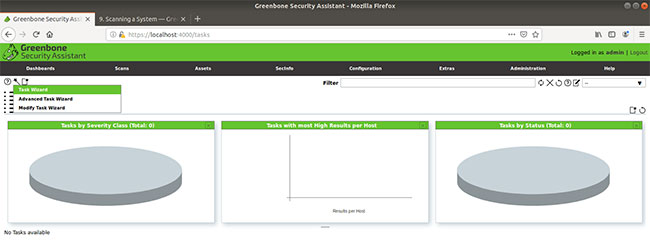
Then, from the task window, find the 'magic wand' icon and select Task Wizard .
When the Task Wizard window appears, we will enter the IP address of the host. Because only one machine is used, the example will scan the local host. To do this, confirm that 127.0.0.1 has been entered. If not, manually enter the space provided.
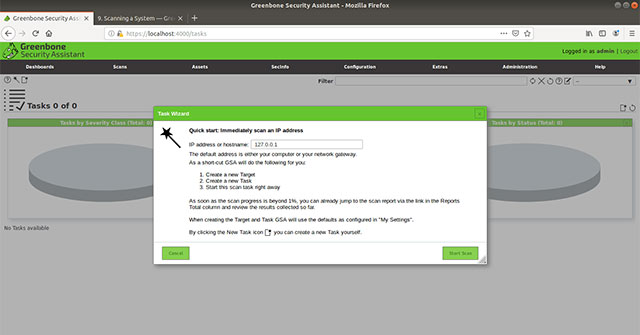
Click 'Start Scan' and wait. This may take several minutes, depending on whether you have used a new installation of Ubuntu or an existing machine.
When the scan is complete, you will see a page similar to the following message.
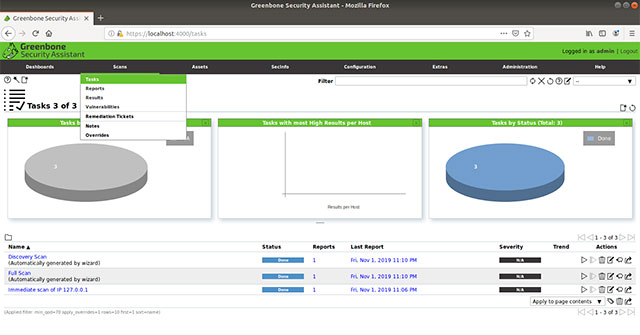
Now to see the results, go to Scans> Reports . Due to the fact that this is a new testing machine, the result was found nothing. If you run the scan on an existing machine at the company or home network, the results will be different.

These are just the tip of the iceberg about what the GVM can do to find system vulnerabilities. You can configure different scans and discover what you don't know. Sure, you will be surprised at what you will find.
Hope you are succesful.