How to Format SD Card
On Android operating system
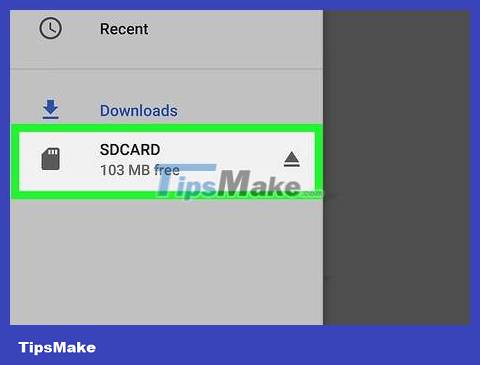
Make sure the SD card is attached to the Android device. If you need to insert an SD card, you must remove the back cover of the device.
Tablets and phones often use microSD cards - small versions of SD cards used in cameras.
In some cases, you need to remove the battery of your Android device to see the SD card slot.
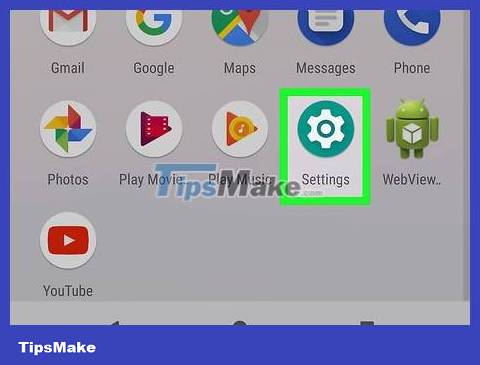
Open Settings on Android with the gear icon in your device's App Drawer.
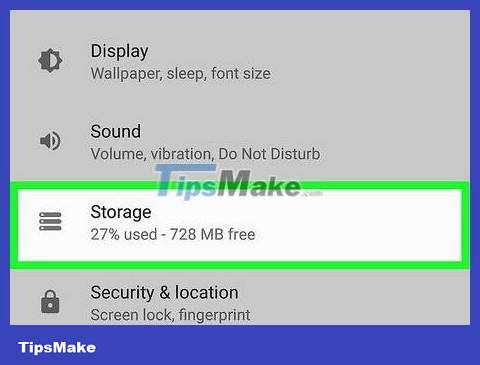
Scroll down the screen and select Storage . You'll find this option in the middle of the Settings page.
On a Samsung device, select Device maintenance .

Tap the name of your microSD card below the "Portable storage" heading.

Tap the ⋮ icon in the top right corner of the screen.

Tap Storage settings . It's below the selection list.
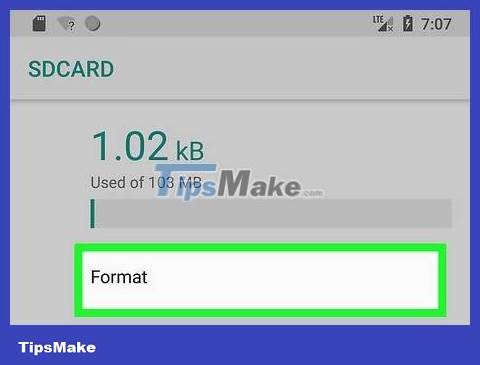
Select Format or Format as internal . If you want to set the SD card as internal memory, select Format as internal . If you only want to delete data on the SD card, select Format .
First, you may have to select Storage at the bottom of the page on your Samsung device.

Select ERASE & FORMAT at the bottom of the page to start formatting your Android device's SD card.
This process only takes a few seconds. Once completed, your SD card has been formatted successfully.
On Windows operating system
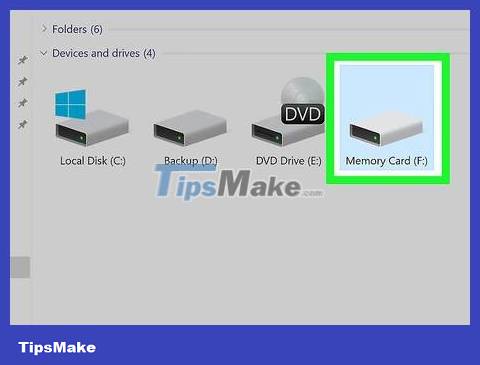
Insert the SD card into the computer. Your computer usually has a thin, wide slot on the outside for an SD card.
Remember to insert the SD card's cornered end first and the side with the sticker facing up.
If your computer does not have an SD card slot, you can purchase a USB-type card reader to connect the SD card through the USB port.

Open Start by clicking the Windows icon in the bottom left corner of the screen.
You can also press the key ⊞ Win.

Click the icon on the left side of the Start window to open File Explorer.
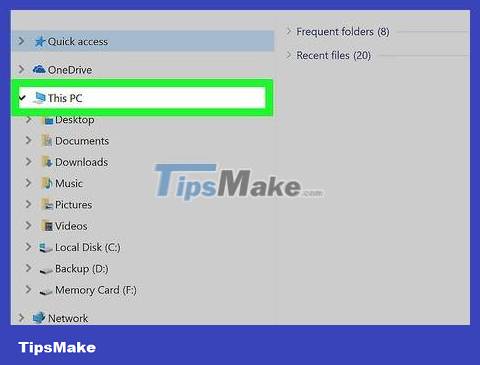
Click My Computer , the desktop icon on the left side of the File Explorer window.
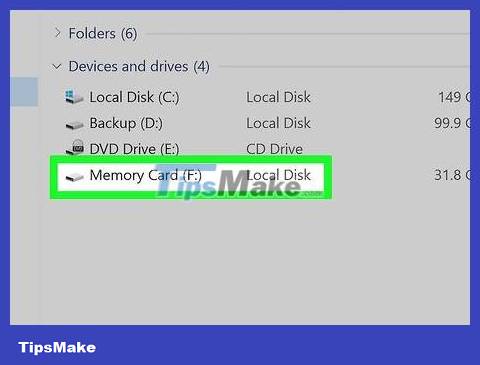
Click the name of the SD card. You'll see the card's name below the "Devices and drives" heading in the middle of the This PC window. The name of an SD card is often accompanied by the letters "SDHC".
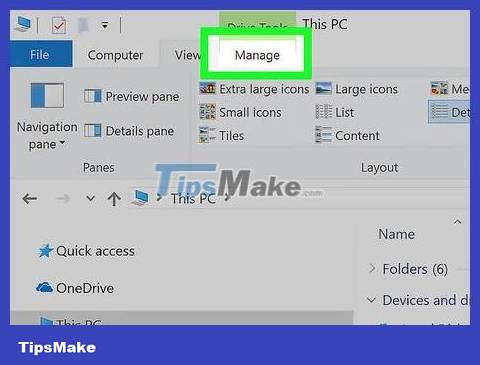
Click the Manage tab in the menu in the upper left of the This PC window.
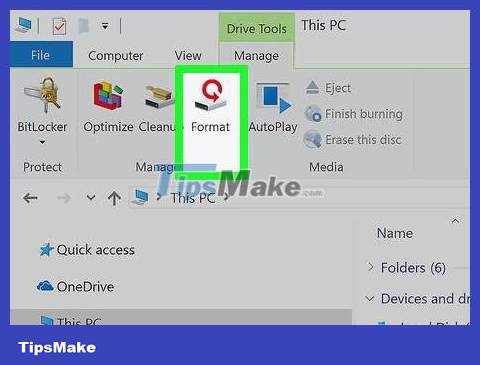
Click Format . It's in the upper left of the window, with a flash drive icon and a red circular arrow above it. This will open the Format window.
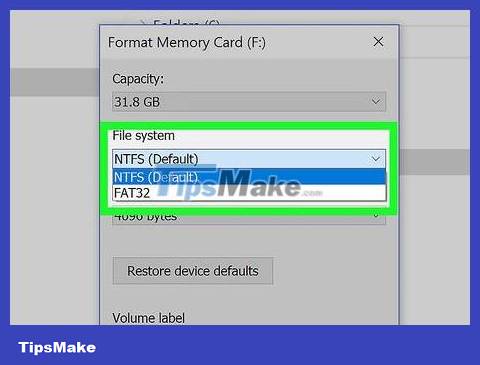
Click the "File System" box below the "File System" heading near the top of the page. The screen will display a list with the following options:
NTFS - The default format of the Windows operating system and is only suitable for Windows.
FAT32 - Widely compatible format. Compatible with Windows and Mac, but has a 2 terabyte memory limit with a maximum individual file size of 4 gigabytes.
exFAT (Recommended) - Suitable for Windows and Mac, no memory limits.
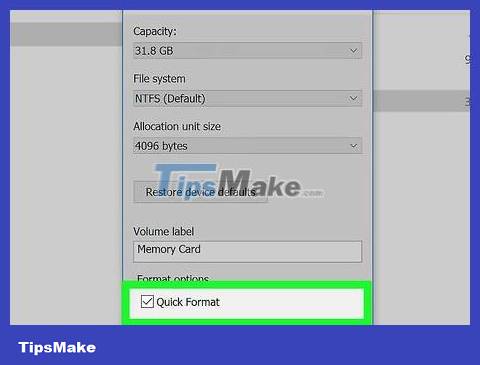
Click to select a format type you want.
If you have previously formatted the memory, check the Quick Format box .
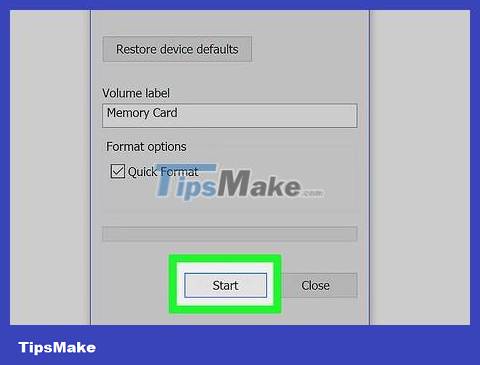
Click Start , then select OK to let Windows begin formatting the SD card.
Photos on your SD card will be deleted during processing.
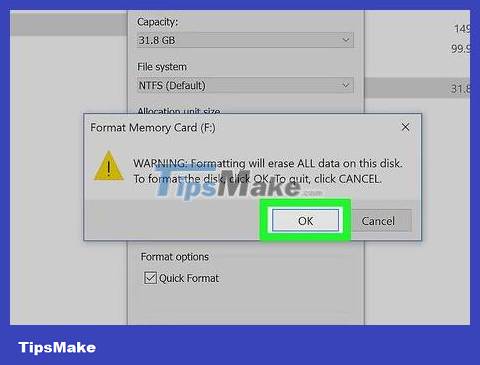
Click OK when prompted. This indicates that the SD card has been changed to support the selected format.
On Mac operating system
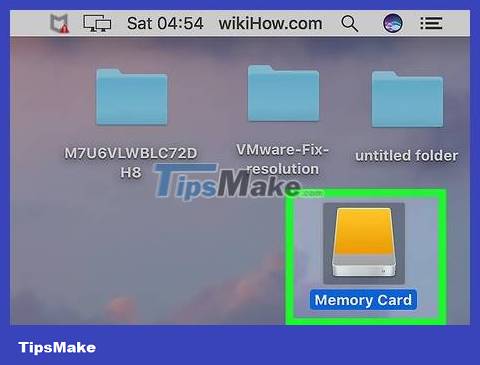
Insert the SD card into the computer. Your computer usually has a thin, wide slot on the outside for an SD card.
Remember to insert the SD card's cornered end first and the side with the sticker facing up.
Many newer Mac computers do not have an SD card slot, you need to buy a USB-type card reader to connect the SD card through the USB port.
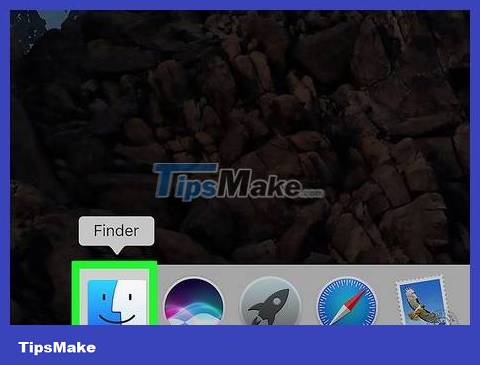
Open Finder with the blue face icon in the Dock.
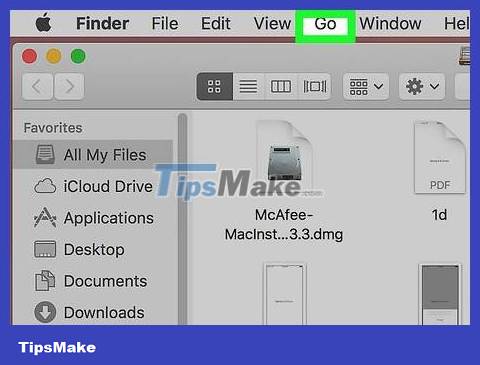
Click Go at the top of the screen, to the left of your Mac's menu bar.
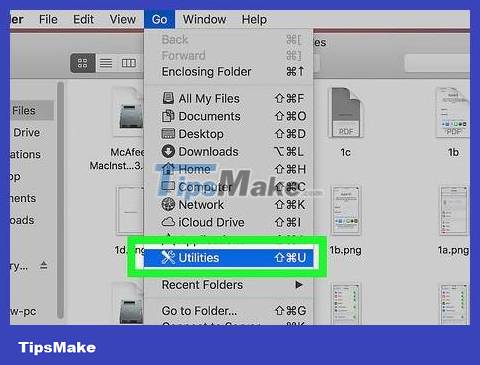
Click Utilities in the Go drop-down list .
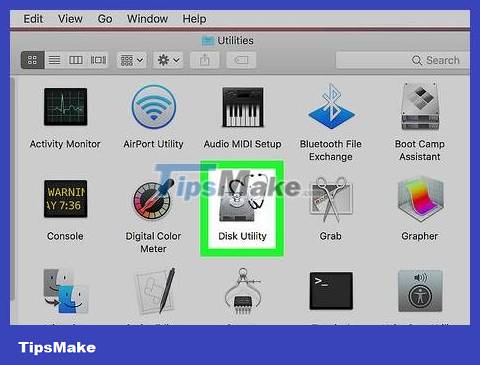
Double-click Disk Utility. It's in the middle of the Utilities page.
The widgets on this page are usually arranged in alphabetical order.
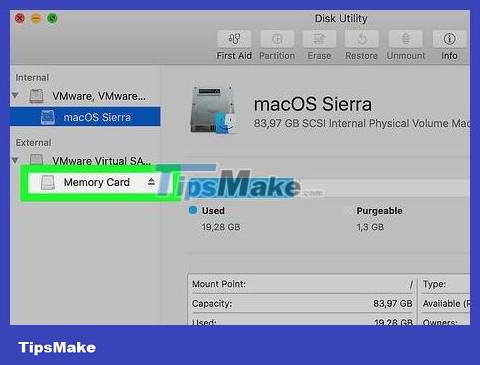
Click the memory card's name in the window on the far left of the Disk Utility page.
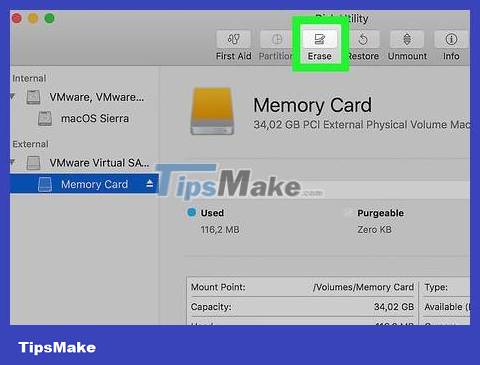
Click the Erase tab . It's at the top of the Disk Utility window.
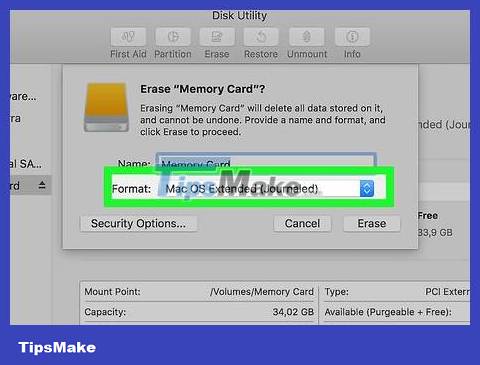
Click the box below the "Format" heading in the middle of the page. This will display a list with the following options:
Mac OS Extended (Journaled) - Default format on Mac, Mac only.
Mac OS Extended (Journaled, Encrypted) - Encrypted version of the default Mac format.
Mac OS Extended (Case-sensitive, Journaled) - Version of the default format on the Mac, with different behavior for files with the same name but with case differences (such as " file.txt" and "File.txt").
Mac OS Extended (Case-sensitive, Journaled, Encrypted) - A combination of the three format options above for formatting on Mac.
MS-DOS (FAT) - Suitable for Windows and Mac computers, but has a 4 gigabyte file limit.
ExFAT (Recommended) - Suitable for Windows and Mac computers, has no memory limits.
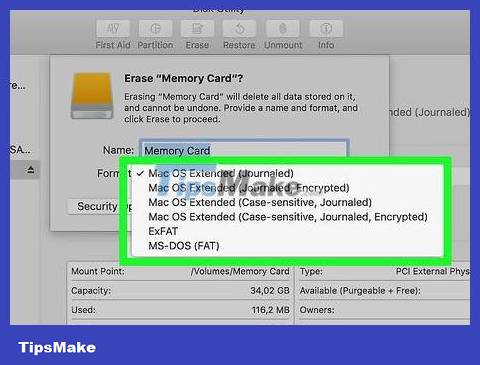
Click the format you want to use as the SD card setting.
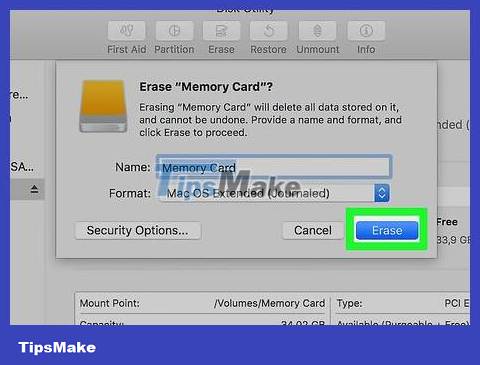
Click Erase , then click Erase when asked. This allows your Mac to begin erasing and reformatting the SD card. Once the process is complete, your SD card will support the selected format.