Table of Contents
This practical guide walks through how to fix the error that cannot open the start menu on a, explains the main requirements, and highlights common issues that may appear along the way.
1. Reboot the computer
To fix the Start Menu not working error, try restarting your computer to see if it works. After the boot is complete, see if the error has been fixed.

2. Restart Windows Explorer
To restart Windows Explorer, follow the steps below:
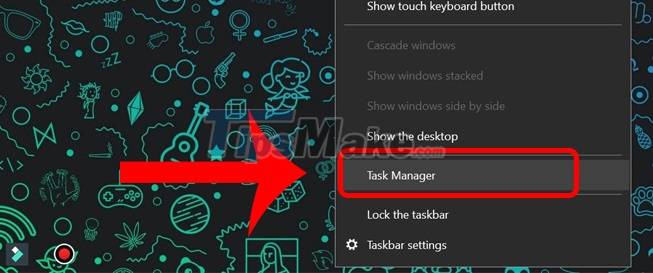
Step 1: Right-click the Taskbar> Select Task Manager.
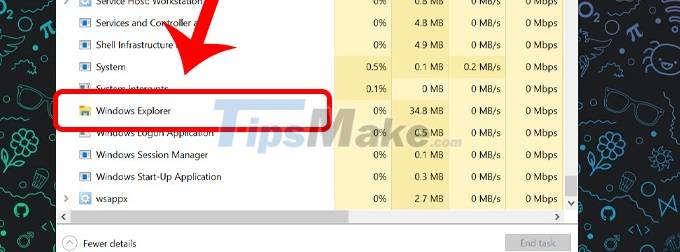
Step 2: In the Processes tab, scroll down to find Windows Explorer.
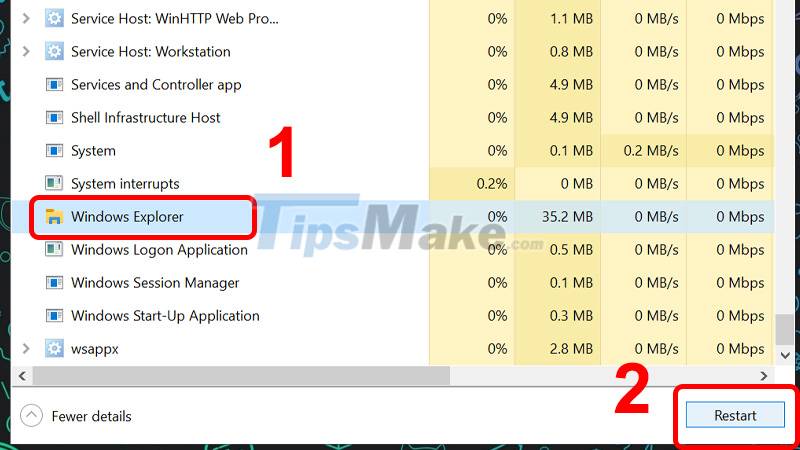
Step 3: Click Windows Explorer> Select Restart to restart Windows Explorer.
After rebooting the computer, you will be able to use the Start Menu, but this is only temporary and the error will likely occur whenever again.
3. Turn off login information
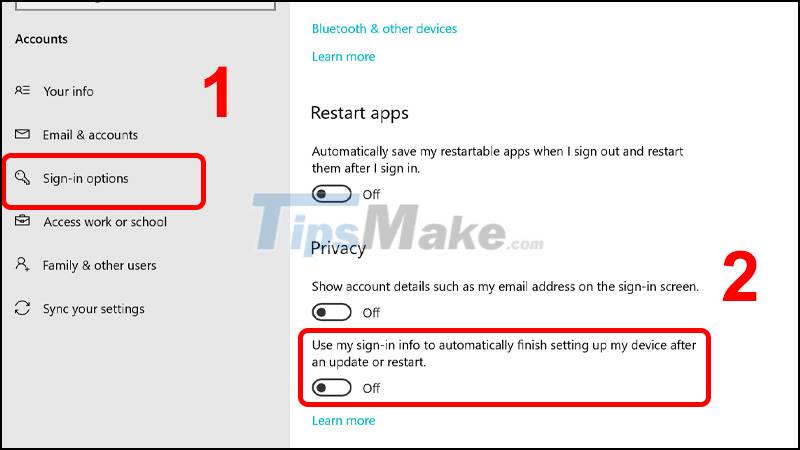
Step 1: Press the Windows + I key combination to enter Windows Settings.
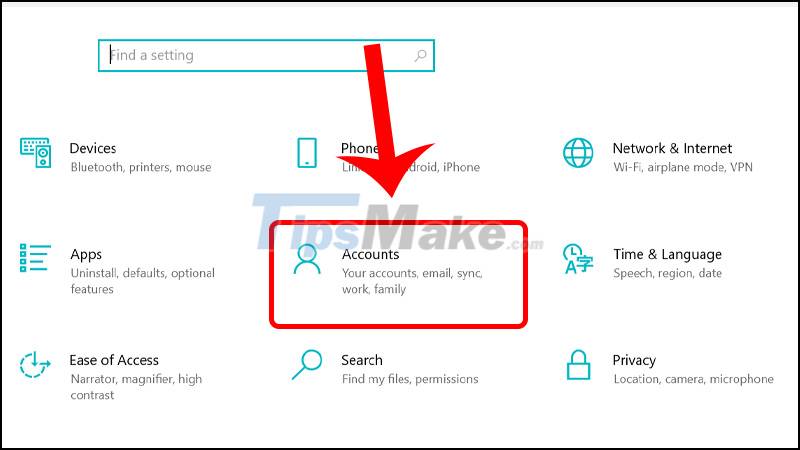
Step 2: Select Accounts.
Step 3: In the tab Sign-in Options> Scroll down to switch Use my sign-in info to automatically to Off.
4. Update Windows 10
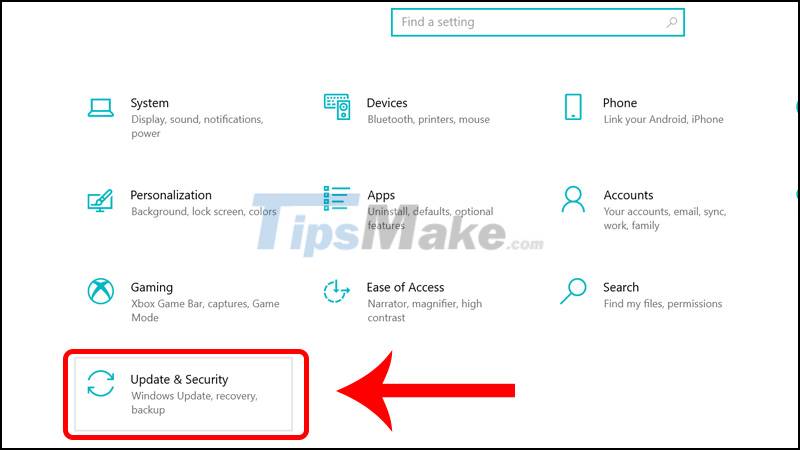
Step 1: Open Windows Settings using the keyboard shortcut Windows + I.
Step 2: Click the Update & Security icon.
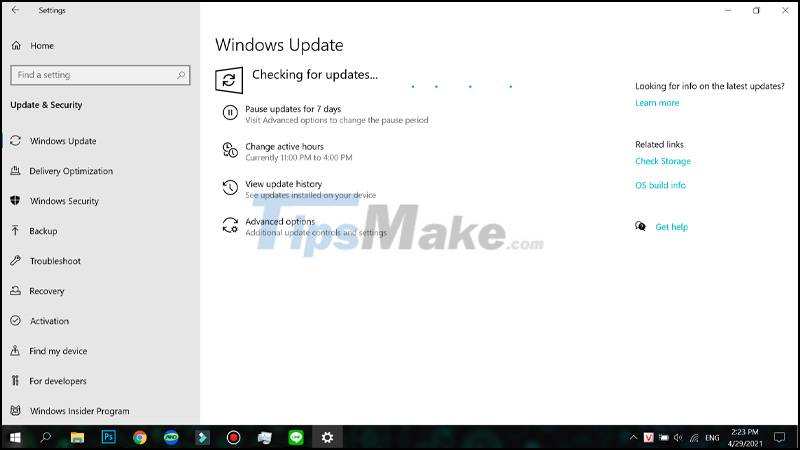
Step 3: Windows will automatically check for the update process.
Step 4: If there is a new update available, click Download and install to update and Install.
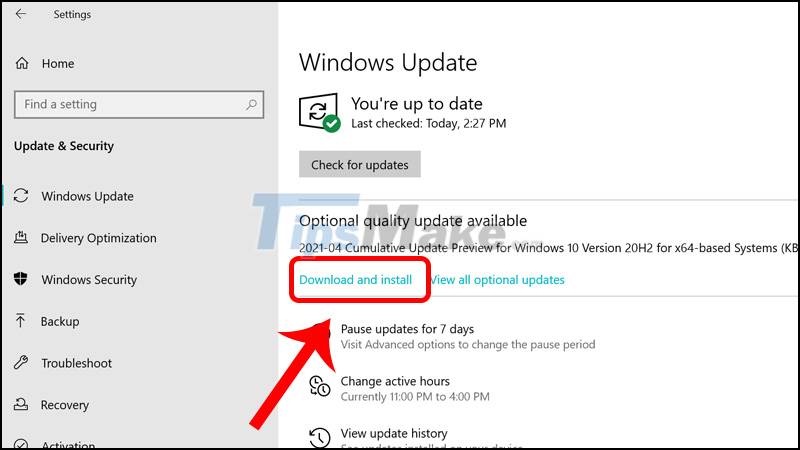
The update download and installation process is in progress, after the installation is complete, restart your computer to see if the error has been fixed.
5. Fix Start Menu error with Windows PowerShell
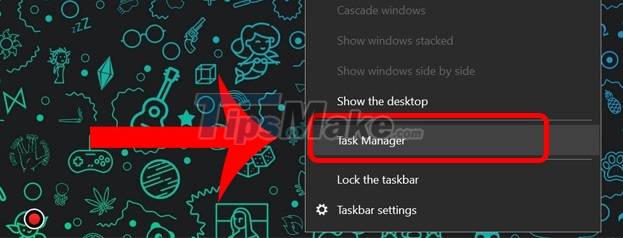
Step 1: Right-click the Taskbar> Select Task Manager.
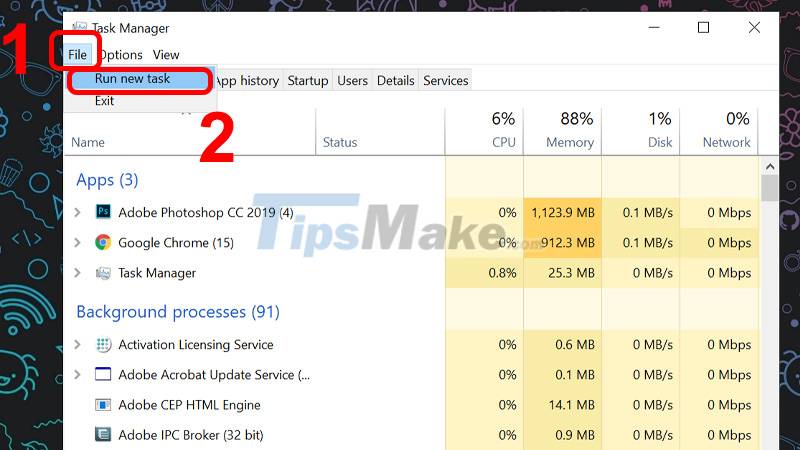
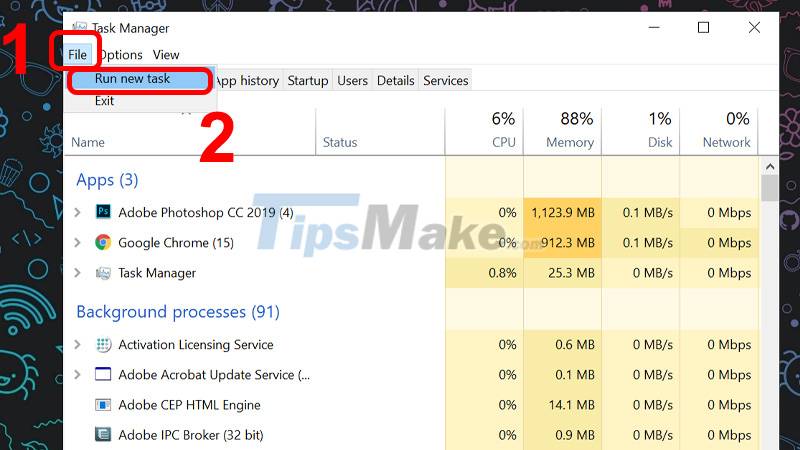
Step 2: Click File> Select Run new task.
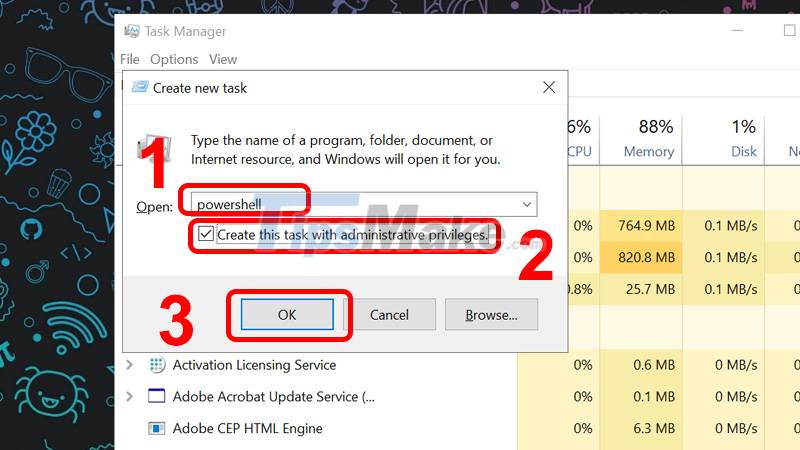
Step 3: Enter powershell into the Open box> Check Create this task with administrative privileges> Click OK.
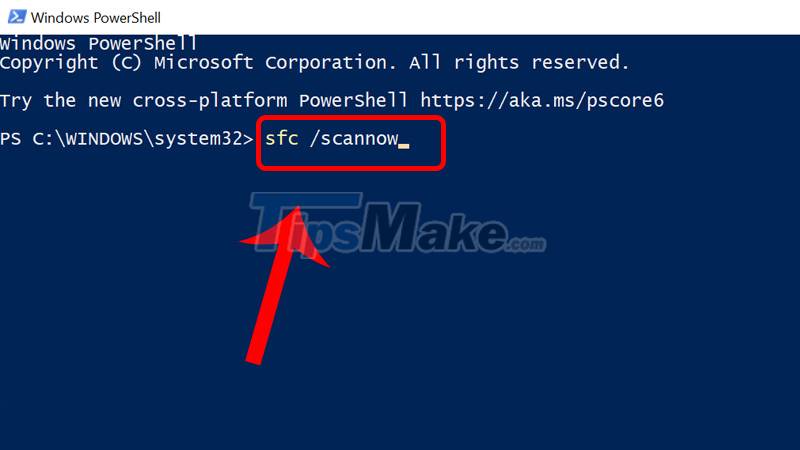
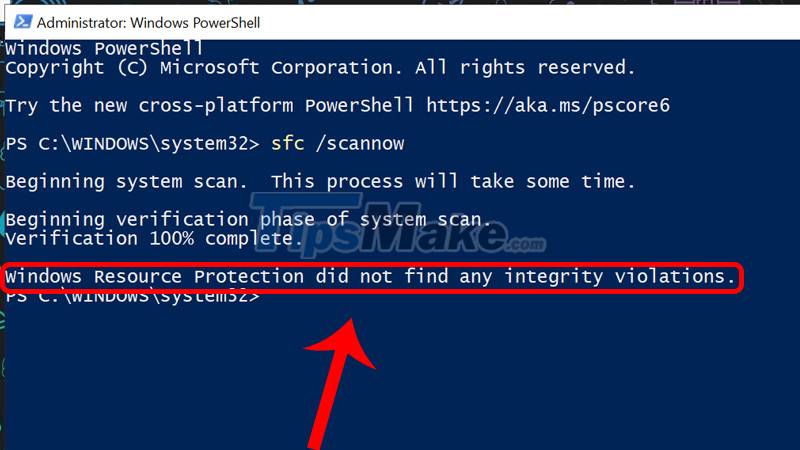
Step 4: Enter keywords sfc / scannow> Enter.
Step 5: After running, you will receive 1 of 2 following messages
Case 1: The message "Windows Resource Protection did not find any integrity violations" appears that your computer does not contain any error files.
Case 2: The message "Windows Resource Protection found corrupt files but was unable to fix some (or all) of them" appears, meaning your computer currently has a corrupt file and needs to be fixed.
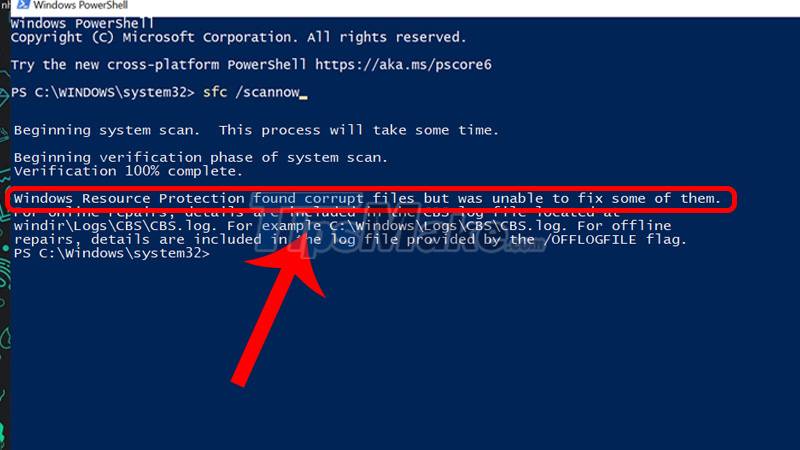
Step 6: Enter the command DISM / Online / Cleanup-Image / RestoreHealth into the PowerShell window and press Enter.
This command will help automatically download files directly from Microsoft to replace corrupted files. After the download is finished, restart your computer and see the results.
6. Create a new user account
Step 1: Right-click the Taskbar> Select Task Manager.
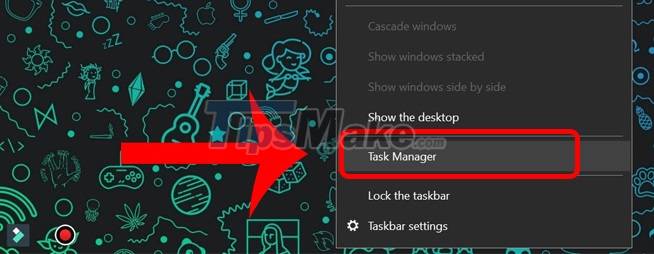
Step 2: Go to File> Select Run New Task.
Step 3: Type NET USER ACCOUNTNAME PASSWORD / ADD> Check Create this task with administrative privileges> Click OK.
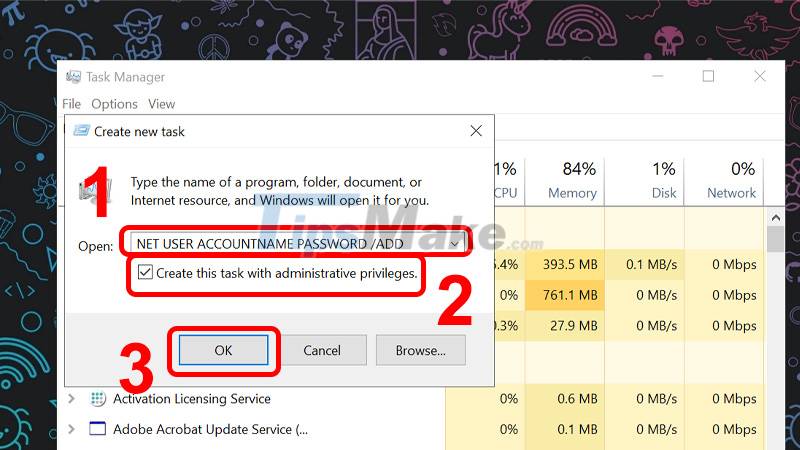
Where ACCOUNTNAME is the account name, PASSWORD is the password.
Step 4: Go to Control Panel> Select System.

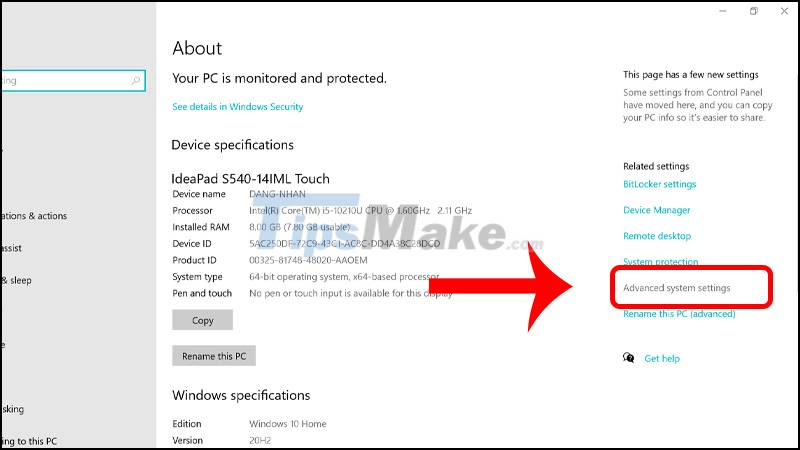
Step 5: Go to Advanced System Settings.
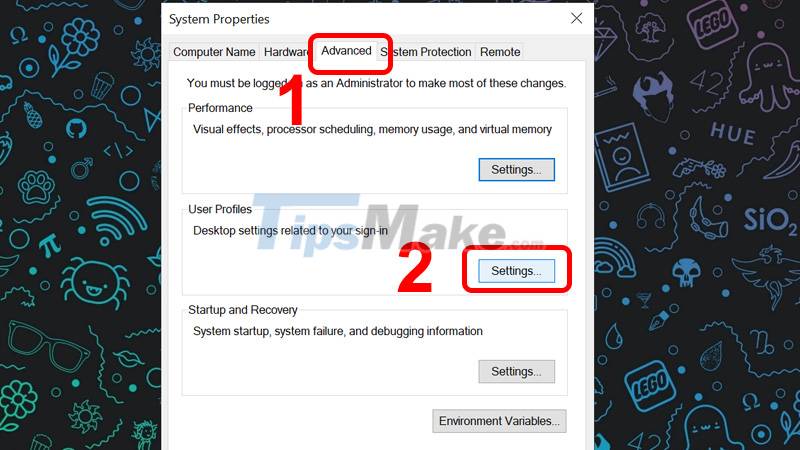
Step 6: On the Advanced tab, click Settings under User Profiles.
Step 7: Choose New Account> Click Copy To.

8. Reset, factory reset Windows 10
If the above fixes that you can not fix this error, you should factory reset your computer.
9. Reset Index Windows 10
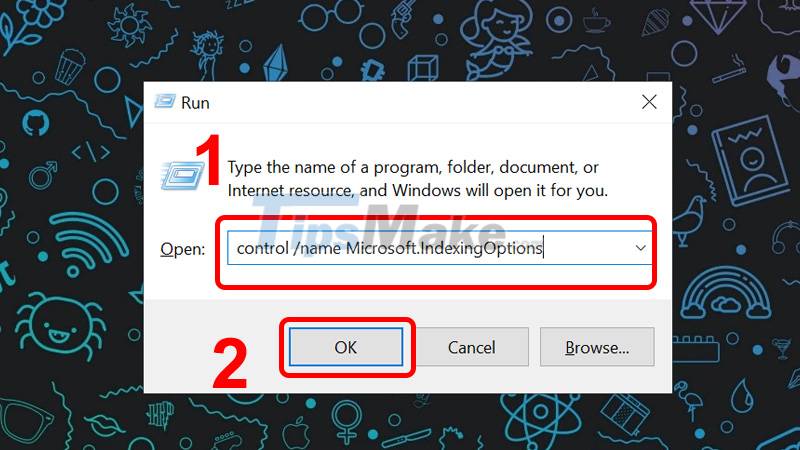
Step 1: Press the Windows + R key combination to open the Run dialog box.
Step 2: Enter the keyword `` control / name Microsoft.IndexingOptions '' in the box Open> Click OK.
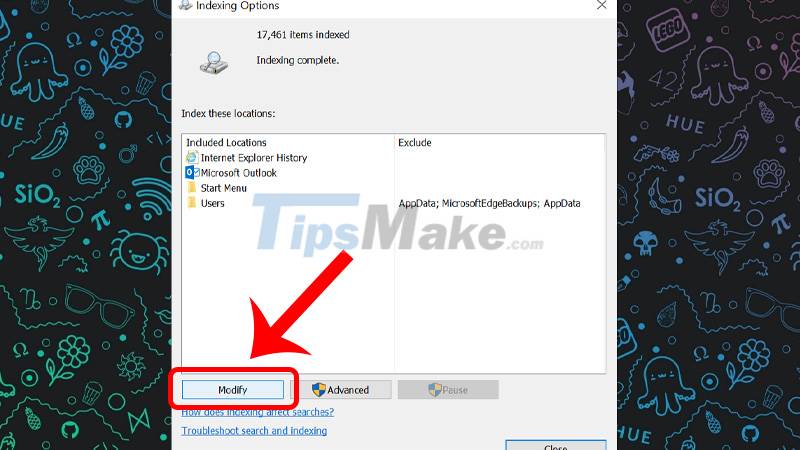
Step 3: In the window of Indexing Options, click Modify.
Step 4: Click Show all locations.
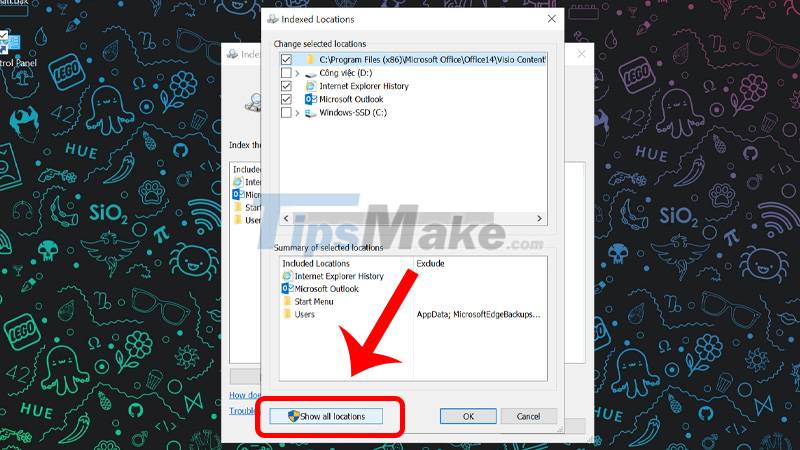
Step 5: Turn off marking all items> Click OK.

Step 6: Click Advanced> Select Rebuild.
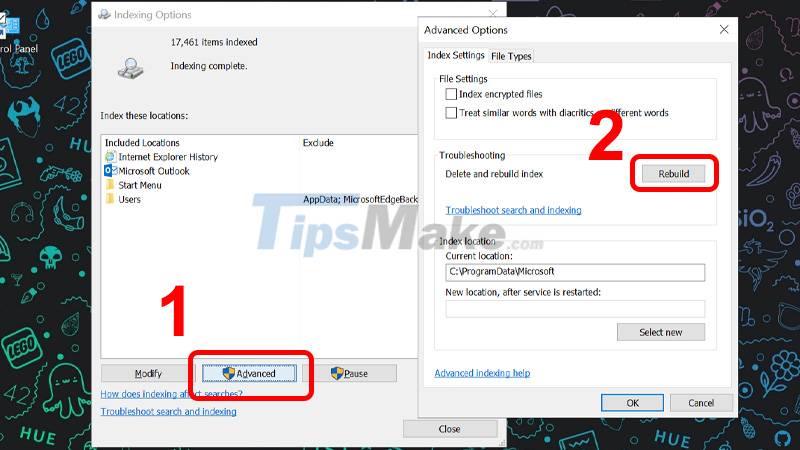
A new window appears, wait for it to finish running and click OK.
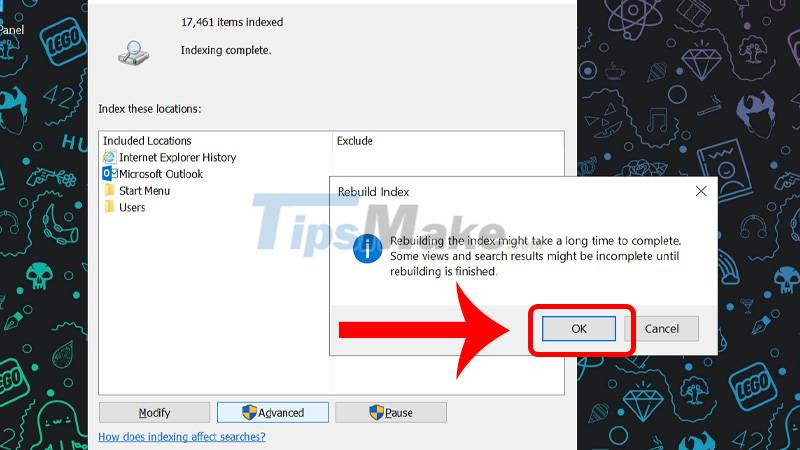
Click OK to finish
The last article has guided you how to fix the error that cannot open Start Menu on Windows 10 computer simply and quickly. Wish you all success!
Key Takeaways
Use the information above as a practical reference for how to fix the error that cannot open the start menu on a. Review each step carefully, confirm any requirements, and choose the option that best fits your situation.
FAQ
What does this guide explain about Fix the Error That Cannot Open the Start Menu on a?
It explains the main concepts, practical considerations, and useful steps related to fix the error that cannot open the start menu on a without requiring advanced knowledge.
Who can benefit from learning about Fix the Error That Cannot Open the Start Menu on a?
This information is useful for readers who want a clear overview, practical guidance, and reliable steps related to fix the error that cannot open the start menu on a.
What should I check before applying this information?
Review the requirements, confirm that your device, software, or situation matches the instructions, and back up important data before making major changes.
Related Articles
 How to Fix the Error Can Not Open the Start Menu on Windows 104 minutes read
 How to Fix Pin to Start Error on Windows 105 minutes read
 How to Fix Some Ways to Fix Start Menu Error on Windows 10 Stops9 minutes read
 3 Ways to Fix Start Menu on Windows 10 Stopped Working5 minutes read
 How to Restore a Disappeared Start Menu4 minutes read
 Instructions for Fixing Errors Start Menu and Cortana Do Not Work5 minutes read
Reader Comments 0
Sign in with email or Google to join the discussion.