Table of Contents
This guide explains how to resolve Automatic Repair Loop Error on Windows 10, starting with the most likely causes and moving through practical troubleshooting steps.
1. Common causes of Automatic Repair errors
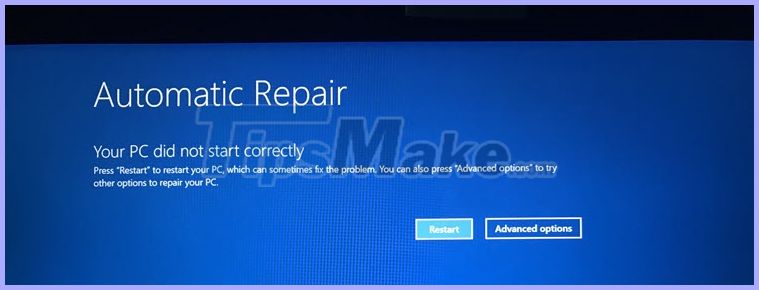
Automatic Repair usually occurs when your computer is suddenly powered off due to a power outage or because we turn off the power with the Power button. Additionally, the Automatic Repair error appears when the file that executes the Boot process ( Windows Boot Manager ) fails. Besides, there are many other objective causes affecting Automatic Repair errors such as driver conflicts, blue screens.
2. Ways to fix Automatic Repair errors
2.1. Access to Command Prompt
Step 1: On the Automatic Repair error screen, click Advanced options .
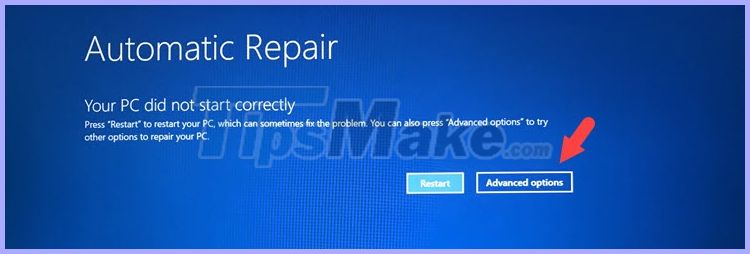
Next, click on Troubleshoot .

Then choose Advanced options .

Next, select Command Prompt . Your computer will restart momentarily and configure the Command Prompt feature.

After rebooting the computer, Windows will ask you to select an account on the machine. Please click on the account and login password (if any).

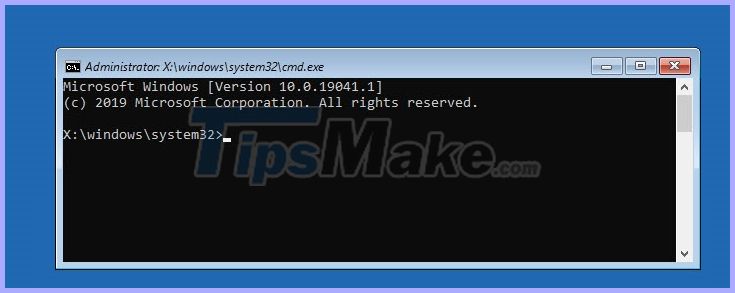
After we access the Command Prompt as shown below is successful!
2.2. Use the Check disk command to automatically correct errors
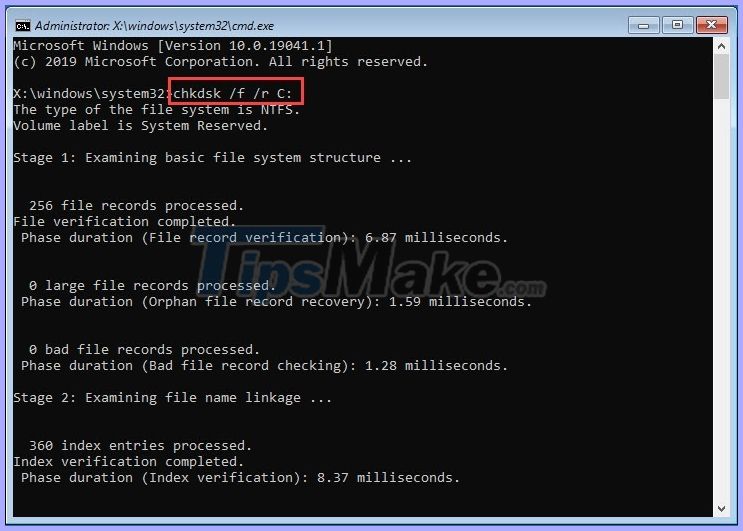
In the Command Prompt window, enter the following command and press Enter :
chkdsk / f / r C:
After that, the Check Disk tool will automatically correct the errors and apply the changes to you. The next thing you need to do is turn off the Command Prompt window and restart the computer after the Check Disk is complete.
2.3. Use the Bootrec command in the Command Prompt
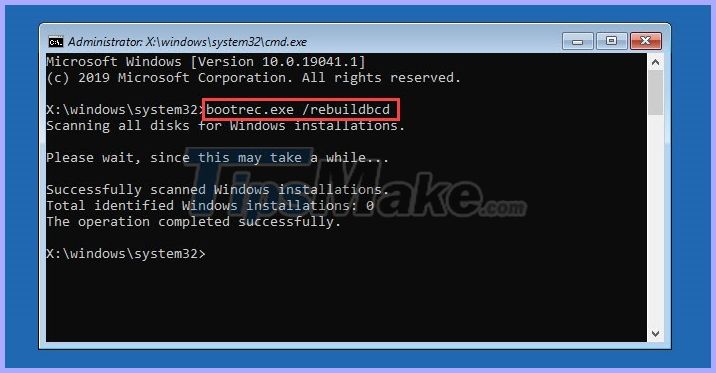
Step 1: Enter the following command and press Enter .
bootrec. exe / rebuildbcd
Step 2: Enter the following command and press Enter .
bootrec. exe / fixmbr

Step 3: Enter the next command and press Enter .
bootrec. exe / fixboot
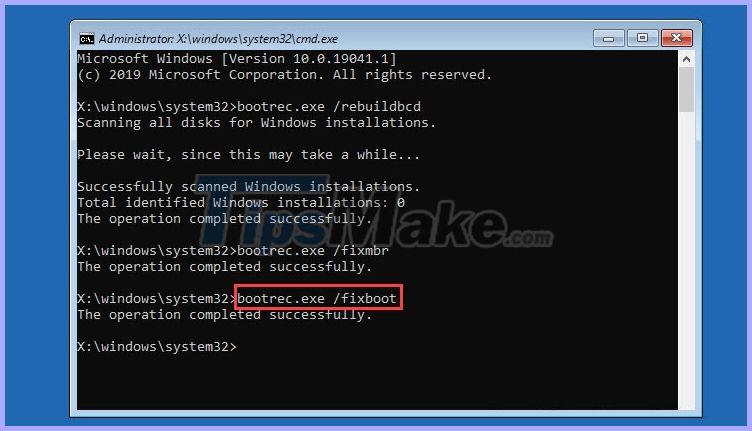
After completing the commands, then exit CMD and restart the computer.
2.4. Turn off Automatic repair in Command Prompt
To turn off Automatic Repair in CMD, enter the following command and press Enter :
bcdedit / set recoveryenables no
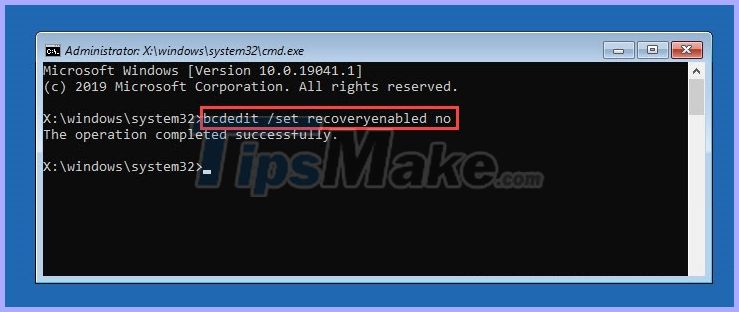
To turn this feature back on, change it from No to Yes in the above command.
bcdedit / set recoveryenables yes

2.5. Data reset in the computer
Step 1: Click Advanced options on the Automatic Repair screen.
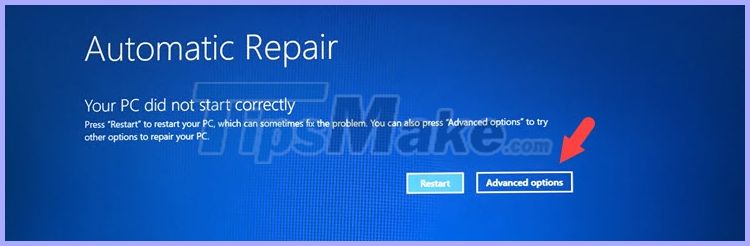
Step 2: Click Troubleshoot .

Step 3: Click Reset this PC .

Step 4: You choose Keep my files to keep documents and files not backed up on drive C. If you have saved the file, you should choose Remove everything to make the computer after the reset "cleaner" and avoid errors such as software conflicts, drivers.
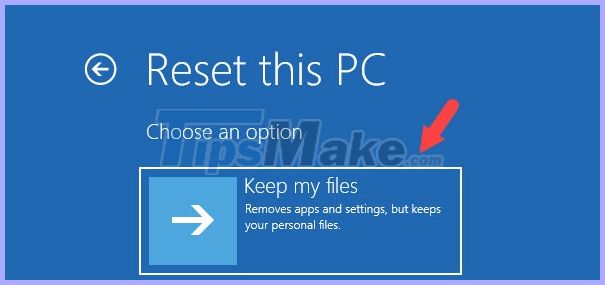
Step 5: Click on Cloud download if you do not have the Windows installer on your computer and the Local reinstall option if you have ISO windows 10 on your computer. After selecting, the computer will begin the reset process.

Good luck!
FAQ
What usually causes Automatic Repair Loop Error on Windows 10?
The cause may involve incorrect settings, outdated software, damaged files, permission problems, device compatibility, or a temporary system issue.
What should I try first to resolve Automatic Repair Loop Error on Windows 10?
Restart the affected app or device, install pending updates, verify settings and connections, and follow the troubleshooting steps in order.
How can I prevent the issue from returning?
Keep software updated, maintain backups, avoid interrupted installations, and review system or device settings after major changes.
Related Articles
 How to Fix Automatic Repair Error in Windows 105 minutes read
 Fast Fix Computer Repair on Windows16 minutes read
 Steps to Fix 'Stuck in Automatic Repair' Error in Windows 106 minutes read
 How to Fix Boot Loop Problems in Windows7 minutes read
 4 Effective Ways to Fix Preparing Automatic Repair Black Screen Error: Top Picks7 minutes read
 Fix Windows Startup Errors with Startup Repair6 minutes read
Reader Comments 0
Sign in with email or Google to join the discussion.