How to Erase a DVD
If you want to make space on a DVD so that you can add additional files or want to get rid of the files permanently, you may want to erase a DVD. DVD-RW and DVD-R are the most common format for DVDs. DVD-RW are rewritable discs that you....
Method 1 of 4:
Deleting a DVD-RW on a Mac
-
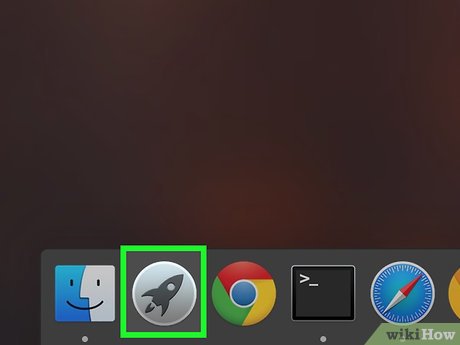 Click the Launchpad icon on the bottom of the screen. The Launchpad icon should be located on the bottom of your screen and looks like a rocket ship icon. Clicking the icon will open up a list of different applications on your computer.[1]
 -
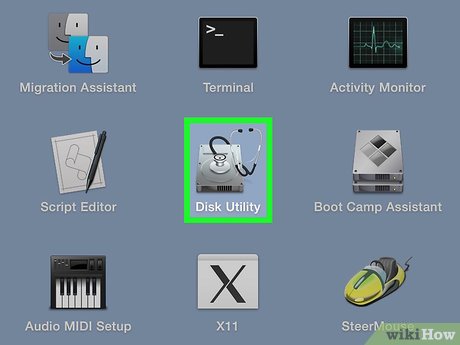 Click the disk utility icon. From the launchpad screen, look for the disk utility icon. It will look like a disk drive. If you can't find the disk utility icon, you can search for it in the search on the top right of your screen by clicking the magnifying glass and typing 'disk utility.'[2]
 -
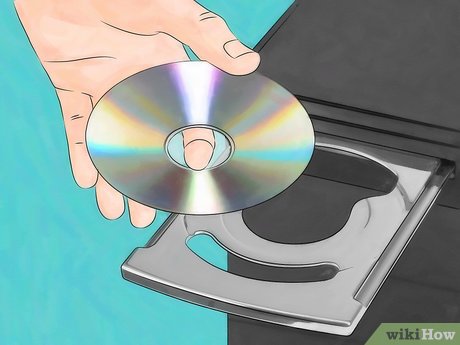 Insert the DVD into your computer's DVD drive. To open the disc drive, press the button that's on the front of the drive. Open up the disc drive for your DVD player and insert the disc and close the drive. Your disc utility application should automatically show the disc on the left-hand side of the screen.[3]
 -
 Click the DVD icon. Locate the DVD icon on the left side of the screen and left click it. This will open up options to delete the data from the disc.[4]
 -
 Select either the 'quickly' or 'completely' options. If you haven't been able to read or rewrite the data on the disc, select the 'completely' option by clicking the bubble next to the text. If you have been able to read the disc but just want to delete the files off of it, select 'quickly.' Doing a quick delete of the data should only take a couple minutes, while a complete deletion of data could take up to an hour.[5]
 -
 Click the 'Erase' button. Once you're done making your selection, hit the erase button. Your computer will then go through the process of deleting the data off of the DVD. Watch the status bar until the deletion is complete.[6]
Method 2 of 4:
Removing DVD-RW Files on Windows 10
-
 Bring up Windows File Explorer. Hit the Windows icon on the bottom left of the screen then navigate to the File Explorer icon. The icon will resemble a folder. Alternatively, you can get to the File Explorer by hitting the windows key on your keyboard while simultaneously hitting the E key.[7]
 -
 Click 'This PC' on the left-hand side of the File Explorer. On the left-hand side of the screen, you'll have options to go into multiple folders on the computer. Clicking 'This PC' on the left-hand side will bring you to a list of your disk drives.[8]
 -
 Double click on the DVD icon. You should now see the DVD show up on your disk drive. Double click the DVD, or right click the icon and click "Open." This will bring you to a folder with all of the files on the DVD.[9]
 -
 Select the files you want to delete. Once you get to the files on the DVD, select them by left-clicking the files that you want to delete. You can left click the files while pressing the Ctrl key to select more than one file.[10]
 -
 Hit the "Delete" key. Once the files are selected, pressing the "Delete" key will send the files to your trash bin. If you want to get rid of the files permanently, you can empty out the trash bin afterward by right-clicking its icon and left-clicking "Empty trash bin."[11]
Method 3 of 4:
Deleting Files on a DVD-RW for Windows 7 and Vista
-
 Click the "My Computer" icon. Go to your desktop and click the "My Computer" icon. If there is no icon there, go to "Start," then scroll up to "My Computer."[12]
 -
 Insert the DVD into the drive. Open up your disc drive by pressing the button on the front of it. Once it opens, stick the DVD into it and close the drive. When the DVD drive closes, it should show up on the "My Computer" screen.[13]
 -
 Right-click the DVD-RW and left-click the "Erase this disc" text. It should only take a few seconds for the DVD-RW icon to pop on the screen once you close the disc drive. Clicking "Erase this disc" will bring up a separate screen.[14]
 -
 Click the "Next" button. This screen should say "Ready to erase disc." Clicking the "Next" button will begin the process of deleting the disc. Wait until the loading bar is complete before closing the window. Your files should now be deleted off the disc.[15]
Method 4 of 4:
Deleting Files on a DVD-R
-
 Backup the files that you want to save on your hard drive. Since you can't delete files off a DVD-R, you'll have to physically destroy the disc. Backup any files that you want to save for later use before doing anything else. Click and drag the files onto your desktop or hard drive to save them to your computer.[16]
 -
 Destroy the old DVD-R disc. Use a cd shredder to dispose of the old discs. Just feed the discs into the shredder to destroy them. Alternatively, you can clip the discs with a tin clipper to destroy them.[17]
- Burning the discs lets off harmful smoke that is bad for your health.
-
 Transfer the files that you want onto a new disc. You can now take up any backed up files and rewrite them to a DVD-R or DVD-RW disc. Drag the files that you saved before onto the new disc. You'll have successfully gotten rid of the old files and retained the ones that you want.[18]