How to enable or disable the File History feature in Windows 10
File History is a very useful backup feature, below is how to enable or disable this feature on Windows 10..
The first File History was introduced in Windows 8 and improved in Windows 10.
Users use File History to automatically backup scheduled file versions to the saved save location. You can choose to save the copies to the internal hard drive, the external drive (eg USB drive) or to back up on the network. Also you can add, delete or remove backed up folders in File History.
Over time, File History will contain all the file versions. If the original is lost, corrupted or deleted, you can restore them with different versions of the file.
File History takes advantage of an integrated feature in the NTFS file system called Journal Change to track changes in files. Basically, when making changes on a file or folder on the hard drive, the change log will update with a change description and the name of the file and directory. Therefore, to decide which files to backup, File History simply refers to the NTFS change log. Use diary changes quickly and efficiently and do not use a lot of system resources like running regular backups.
If the selected drive as a backup location is not available such as a disconnected USB cable or a maintenance network, File History will continue its work by saving a copy to memory on the local drive. When the backup location appears again, the content saved in the memory will be transferred to that location and deleted from the local drive.
This article will show you how to turn on and turn off File History in Windows 10.
- How to delete the old File History version in Windows 10
- How to transfer User Profile to another Windows 10 computer
- How to backup Outlook email with File History on Windows 10
1. How to turn File History on or off in Settings
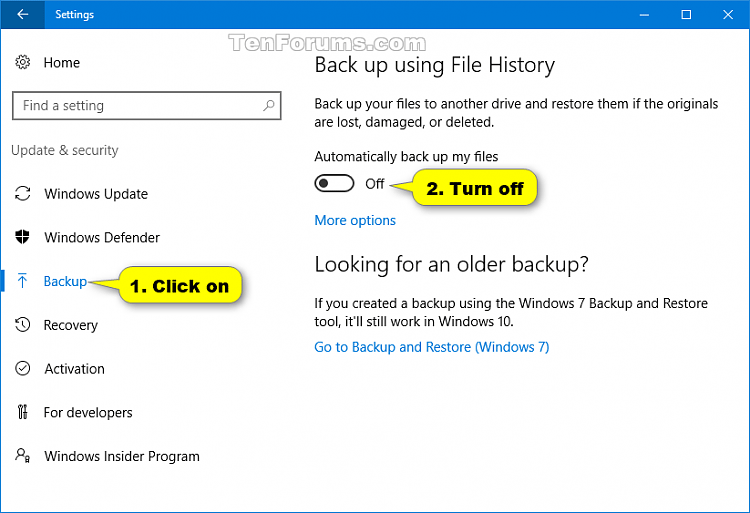
Step 1 . Open Settings and click on the Update & security icon.
Step 2 .
To turn off File History click on Backup on the left and turn off Automatically back up my files on the right.
Note : This setting is the default.
Note: If you see Add a drive , it means that the File History has been turned off without the selected drive.
You can close Settings if you want.
To turn on File History click on Backup on the left and turn on Automatically back up my files on the right.
Note : If you see Add a drive , you need to select the drive to back up the File History. File History will automatically turn on later.

File History is enabled. If you want, you can click More options and make changes to backup options. Here you can change the frequency of saving the file copy, change the time to save the file version, add the backup folder, remove the folder without backup, and select the File History drive.

2. Turn on or off the File History in Control Panel
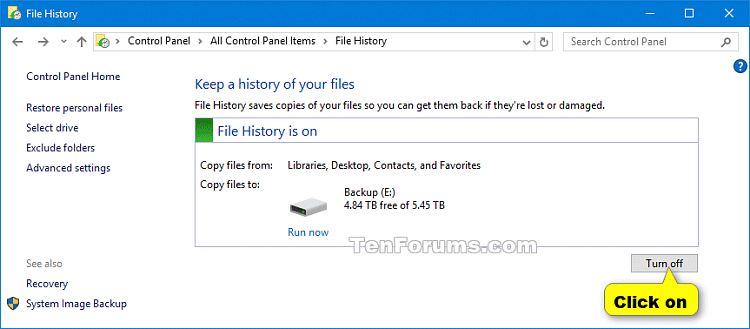
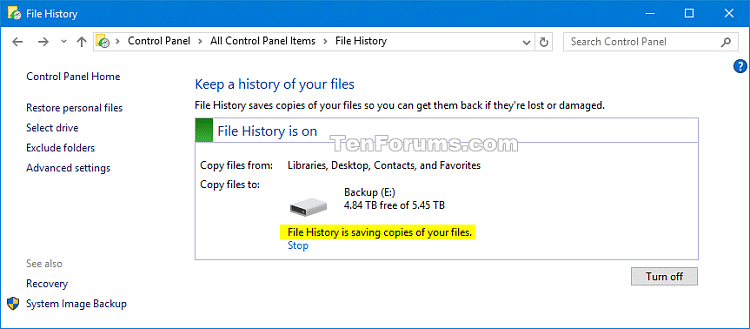
Step 1 . Open Control Panel and click on the File History icon.
Step 2.
To turn off File History, click the Turn off button. You can then close the Control Panel if you want.
Note: This setting is the default.
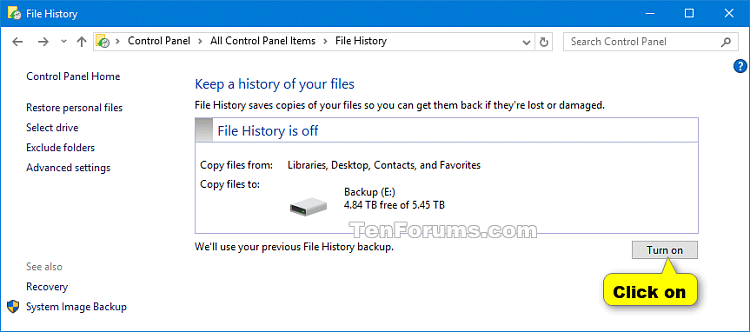
To turn on File History, click the Turn on button.
Note : If you do not want to use the current drive for backup, you need to select a different File History drive. File History will automatically turn on later. If there is a previous backup on this File History drive, you can choose to use it.
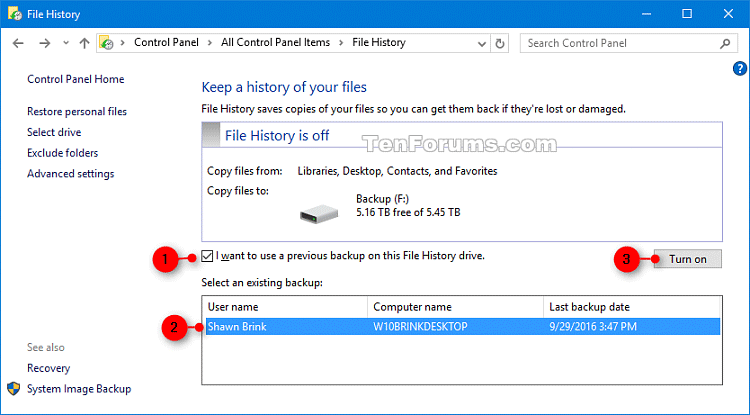
File History is now enabled, you can make changes to backup options if you want.
You can choose the frequency of file backups and saved version time.

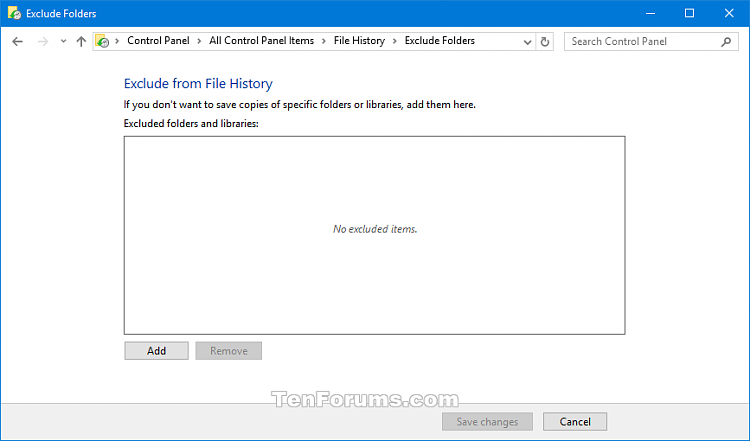
And also choose the folder or library that does not backup.
I wish you all success!