How to check the history of printed documents on Windows 10
Check your printer history to see what has been printed slightly difficult to track. By looking at the amount of ink you cannot know how many documents have been printed. You need to enable printing log in Windows 10 and this is how to do it.
Table of Contents
Check your printer history to see what has been printed slightly difficult to track. By looking at the amount of ink you cannot know how many documents have been printed. You need to enable printing log in Windows 10 and this is how to do it.
- Instructions to change the printer name on Windows 10
- How to install 2 printers on a Windows computer
- How to fix offline printer error on Windows 10
Enable journaling of recently printed documents
By default, your print document history will be deleted after printing is complete. You can change the settings to see a list of recently printed documents from the printer print queue.
You need to change this setting for each installed printer.
Access the print queue
To access the print queue, right-click on the Windows Start menu and select the Settings option. From here, click on Devices> Printers & Scanners .
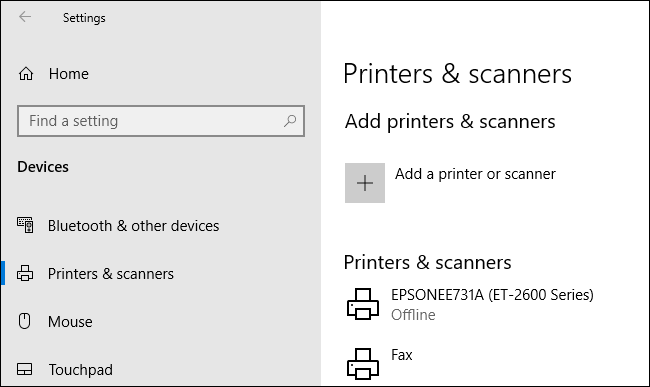
Find the printer in the Printers & Scanners list, click it, and then click Open Queue to open the print queue.
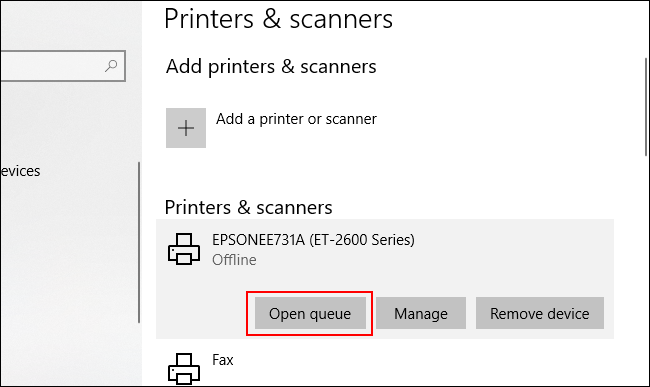
The printer queue will list the items currently printing and the queue. Previously printed documents will not be displayed, so you need to enable logs.
Turn on printer history
In the printer print queue window, click Printer> Properties . Alternatively, select a printer and click on Manage in the Printers & Scanners settings menu.

In the printer properties, click on the Advanced tab and then select the Keep Printed Documents box .
Click OK to save the settings.
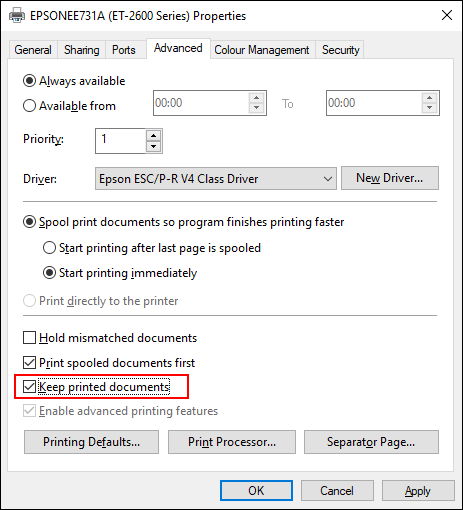
When document history is turned on, printed files will not disappear from the print queue after printing is complete.
Turn on longer print history
The print queue will provide an overview of previously printed documents. If you want to see a long list, you need to use the Windows Event Viewer.
To get started, right-click on the Start menu and click on the Event Viewer option.
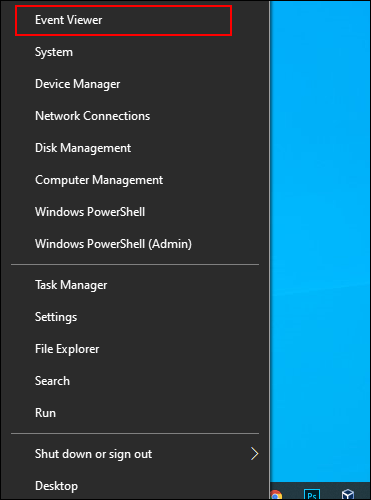
The Event Viewer will allow you to view a list of previously printed files, but you need to have Windows set up the long-term print history first.
Enable print history in Event Viewer
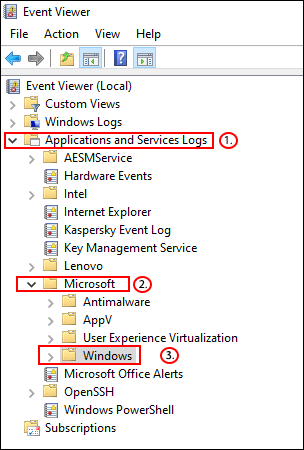
In the Event Viewer window, click Applications and Services Logs> Microsoft> Windows in the Event Viewer (Local) menu on the left.
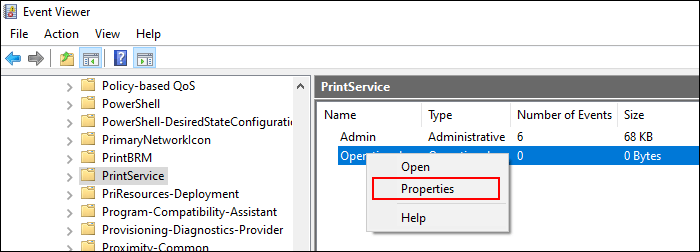
This will open the Windows services, scroll down to find PrintService . From here, right-click on Operational and then select Properties .
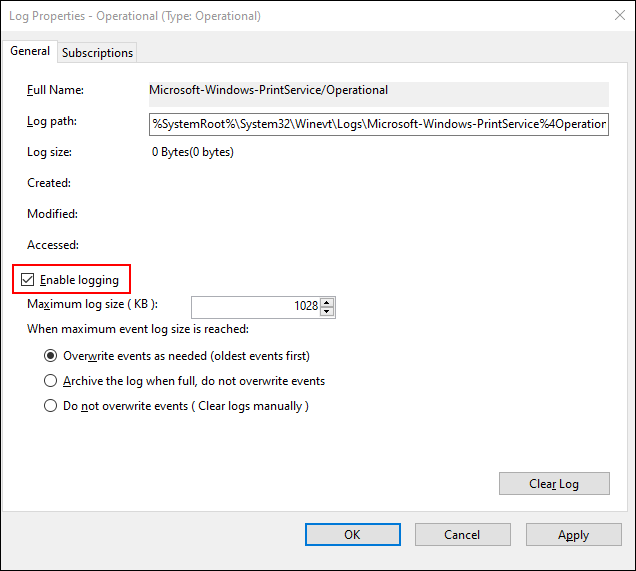
Click the Enable Logging box and then set the maximum size for the log. The larger the size, the more Windows records the history of printed documents.
Click OK to save the settings.
Windows will now automatically save the printer history for all installed printers to the log file, which you can access in Event Viewer.
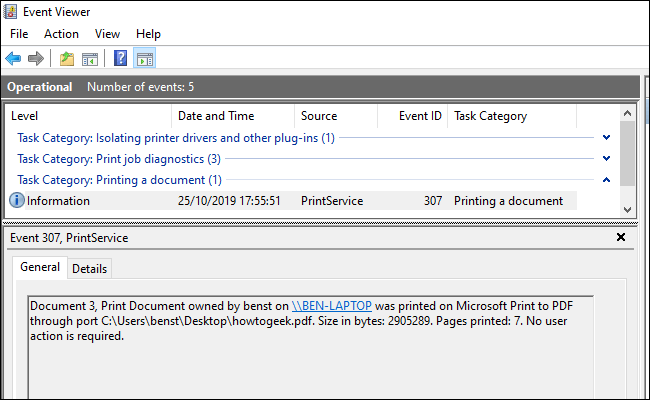
View print history in Event Viewer
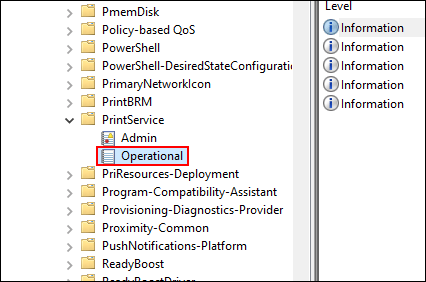
Once the printer history is turned on, you can access it anytime from the Event Viewer. To do this, find and open PrintService , then click on Operational .
History of all Windows printer events will be listed from print file success to failure. Unprintable files also appear here.

For easy sorting, you can group print logs by type, to separate Printing a Document events into separate components. To do this, right-click on the Task Category and then on the Group Events by This Column button .
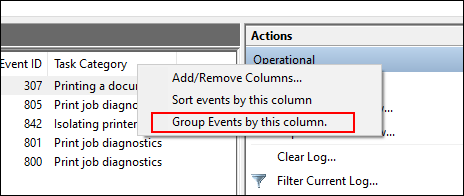
Item will now be broken down by category.
You can minimize other categories, leaving the Printing a Document as a whole to display only a list of previously printed documents.
Use third party printing journaling software
Although the way Event Viewer works, it is a bit complicated to view printed documents. You can use third-party print journal software such as PaperCut Print Logger to view a long printer history.
- Download PaperCut Print Logger for Windows
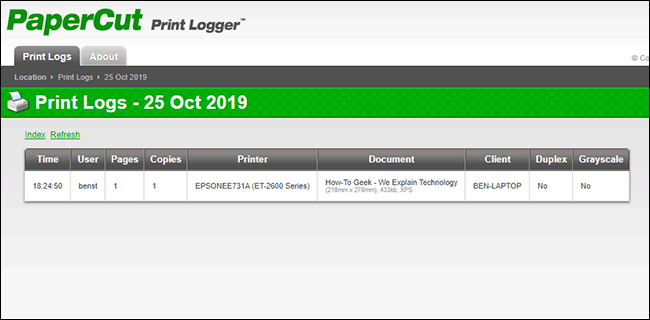
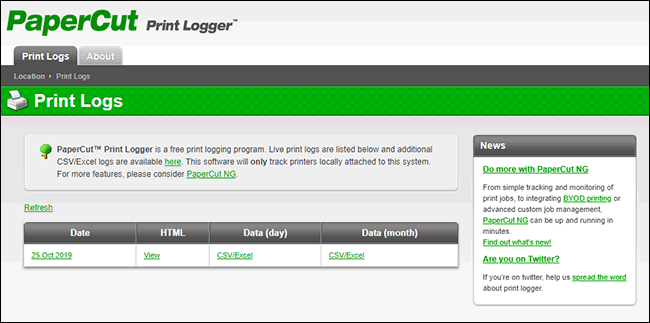
PaperCut Print Logger provides a list of timestamped documents, including information about Windows users who have printed documents, document names, and the number of pages and copies.
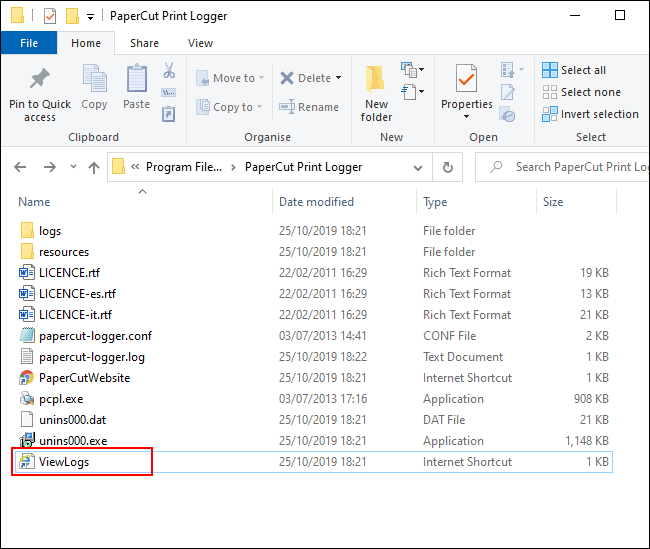
You can access the admin page from the default PaperCut Print Logger folder.
On Windows 10, the folder is always located at C: Program Files (x86) PaperCut Print Logger. Double-click the ViewLogs shortcut to open the admin panel to see the list of printed documents broken down by date.
When you open the PaperCut Print Logger admin page in View, click the HTML button to access the print history for that date.
You can also click the CSV / Excel button in the Date (Day) or Date (Month) sections to export this monthly or monthly print history to the XLS Excel file.
You can also access these logs from the Logs> CSV folder in the PaperCut Print Logger settings folder.
I wish you successful implementation!
Was this article helpful?
Your feedback helps us improve.
Related Articles
 How to check AI activity on Windows by application2 minutes read
 How to fix the printer error check the printed output4 minutes read
 How to check VietinBank transaction history3 minutes read
 4 ways to check BIDV transaction history on mobile phones and computers3 minutes read
 History of Microsoft Windows operating system throughout the ages24 minutes read
 Clipboard History: An extremely useful but often 'forgotten' feature on Windows4 minutes read
Reader Comments 0
Sign in with email or Google to join the discussion.