How to enable Ransomware Protection on Windows
However, by default, this anti-ransomware protection is disabled on all Microsoft devices. Let's discover how to enable this feature in the privacy settings through the following article!
How to enable Ransomware Protection in Windows 11
Before making these changes, make sure you are using an admin account. Guest accounts do not have access to this feature.
Step 1. Click the Win button and scroll down to the Start menu to find the Settings tab. Click it to open the Settings menu.
Another way is to look for the Settings icon on the pinned items or use the search bar to find 'Settings'.
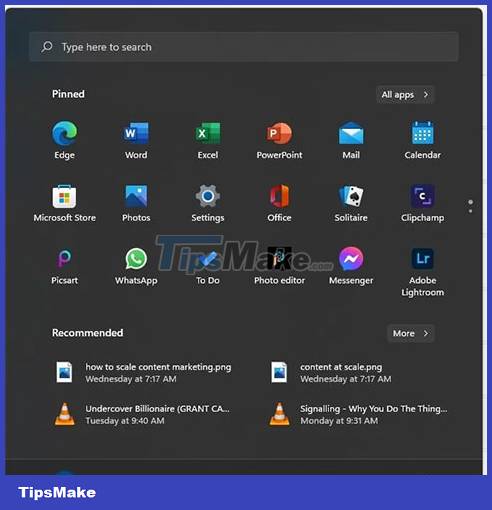
Step 2. When the Settings tab launches, select Privacy & Security .

Step 3. Find the Windows Security menu.

Step 4. Click the Open Windows Security button to access the ransomware settings.

Step 5. A new window will open. Here, click on the Virus & Threat, Protection menu item and scroll down to find the Ransomware Protection option .

Step 6. Click Manage Ransomware Protection to get a list of options related to ransomware.
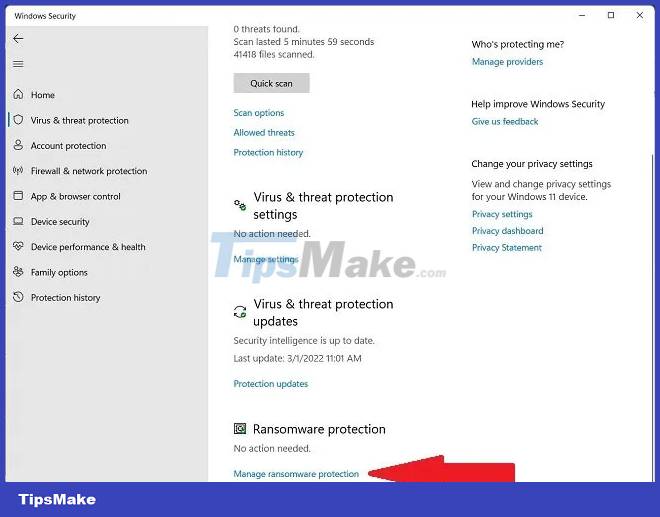
Step 7. Find the Controlled Folder Access option in the right pane.
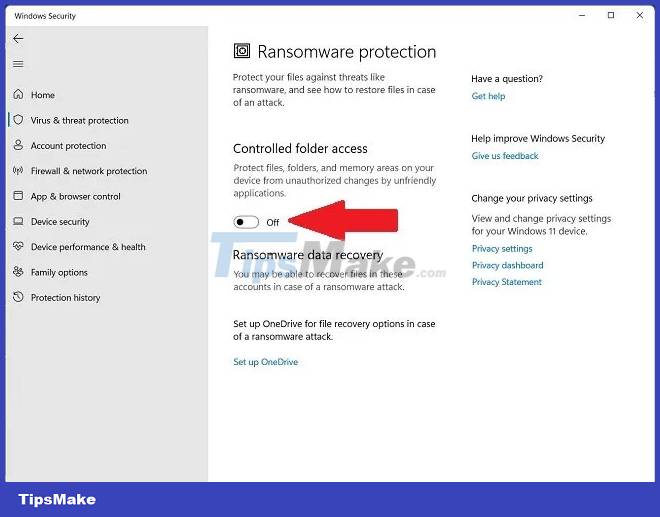
Step 8. Toggle the switch to enable the feature.
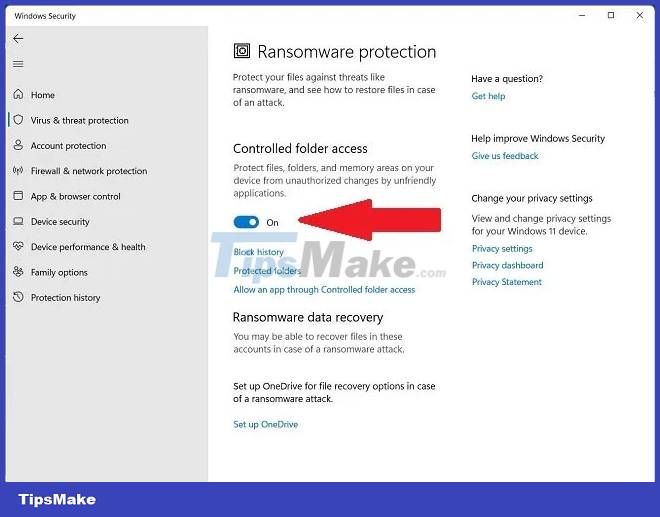
Ransomware Protection is now enabled. Here you can also add (whitelist) the program folders that can give incorrect warning results in protected folders.
How to use a PC with Ransomware Protection enabled
Once the Ransomware Protection feature is enabled, you will have to whitelist some of your favorite programs in order for them to gain controlled folder access. These steps will help you avoid false authentication and allow the installation of new programs:
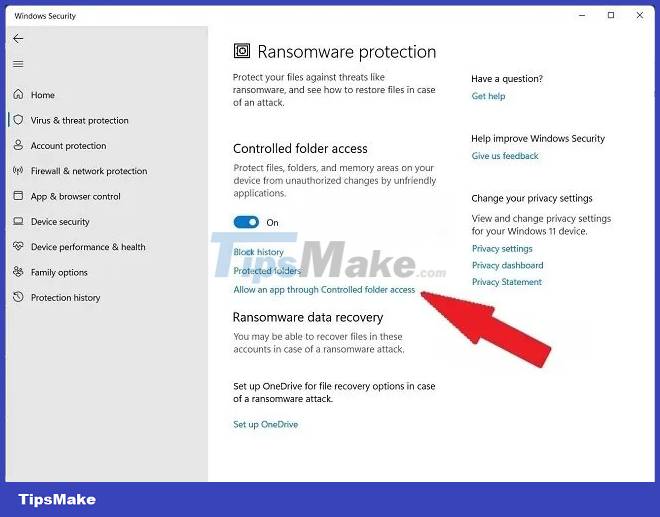
Step 1. Click Allow an app through Controlled folder access in the Controlled Folder Access window .
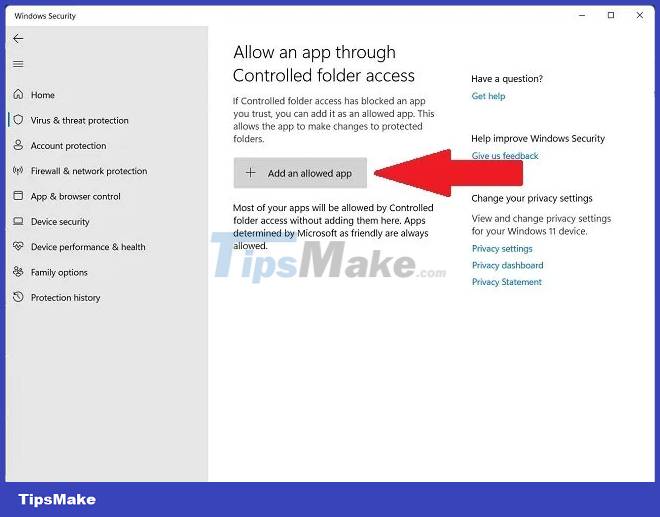
Step 2. Click Add an allowed app .
Step 3. Select Browse all apps or Recently blocked apps to see if Windows Security (formerly known as Windows Defender) has been cached or blocked.
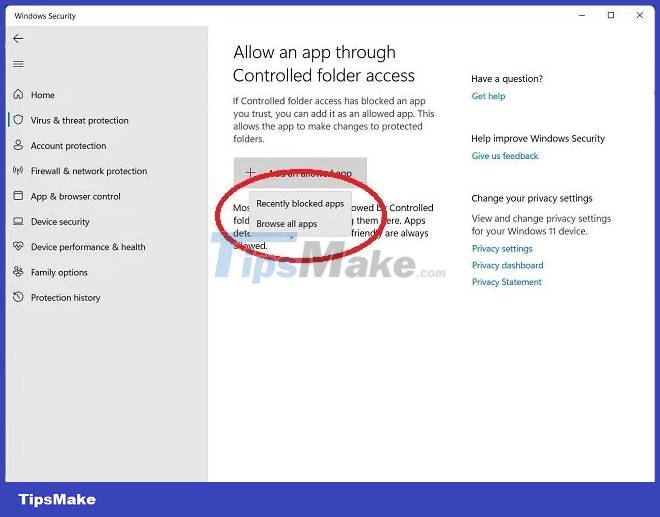
Step 4. Choosing Browse all apps will open a pop-up window allowing you to select all executable files with .exe extension.
Step 5. In Recently Blocked Apps , you can delete harmful or unwanted apps or restore the ones you want to keep.
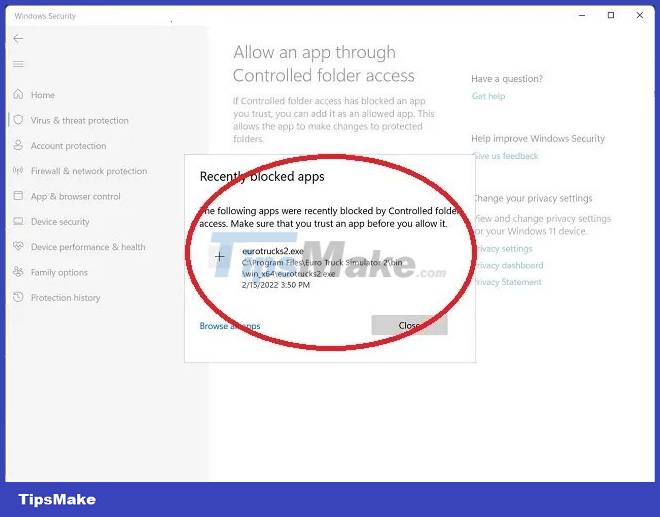
To avoid mistakenly flagging useful software or applications as ransomware, add them to the Protected Folders section.