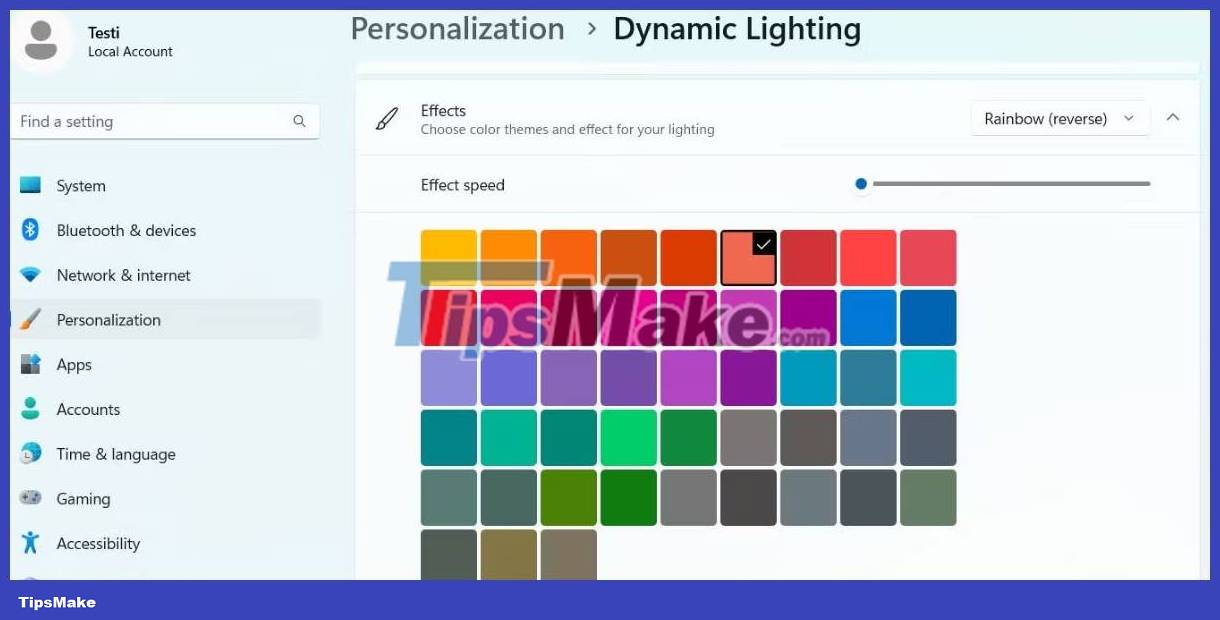
How to enable Dynamic Lighting on Windows 11
Windows 11 build 23466 includes an updated Dynamic Lighting setting. Previously, Microsoft tested the RGB lighting management inside the Settings app. It's a great move to eliminate the need to use third-party apps to individually control each device's lighting.
But what are the new Dynamic Light settings and how do they work? We'll discuss all the key points in this post and share how to enable it on a Windows 11 PC.
What is Dynamic Lighting on Windows 11?
Microsoft is testing a new section that provides the option to enable ambient lighting for all connected devices with RGB lighting. But in build 23466 and later, a new experimental feature has replaced the old lighting control. Microsoft has renamed it "Dynamic Lighting", which provides detailed settings for adjusting the lighting of connected devices.
Before that, there was only one option to turn on the ambient light mode. You can adjust the effect and brightness of each connected device to some extent. You now have a unified way to adjust lighting according to your applications in the Dynamic Lighting section. It will also allow apps to control the lighting when another app or game is not in use.
Not all devices support Dynamic Lighting, but things will change soon. Currently, some Razer keyboards and mice are supported. Acer, ASUS, Logitech, HP and many more will soon enter the market and build and provide support for their devices.
How to enable the new Dynamic Lighting in Windows 11
At the time of writing, Dynamic Lighting is only part of the Windows Dev Insider channel. If you're not an Insider, you can use UUP Dump to download the Insider build and install it on your PC.
You will need the help of ViveTool to enable Dynamic Lighting on your PC. First, update your PC to Dev Insider build 23466 or later. Then, download ViveTool from GitHub and extract it to a folder named 'Vive' in the C: drive.
Follow these steps to enable Dynamic Lighting:
1. Press Win + R to launch the Run dialog box. Type cmd in the text box and press Ctrl + Shift + Enter keys simultaneously .
2. UAC will launch. Click the Yes button to open Command Prompt with admin rights.
3. Now you have to navigate to the folder in C drive with ViveTool. If you follow the advice and extract the tool to a folder, you will be able to access it very easily. Type cd c: into Command Prompt and press Enter key .
4. Then enter cd [folder name]. In the example case, the command is cd vive .
5. You are now in the ViveTool folder. Type the following command and press the Enter key :
vivetool /enable /id:35262205 
6. After successfully executing the command, close the Command Prompt window.
7. Restart your PC to apply the changes.
After your PC boots to the desktop, repeat these steps to configure the feature:
1. Press Win + I to open the Settings application. Click the Personalization option in the left menu.
2. Scroll down and click the Dynamic Lighting option.

3. Click the toggle next to the Use Dynamic Lighting on my devices option to enable the feature.

4. Scroll to the Compatible apps in the foreground always control lighting option and click the toggle to enable this option.
5. Use the Brightness option to adjust the color brightness of the light on connected devices.
6. Finally, scroll down to the Effect option to apply the effect and change the speed and color of the effect.
