How to Dual Boot
Method 1 of 2:
Dual Booting Mac OS X and Windows
-
 Check that your Mac meets the requirements. In order to install and boot Windows on your Mac, you will need to have OS X 10.5 or later with all the available updates, at least 20 GB of free space, and an Intel processor. You will also need a full copy of Windows, either an installation DVD or an .ISO file.[1]
- You can check if your Mac is using an Intel processor by clicking the Apple menu and selecting "About This Mac". Look at the Processor listed in the window; if it says Intel then you're good to go.
- It is possible to install OS X on a Windows PC, but that is outside the scope of this article. See the this guide for detailed instructions for setting up a Hackintosh.
-
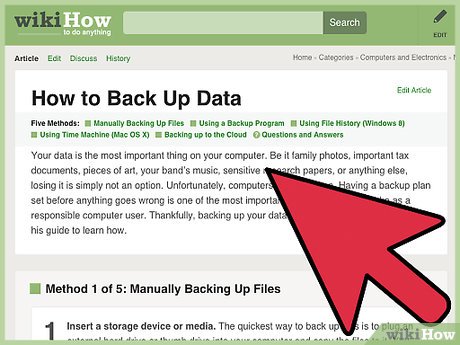
 Backup your important data. You shouldn't lose anything during the process, but it's always a good idea to have backups just in case something goes wrong. Make sure all of your important documents, pictures, and other files are backed up on a separate drive or in the cloud. See this guide for more details on backing up your data.
 -
 Print this guide, or load it on another computer. You will be restarting your computer multiple times during the installation, so it's a good idea to have access to this guide or your Boot Camp manual before proceeding.
 -
 Start Boot Camp Assistant. This program is located in the Utilities subfolder in your Applications folder. Boot Camp Assistant will create a new partition on your drive and start the Windows installation process.[2]
 -
 Create an install disk if using an ISO file. If you are installing from a Windows ISO file, you will need to use a USB flash drive to create a Windows Installation Disk. This will copy the ISO to the flash disk and prepare it for booting.
- Insert an 8 GB or larger flash drive into your Mac and check the "Create a Windows 7 install disk" box. If you are using a Windows installation DVD, you can leave this box unchecked.
- Any data on the flash drive will be deleted when the installation disk is created.
-
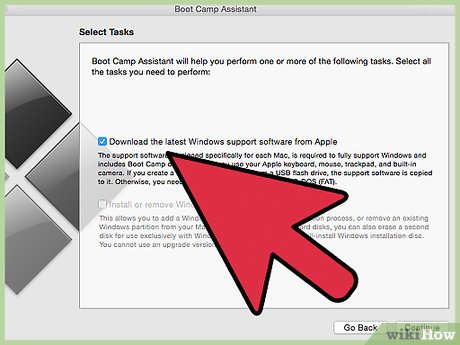
 Download the support software. Check the "Download the latest Windows support software from Apple" box. This software is necessary to allow you to use your hardware in Windows.
- If you are creating a Windows install disk, the files will be copied to the same flash drive. If you are using an installation DVD, you will need to insert a blank flash drive or blank CD/DVD.
-
 Check the "Install Windows" box. This will start the Windows installation process once you have created your installation disk and support software disk. Click Continue to start the process.
 -
 Set your partition. Before installation begins, you will be asked to create a partition for windows. A partition splits your hard drive up so that it acts as multiple drives. Windows must be installed on a separate partition from OS X. You can use the slider to adjust how big you want the Windows partition to be.
- You can only create a partition out of free space on your hard drive.
- Make sure that you leave at 20 GB free for Windows, more if you are planning on installing a lot of Windows programs.
- Click the Install button when you are satisfied with your partitions. Make sure that any open programs have been saved and closed before proceeding.
-
 Start the Windows installation. After your disk is partitioned, the computer will reboot and load your Windows installation disk. From here, installation is just like it would be on a PC. See the following guides for detailed instructions for the different versions of Windows:
- Install Windows 10
- Install Windows 8
- Install Windows 7
- Install Windows Vista
-
 Select the Boot Camp drive during installation. When you are prompted to choose a location to install Windows, be sure to choose the one labeled "BOOTCAMP". You will need to format this drive before you can install, as Boot Camp doesn't format it correctly.
 -
 Run the support software installation. After Windows has finished installing, you will be taken to the Windows desktop. Insert the disk that contains your support software, and navigate to the Setup file that comes with it. Run the file to begin installing all of the necessary drivers.
- Make sure that the "Apple Software Update for Windows" box is checked during installation.
-
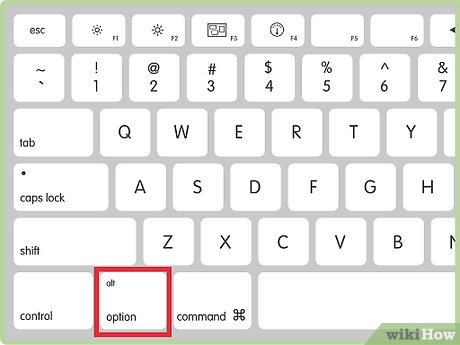
 Choose which operating system you want to boot. Once all of the drivers have finished being installed for Windows, you're ready to start booting between the two operating systems. When you reboot your computer, hold down the ⌥ Option key until the Boot menu appears. You will be able to choose between your OS X installation or your Windows installation.
- If you want your computer to boot up to OS X by default, you can set the default startup disk in the Windows Control Panel. Open the Control Panel from the Start menu and select the Boot Camp option. Select the "Macintosh HD" disk and click Apply to set OS X to start as default.
- You will need to reboot your computer each time you want to change operating systems.
Method 2 of 2:
Dual Booting Windows and Linux
-
 Gather your tools. In order to dual boot Windows and Linux, you will need a Windows installation disk and a Linux distribution installation disk. You will also need to have at least 20 GB available for each operating system.
- You can use any Linux distribution you'd like. Some of the most popular ones include Ubuntu and Mint.
-
 Back up any important data. This method will start with a fresh installation for both Windows and Linux, as this is the most foolproof way to successfully install both operating systems. Make sure all of your important documents, pictures, and other files are backed up on a separate drive or in the cloud. See this guide for more details on backing up your data.
 -
 Install Windows first. Windows takes over the boot sequence, so you'll always want to install it first so that your boot sequence isn't messed up later. When installing Windows, you can make the entire hard drive a single partition. The Linux installation will let you split it up later. See these guides for instructions on installing Windows:[3]
- Install Windows 10
- Install Windows 8
- Install Windows 7
- Install Windows Vista
-
 Start the Linux installation. After Windows has finished installing, you can start the Linux part of the installation. Insert your Linux installation disc and reboot your computer. Boot to the disc and start the installation program. See these guides for detailed instructions for installing various Linux distributions:
- Install Ubuntu Linux
- Install Linux Mint
-
 Set the partitions. During the Linux installation, you will be asked if you want to install Linux alongside your Windows installation or replace your Windows installation. Make sure to install it alongside your existing Windows installation to allow dual booting.
- Once you choose to install alongside, you will be allowed to set the size of your partition. Make sure that you allow at least 10 GB for the operating system files, as well as extra space for programs. Use the slider to adjust the Linux partition size.
- Click the "advanced partitioning tool" link if you want to create a third partition that can act as storage for both operating systems. You can allocate most of your space to this partition to ensure that you have plenty of space to store your files.
-
 Choose your operating system. After you finish installing Linux, your dual boot setup is complete. Whenever you reboot your computer, you will be given the option to choose which operating system you would like to boot.
- You will need to reboot in order to change operating systems.
5 ★ | 1 Vote
You should read it
- How to install Windows Game on Linux with Winepak
- How to install Windows Subsystem for Linux 2 on Windows 10
- Run Windows applications on Linux, macOS and other platforms
- How to encrypt LVM partitions when installing Kali Linux
- How to Install Windows from Ubuntu
- How to install new fonts in Windows, Mac and Linux


 How to Set Administrator Password
 How to Format a PC
 How to Install a New Operating System on Your Computer
 How to Pick an Operating System
 How to Access the System Configuration Utility
 How to Install DirectX